Kudu Mount-A-Long
International
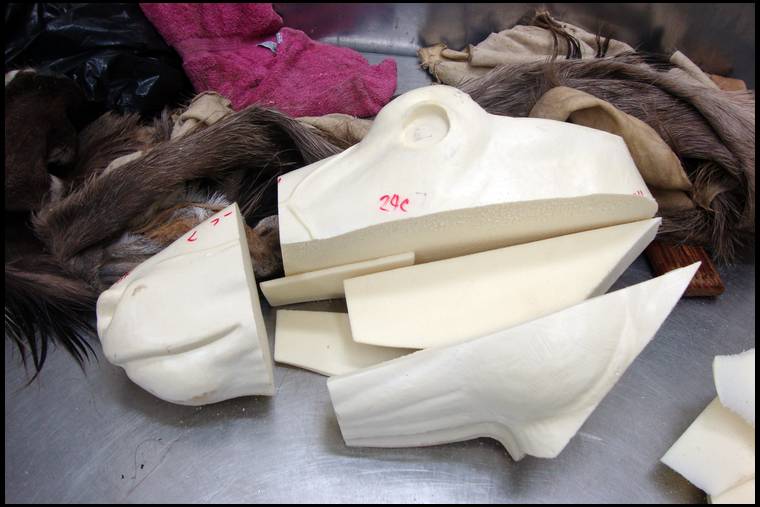
Just finished up my son's kudu and thought I would share a bit of the work that had to be done. Dennis Razza provided the inspiration to post this. It will not be near as detailed as his as I had completed all of the cape prep before I started taking the pics. The form pose, as 99% of the African critters, was not available in the size so I started out with this standard shoulder form.
Next was chopping this form up to give it the turn I wanted and to cut it down to size to fit the cape. Lopped off the head and started cutting it up....
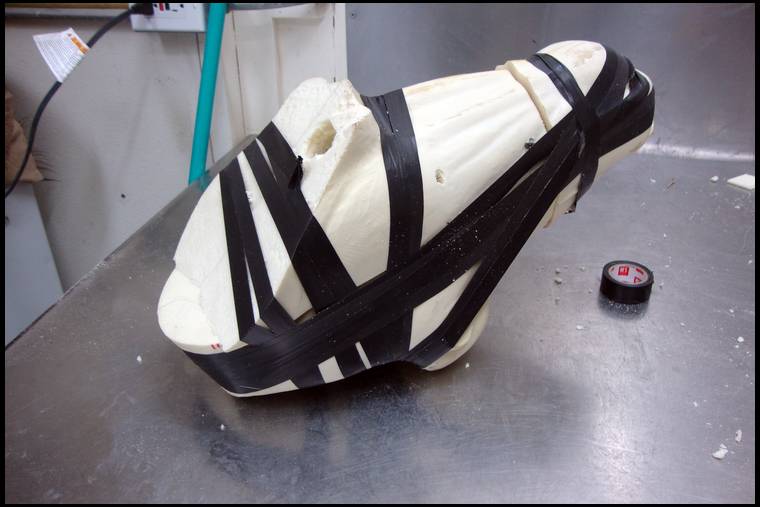
Now to put the pieces back together. I remove foam with a spade bit, and use cheap electrical tape because its nice and stretchy. I use screws as well, but remove them after I pour the two part foam and it sets.
Now for the neck and chest. I cut section and remove center pieces, use the spade bit and foam them back together.
Same for the chest area, remove the center section and foam it back together.
Now to put the pieces back together. I cut the center section of each piece out to make them "tubes". When I put them together with screws and more tape I slide a 2X2 through the tubes for added support, and pour in the form. I did this to the chest and neck sections and than attached the head.
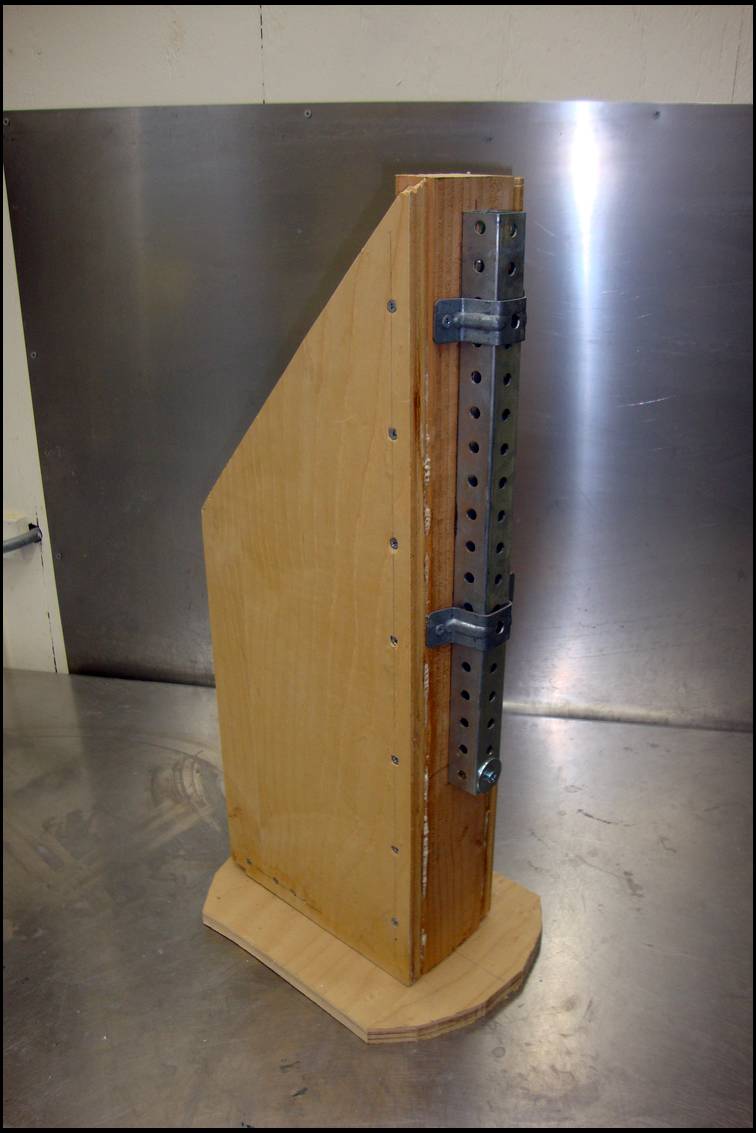
Now, this mount is going to be a pedestal mount so I attached a square steel tube onto the back board. A bolt through the tube will become the stop for the mounting tube. I wrapped plastic to provide the damn to hold the foam that will cover the tube.
This is going to be cool...
Now to pour in the foam, simple as that. I poured it in several small batches to build it up where I wanted it.
After the foam set I sculpted the shape that I had in mine. I usually sculpt in a rock like form but wanted something a bit more formal. You will see why when you see the pedestal. After the shape was what I wanted I brushed on fiberglass resin to give it some structure.
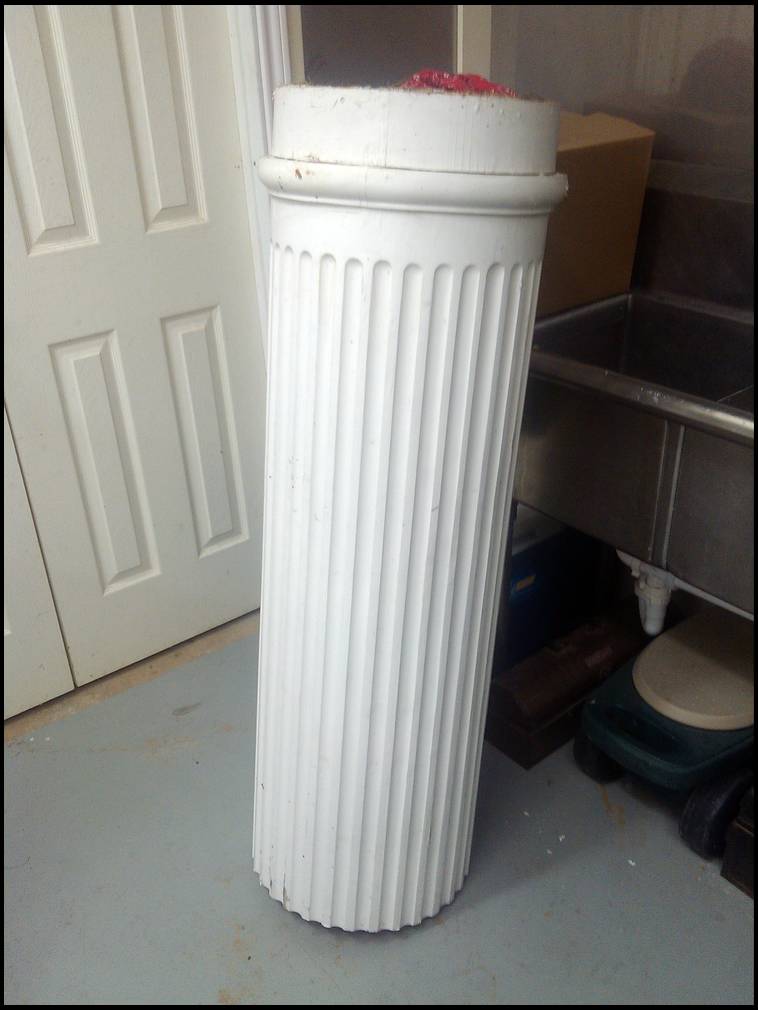
Now that the form has been modified and the cape test fitted and ready to mount, time to build the pedestal. One day on the way home from the office, I noticed a house up the street was having four large columns replaced on the front of their house. They were made of wood and 20 feet long. They had already been cut into sections and some hauled off. They only had 1 of the top sections. I called them and asked if I could have it and here it is.
I had to be careful of the height of the pedestal for a couple reason. The piece had to be under 8 feet tall and I did not want the pedestal to look to skinny or to squatty. I also had to make sure it was stable. After the height was determined I made the structure that the mating square tube would be attached to. Good ole Gorilla Glue and screws did the job.
I purchased a couple of 1 3/4 inch thick walnut panels, one 16 and the other 22 inch diameter. One for the base and one for the top. The stricter base was shaped so the pedestal could only fit in one place. I glued and screwed it to the base. I had to locate and cut the mounting tube clearance hole in the top and added pieces of 2X4 to position the top in only one location. Here are the pieces. The pedestal will later be painted black and coated with polyurethane.
Now lets jump to the finish piece. Sorry for not having the detail Dennis Razza shares with us.....but here he is. The back side is covered in sand. I simply brushed on white glue and poured the sand all over it. The next day I would pour off everything that was not glued on. I did this in multiple steps because you have to have the glued area flat so it doesn't run.
One more pic for y'all. Hope you enjoyed the journey..... Next time I will attempt to take more in-process pics. Matter of fact, my sons blue wildebeest is my next effort. It will be a shoulder mount but I figure I will have to modify a form.
Beautiful piece of work. If I could offer my opinion on one part, it would be that a sand backing would look better with a rock/natural pedestal. This one looks extremely rich and elegant and I figure a black or dark brown leather backing would match better.
Either way incredible work. Amazed by some of you taxi's handiwork just with the bases and remolding the forms alone, much less the finished product of a life like animal.
Bo-n-aro, Very nice alteration and idea. I would venture to guess that there are few forms you work with that you have not altered in a major way :-). I remember you sharing that involved process with that lifesize Nyala some time ago.
The pedestal here is so striking that I too would have too concur that the polish and elegance of it almost dictates having a backing finish that compliments that refinement. However, I still like it very much. Do you have a picture taken showing the full back of the piece? Thanks for sharing the ride. Rich
My hell that turned out great!
Good luck, Robb
REALLY nice work, Stunning.
The amount of work that goes into a nice mount never ceases to amaze me. The attention to detail, the extra steps necessary to make these dead things look alive is incredible. I doubt that most people realize how much alteration of a form goes into a mount.
The guys that think Taxidermists charge too much, should check out these threads.
When I see bad taxidermy work, I think "I hope the $100 they saved was worth it, they will be looking at that for the next 20+ years".
Looks awesome - well done!
Nice Job Don!
You know you get more work done if the TV is turned off.
Hugh
Thanks for the kind words y'all! TEmbry and AZ: thanks for the critiques. Leather, hide and paint were all considered on the back and sides but the sand was decided on to bring in some of the native South Africa feel. I will post a couple more pics later. Hugh, I have to have something to keep me from talking to myself!! By the way, my son killed this kudu on the trip when we met in the Atlanta airport! Just a little behind in my work. :) Actually he just asked to get it mounted since his new home now has room. Looking at these pic I have posted of the finished piece.... they are really poor at best. The colors just do not look like it???
That looks great! I'm saving the pedestal mount for a Zebra someday... after 22 days of hunting I still haven't got one, perhaps next trip.