How I Built A Pedestal Mount
Mule Deer
Not wanting to hijack another thread in the bear forum about how to build a pedestal for a mount, I will start this one for the original poster. Good luck on your building your pedestal!
I had a lot of fun doing mine because it gave me the freedom to do exactly what I want. I couldn't find what I wanted being produced by any major company, so, partly out of necessity and partly because I wanted to, I designed and built one.
It isn't perfect, but I like it!
First, I commissioned myself to do a professional sketch. Since I am clearly a talented artist, my drawing gave great inspiration for me to build the pedestal and my taxidermist to carry out the clear masterpiece I was hoping to create.
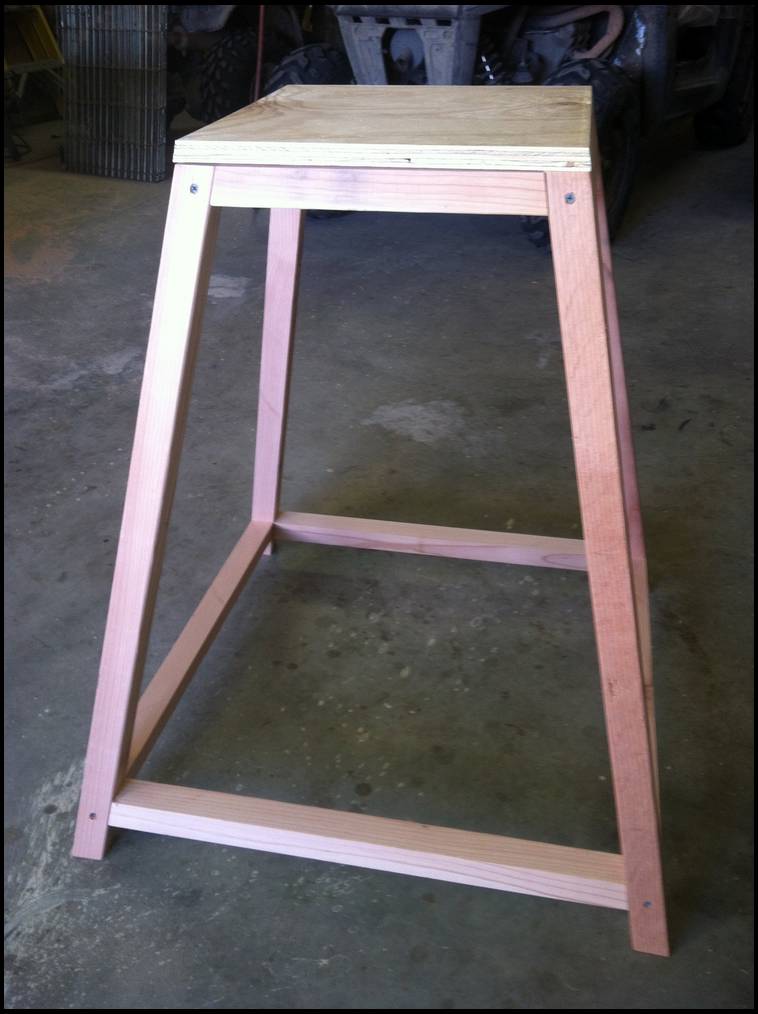
Since my dad is a general contractor, I enlisted his help. By help, I mean I asked him to bring my chicken scratch to life. We decided on redwood for the frame and ripped boards to the proper thickness. Because I wanted the legs at an outward angle, we beveled the top and bottoms of each leg. Getting the angles correctly cut on all three planes was tricky and I may have wasted a couple boards.
For the top platform, as well as bottom, we used 1 1/8” plywood. Since it wouldn’t be showing, we didn’t care what it looked like.
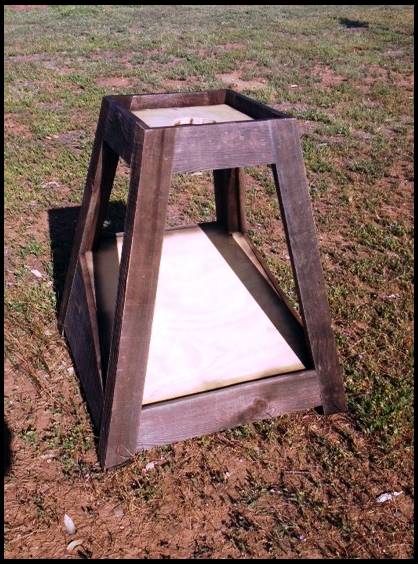
I wanted to be able to see items on the bottom of the pedestal, and also wanted it to have a “mountain” appearance, so we put the bottom piece of plywood at a sloping angle. This would create a definitive front for the mount.
The outer wood was 30-year-old fencing that had an exceptional weathering. I had looked in several places for barn wood and couldn’t find anything that was high-quality, without costing a fortune. The inside pieces of exposed redwood was stained to match the outer boards.
A hole was cut in the top to allow for the tree trunk to fit.
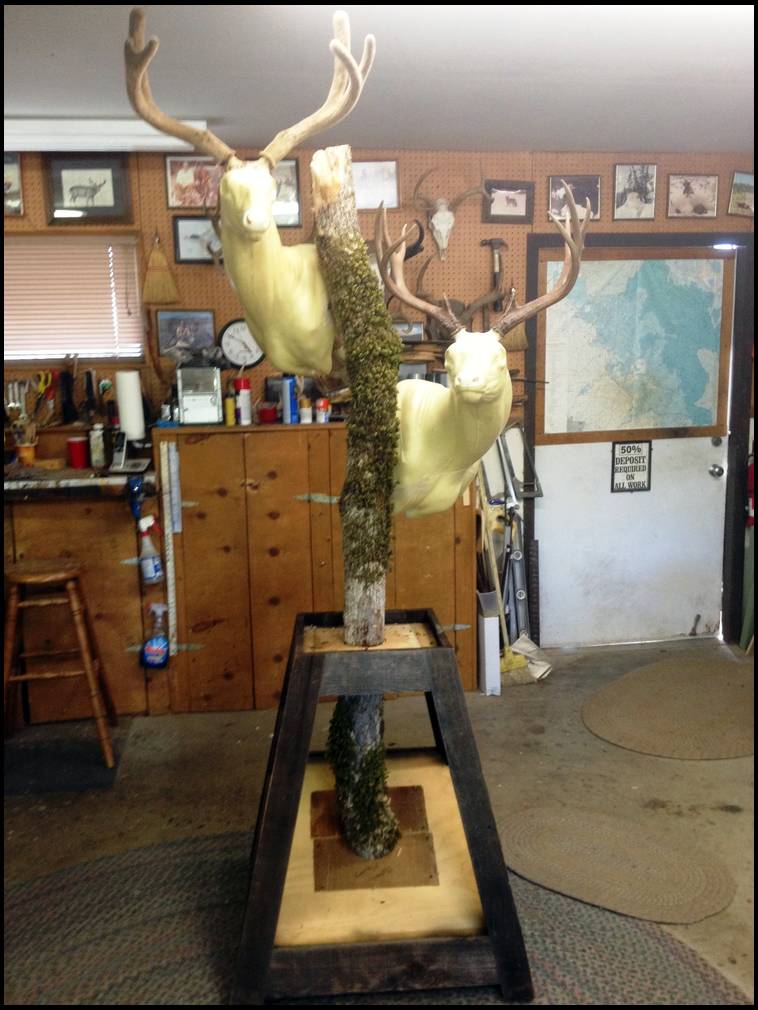
Since the tree trunk was fairly heavy, we made an additional “X” support at the bottom of the pedestal to support the weight. It looked similar to what you would find on a Christmas tree at a lot, but much more sturdy. This allowed for a bolt to screw through the thick plywood “X” into the bottom of the trunk.
My taxidermist decided to cut the tree in half right at the junction of the top plate, so that it would be more manageable to work with, and easier to transport. We left the top plate countersunk so that foliage, etc. could be placed at the top of the mount to help create a diorama.
Nice work! Have you got it back from the taxi yet? If so,post some more pics.
I wish I had taken more photos during design and building process, but I didn’t think about it that much.
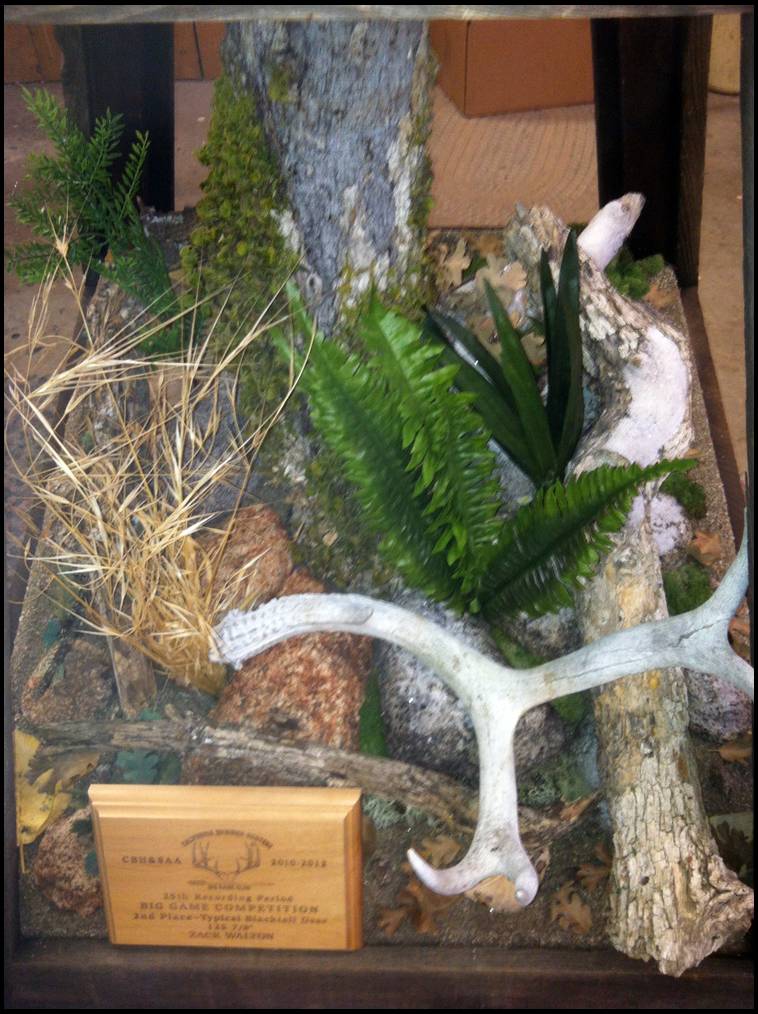
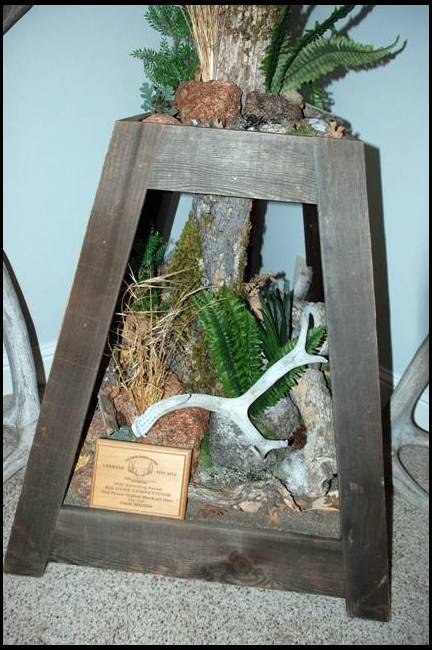
This is what the bottom looked like after the taxidermist finished his magic.
Here is the top portion of the pedestal.
The entire pedestal after I had finished putting in place at home.
Close up of the two Columbian blacktails, just because…
Finished product. Everyone else did all the work, I just came up part of the idea. It will be the center of my trophy room for years to come
Cool looking mount! Good work!
Fantastic. Thanks for posting. C
Beautiful.... much more appreciated when it's done with your own hands. Lots of lifetime memories with that display. Ed F
Awesome........VERY NICE!!!
Looks great! Nice bucks too!
That is awesome, and I'm gonna steal your idea! LOL, Mike
Go for it Mike! I "borrowed" some ideas from other guys as well
That is cool, I like the two tier design.
Step 2:
Acquire materials for a broad base, upright pedestal stem, etc.
Step 4:
Assemble vertical pedestal
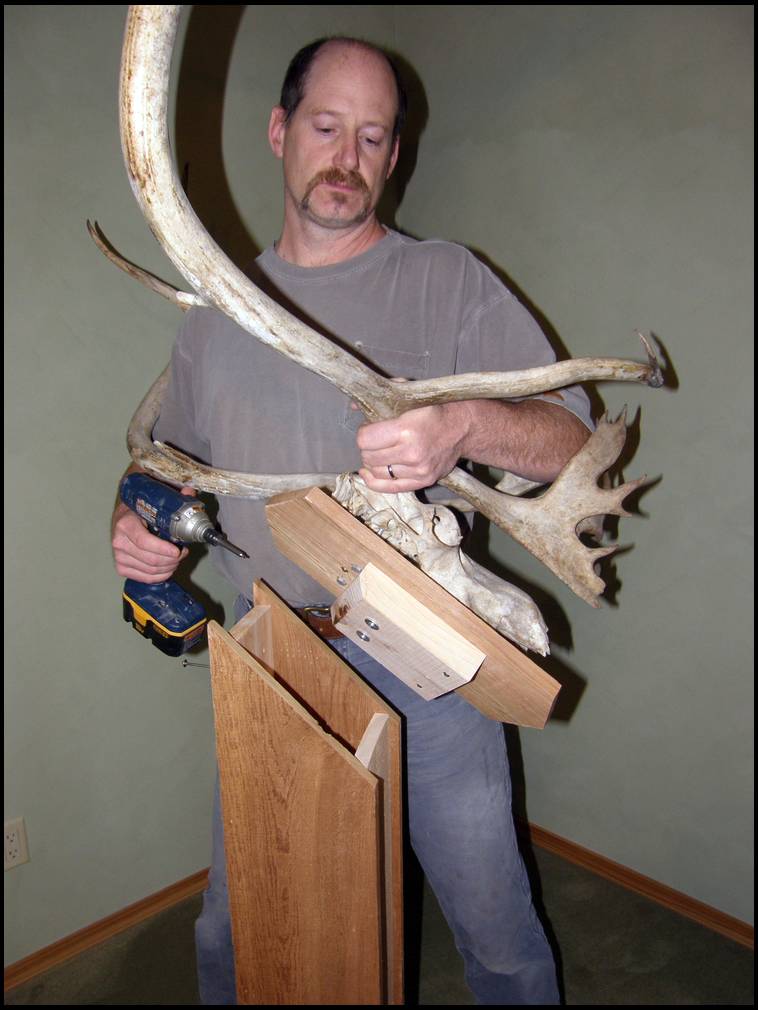
Step 5:
Attach rack or mount to block that can be screwed to vertical pedestal post.
Note hidden storage space in vertical pedestal for storing precious metal bars or 1000s of 5.56 ammo! Weight stabilizes the pedestal.
Step 4.5:
Screw thru base into a block at the bottom of the vertical pedestal
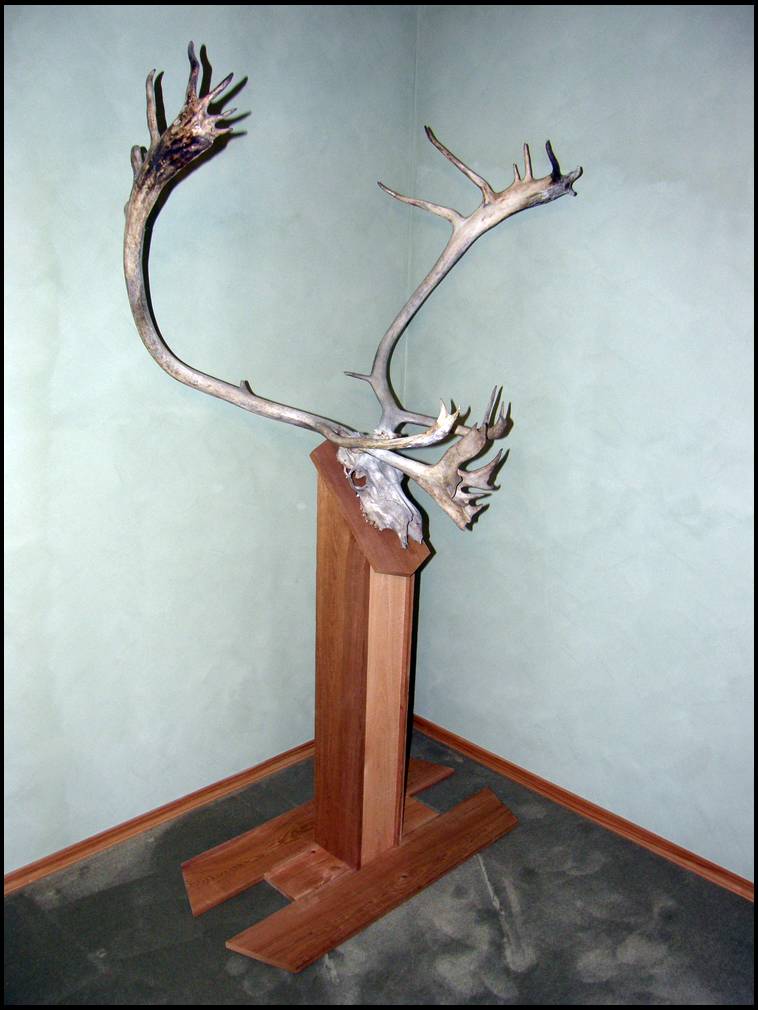
Step 6:
Done!
Zack, that looks great. Did you mount the bucks yourself to?
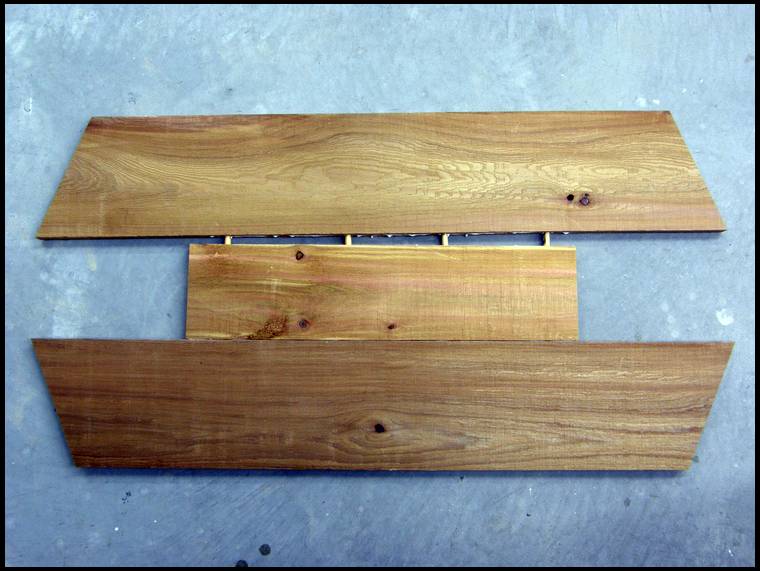
The above pedestal was made from inexpensive cedar fencing from Home Despot.
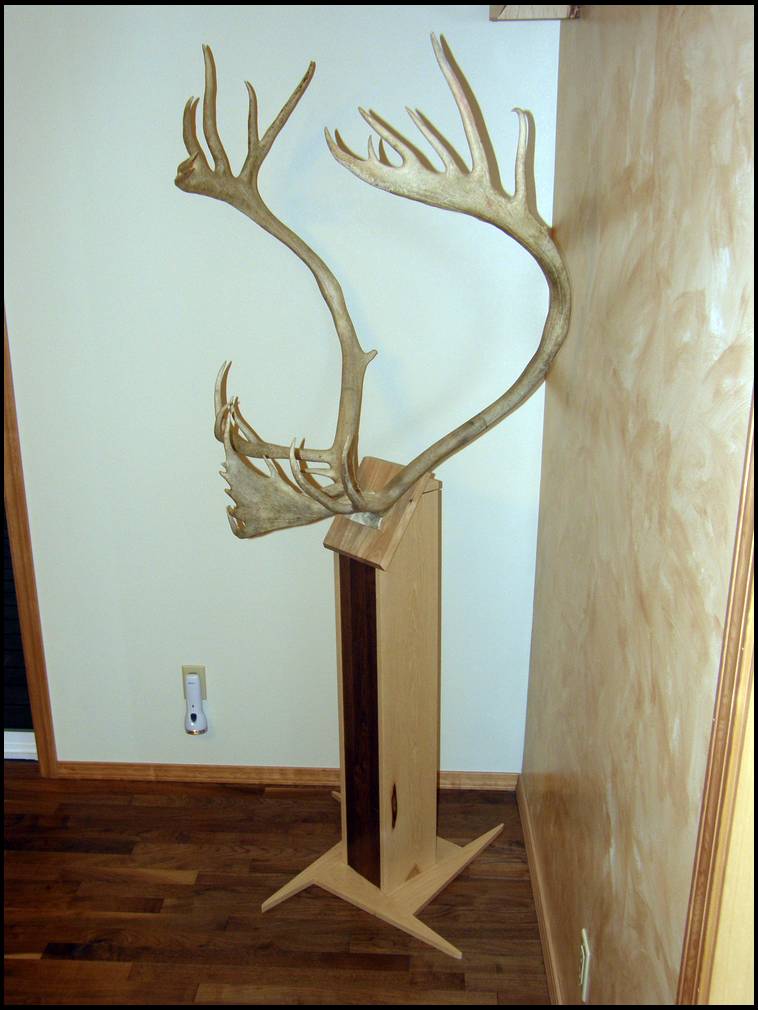
Here's another version using cabinet grade hickory and black walnut flooring.
Julius, I did not. I have no artistic talent and really like the work my taxidermist does.
Nice work Steve!
That's awesome Zack. Cool thread.
I love the mossy oak trunk.
Way nice craftsmanship!
Thanks for the idea's
Good luck, Robb
Great ideas. I had always wanted to do a pedestal so last year I finally did it with a big Wyoming buck I got. A friend allowed me to cut a cedar tree that was destined for the woodpile due to a road widening project. Fortunately it had a nice rub already on it. I cut it to general length, took it to the carwash and blasted all of the dirt and loose bark from it. I then hand scraped it down to the "red" skin, carefully leaving the rub visible. A trip to Lowes got me a pre made round table top for $17. Some expoxy and bolts, some stain and poly and I have a pedestal. Taxidermist worked with me to embed a square piece of channel in the top and the mount has the matching male piece so it is easily removable but locks in tight.
This is the final product. Might do some base work yet.