Stone mounting part1
Wild Sheep
I'm getting a few things ready for the ECFNAWS and thought a stone mounting thread would be appropriate.
If you have any questions feel free to ask and i'll do me best to answer. Hope you enjoy!
Razza's Taxidermy Studio Bowsite Sponsor
First I will rehydrate & stretch the hide. This will give me a good start to order the form.
I'll do all the hide prep after I rehydrate the hide. Turn the ears and prep the seams. Repair all holes and thin the eyes,nose,and mouth.
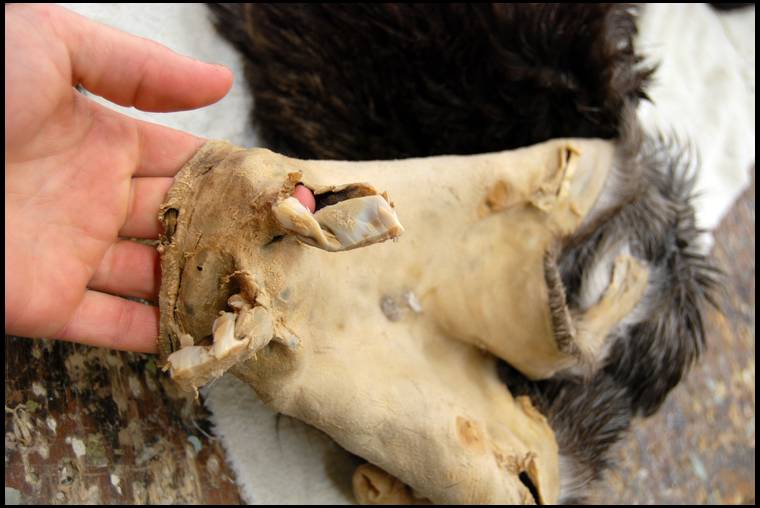
I'm not going into all the hide prep details with this thread but want to point out one very important detail with hooved animals. You have to clean them to the very tip! There is alot of fatty, greasy material in the tip on the hoof that could cause problems down the road.
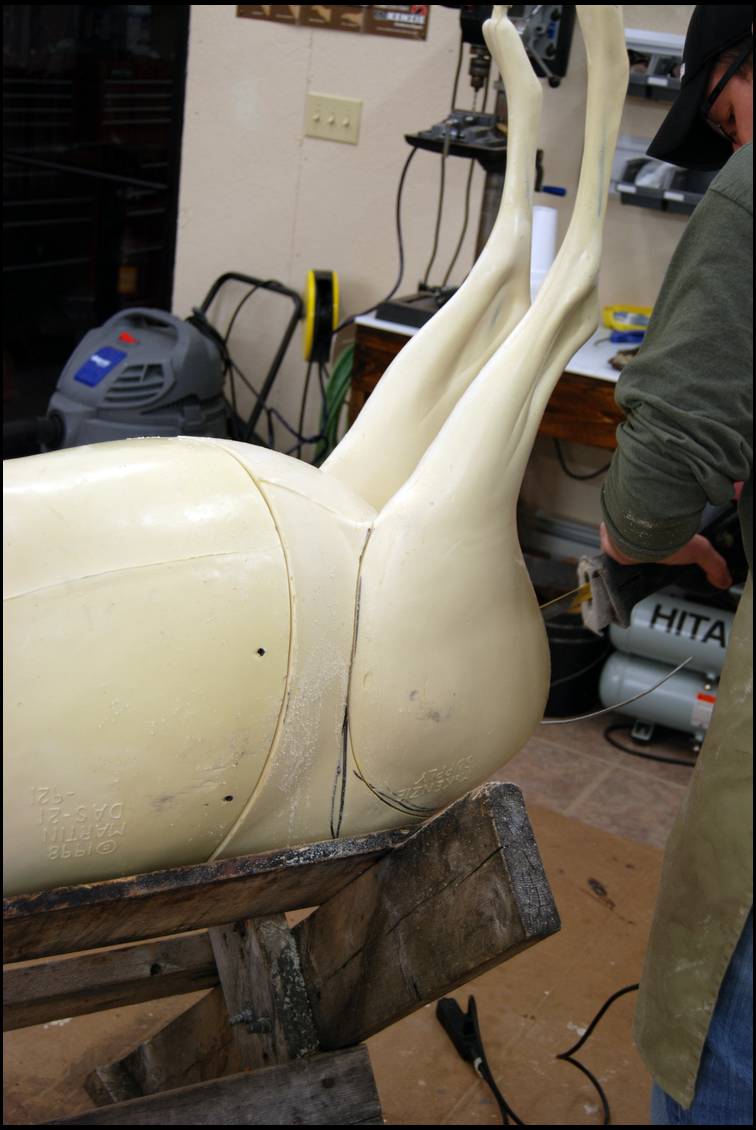
Lets get into the form alterations. The form was a bit small and they didn't have anything close to the pose he wanted. He wanted it steeper in the front. When we raised the front to the height he liked the legs were way off. I cut off all the legs to get the right angles. The next few pics will show this...
We then get the legs into position and screw them down. You can see in this pic the angle of the front legs compared to the back. Next we will get the front cut and positioned.
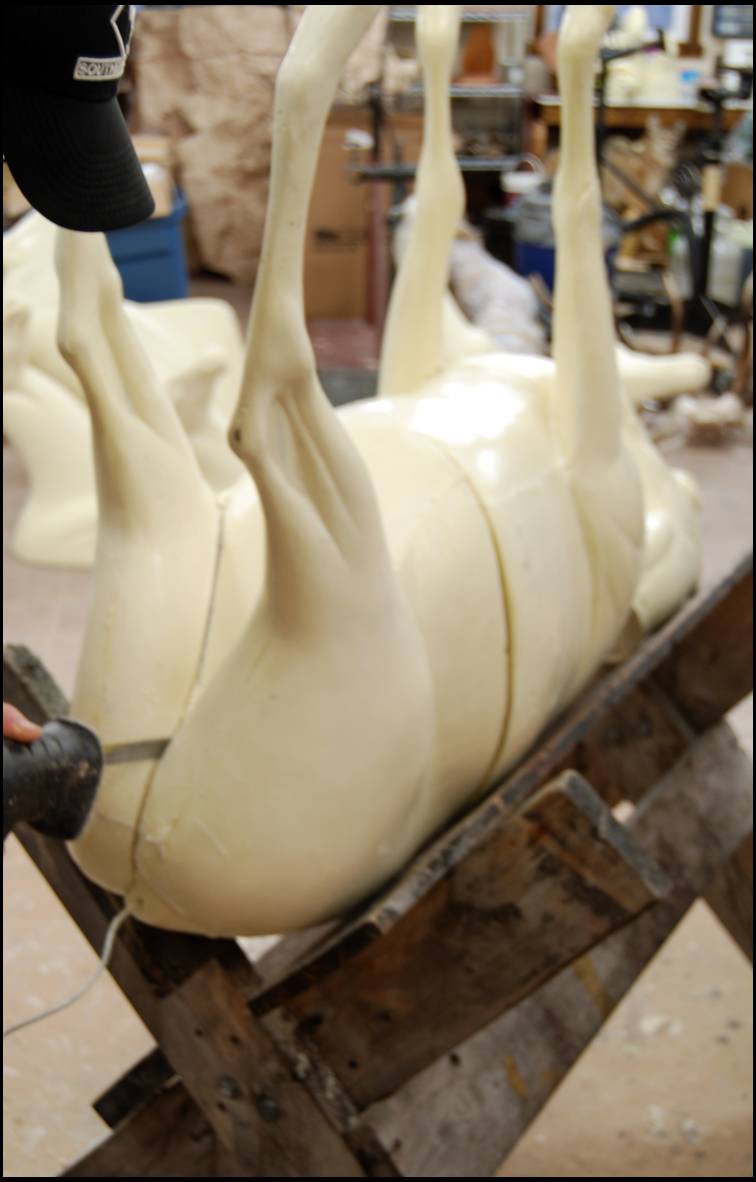
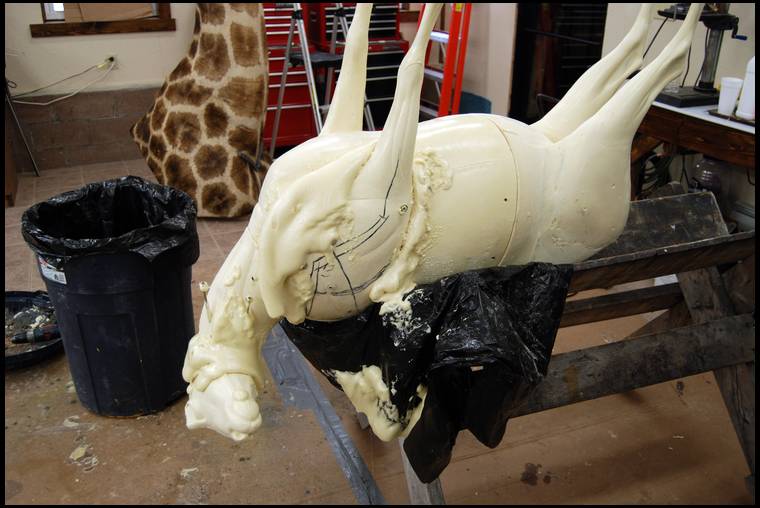
Next we foam them in place and sculpt the muscles back in place.
Now we move the front and the head.
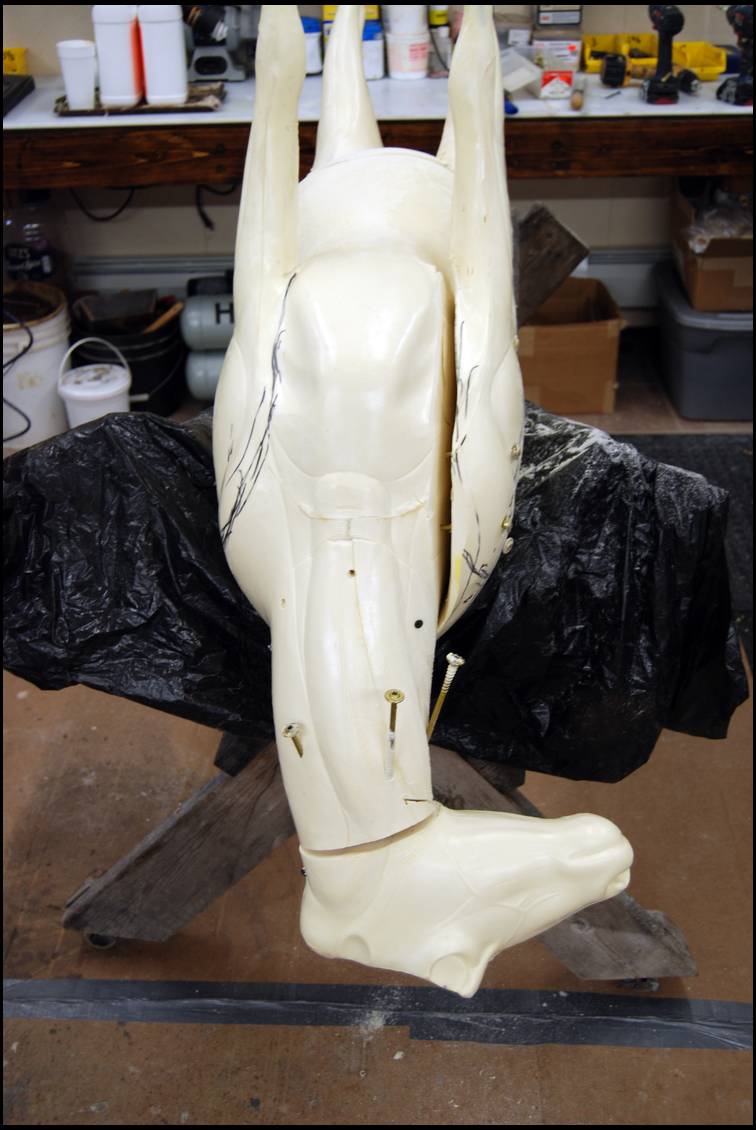
we turn him upside down to poor the foam.
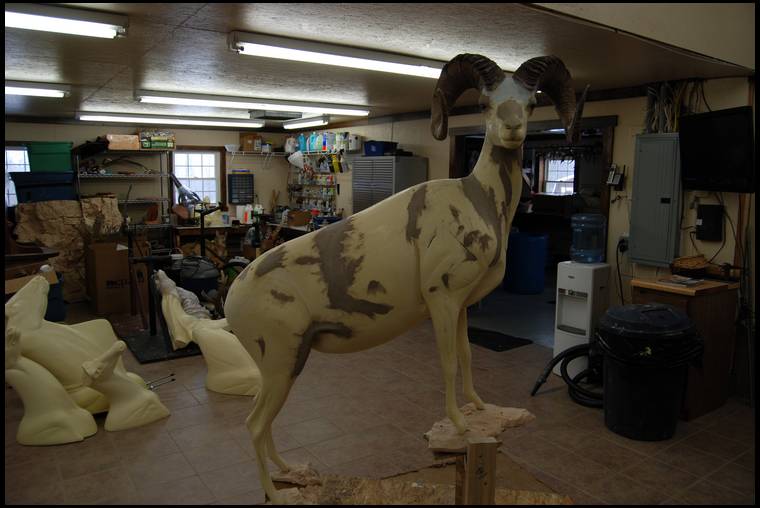
Head higher than rump looks SO much better for sheep & goats IMO. Don't see why so many folks like the butt up in the air.
Stone sheep are also the most striking IMO, so this should be a fantastic mount!
Thanks for sharing, Carl
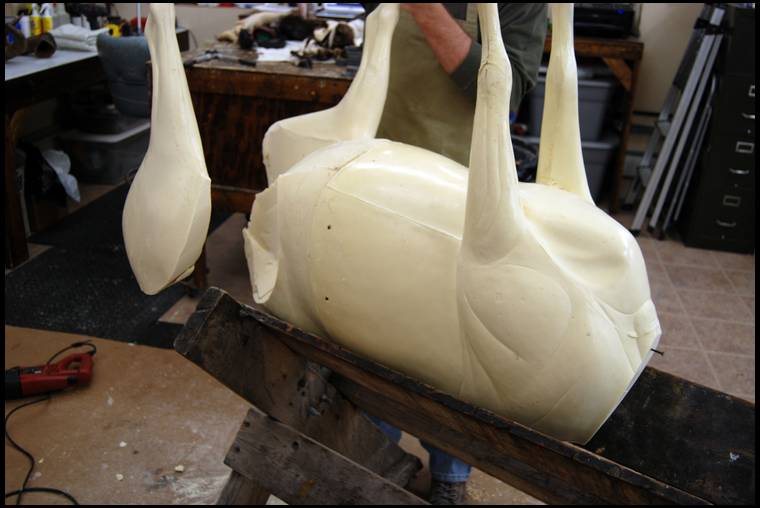
Before I take the screws out I reinforce the arm with 5/8 threaded rod. This will give added strength so the arm won't break. I place 2-3 in each side.
After I get the legs and head roughed in I will add to the length.
I forgot to take pics but I also added to his belly to fill him out a bit. Now I have him to a point were I can test fit the hide again and make any minor adjustments needed.
I'll run a few rods down through the head and neck for support. I'm ready to set the horns now.
First we need to put the horns on the skull plate.
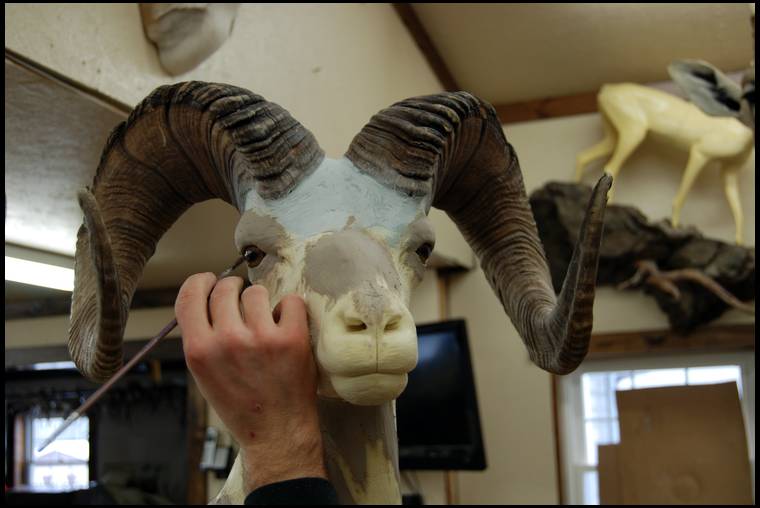
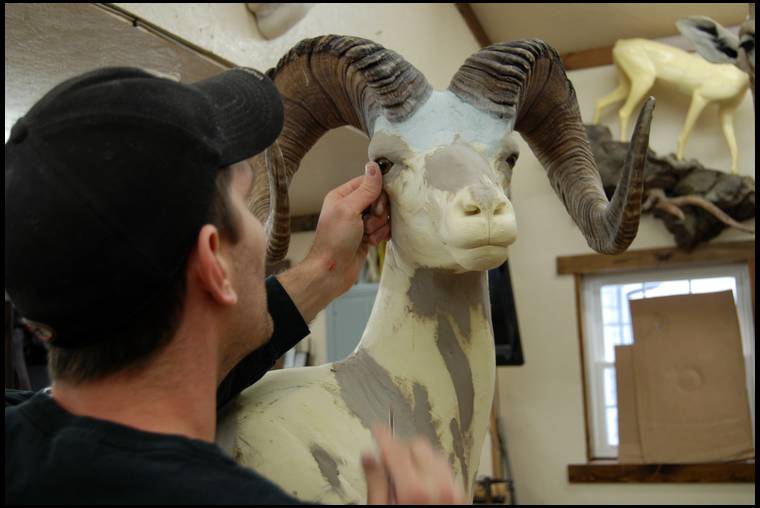
I can start my clay work and get ready to mount.
Looking Great Dennis!
>>>>-------->
Have you seen where they live?! I can understand why so big!!! lol
Getting ready to paste and mount.
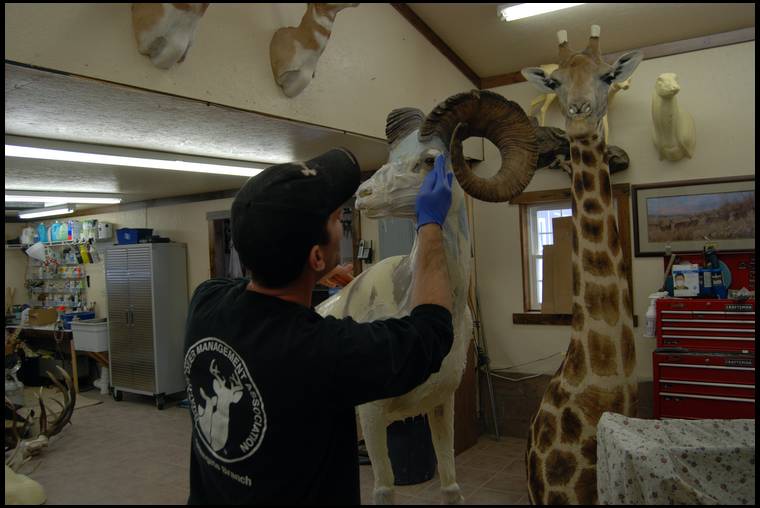
Ok, I got side tracked and didn't take any pictures until he was almost done. Basically I slide the hide up and pinned it. Adjusted the face and around the horns. Adjusted, tucked and sewed his legs and adjusted the belly.
In part 2 I'll show how to finish the base and habitat. Thanks for following...Hope you enjoyed!
Bowsite Sponsor
awesome. you are good at what you do!
Extremely interesting & informative as always! Thanks Dennis
Do they make a left turn semi-sneak form for the gonads?!
very cool thanks for taking us along
Some big game species just lend themselves to a full mount and that Stone is one of them. Did not realize they had so much tan color on their rear and stomach.
I really enjoyed the trip through your studio and to see your work. Quite an artist you are and I am sure the hunter will be very pleased.
Will be waiting to see the full mount on its habitat setting.
My best, Paul
You are an artist!
Thanks for sharing.
Good luck, Robb
Very nice Dennis. You do a great service by sharing the step by step with us. Do you also anchor the horn sheaths to the cores with screws or brads after they are bondo'ed?
Another great thread! I have found most have no idea what it really takes to put a piece like that together and this shows it! Great job my man!!
A dark stone is a beautiful animal. Dennis does it justice
Fantastic....Like to see some close ups if possible. I am actually under the direction and help from my taxidemist doing this years Billy full body...it will be my first full body try. Had planned on a head mount but when I saw that hairy beast laying there he had to be a full body. I am a sculptor and artist so feeling like I can pull it off with my taxis help.
Great job on a beautuful ram....
Thats awesome Dennis, you bringing that mount to the ECWSF?
See you there,
Bill V
All I can sat Dennis is, You sure have talent!!!
Great looking animal
I love your taxi threads! Thanks for posting!
I really look forward to these Dennis, you are an artist !
Wow you have great talent my friend!!!!
Very nice Dennis! Wish I was going to the sheep show again but can't make it this year.
Thanks for sharing the photo's and taking the time to create the post, AWESOME Job!!!!
Great Thread! Looking forward to Part II
I really enjoy these threads, thanks
Thanks for all the comments!
Az- I don't put any nails or brads through the horn. I clean and degrease the horn and just use bondo.
Bill- I plan to take it to the show. Look forward to talking with you.
Brett- Bummer that you're not gonna make the show. Not sure but I think they opened the bidding up to the phones this year.
Here's a few pics for you adventurewriter.I will need to remodel and paint yet. I will update the closeups after he is complete. Best of luck on your billy mount!
Thanks again.
Sir, you do awesome works of art , craftmanship, photography, snd tutorials ! So impressed with your work .thanks for sharing I did taxidermy. When it was a big secret know one would share or help.without a payout. Love your base work too. awesome awesome glenn ps.i wish I could do all that , and keep such a clean shop
With all the sheep threads up I thought this would be a good one to bring back around. Thanks, Dennis
Good job! This is not helping my impatience to get my sheep on the wall!
Awesome. Great detail. Sent you a PM.
Thanks for bringing this back up...fantastic artist skills and work here! Great looking real dark colored Stone! A great specie choice to lifesize!
Hey Dennis, Thanks for sharing your beautiful work with us on Bowsite ! Looking forward to hunting with you again in 2016. Paul
Thanks guys.
Kyle,That is a fine ram you got. I would be excited to get it back too! Congrats again.
Paul, I will be thinking about that hunt everyday until it gets here. We have a great group of guys in camp. I'll let you know when I leave for my Illinois hunt... maybe get out for a few days.
Never2sharp, got it. Thanks