Repairing split skull cap?
Caribou
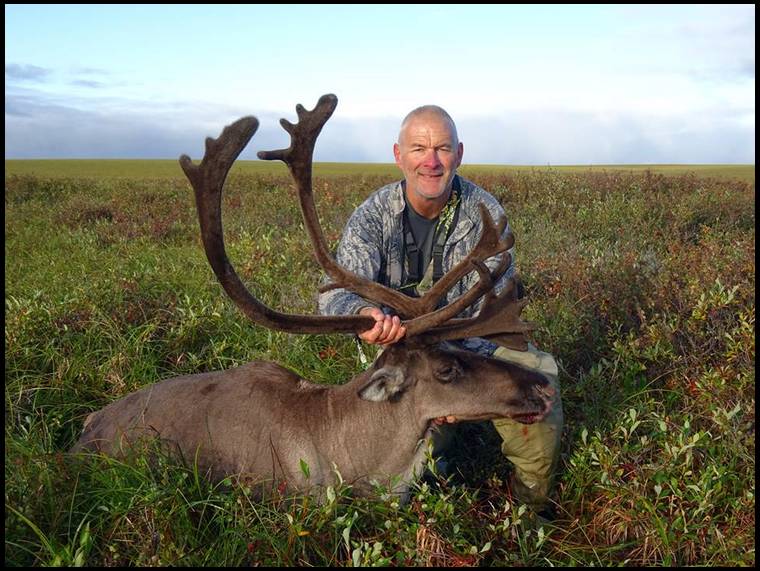
I tagged two bulls recently in Alaska and split the skull caps for transport. The larger is going on a replica skull for European mount, the smaller just on a wooden panel. What is the best way to repair/rejoin the two halves. I was thinking of resin and cloth on the inside.
I've used resin on deer skulls with cloth and it works great. I just super glue them together and go. Congrats on the bou's. Post up some pics.
No experience on the repairs, but congrats on your success!
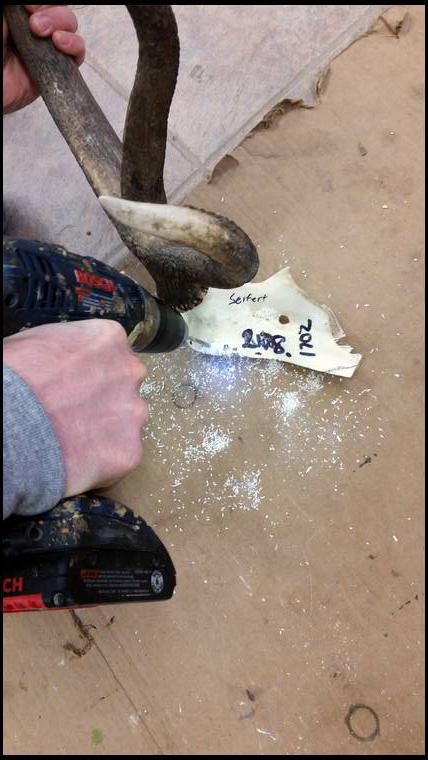
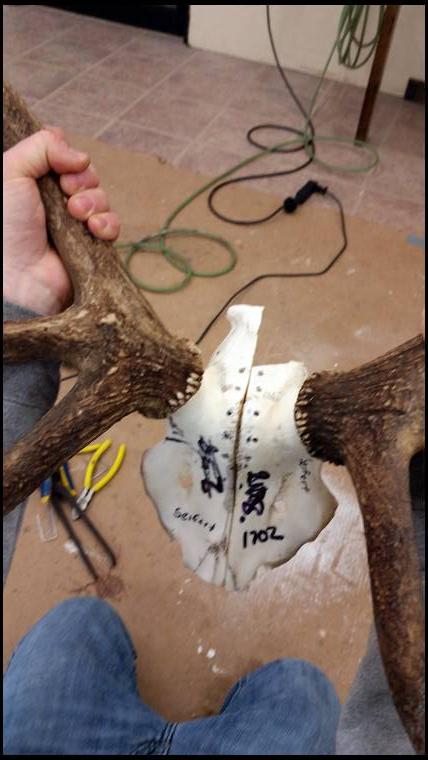
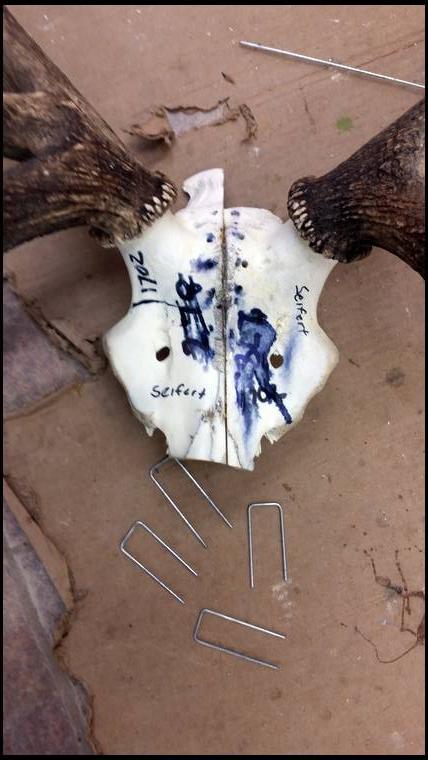
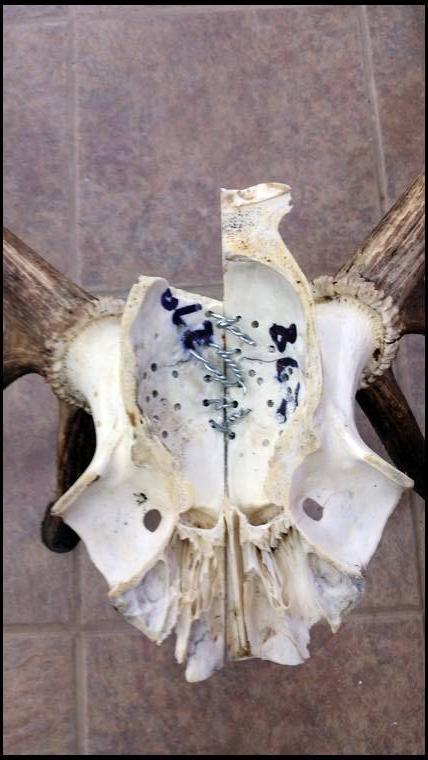
I'm a taxidermist and have reconnected a lot of them.I always wire them together with 16 ga black tie wire first.I drill a hole on each side of the split,bend about a 4-5" piece of wire and put it down through the holes(it spans the cut).The wire ends are then twisted tightly on the underside of the skull cap.I do a series of these,4 to 6,depending on skull cap size.It's OK to use some slow set epoxy in the seam but not absolutely necessary.
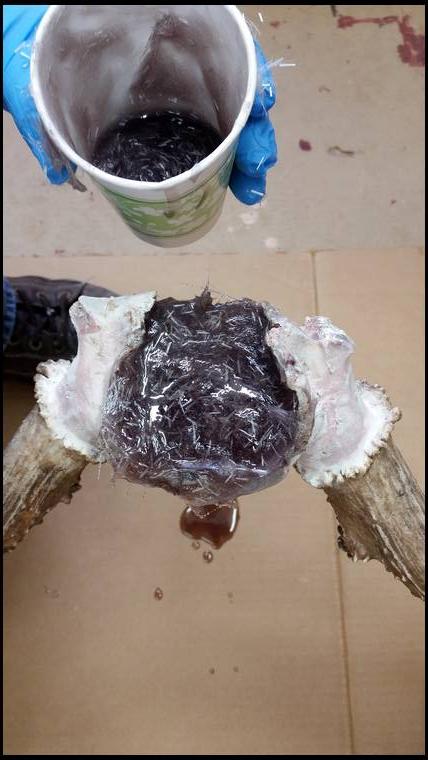
After that,I put a large gob of bondo on the underside.This completely covers the twisted wire ends,bonding to the skull and twisted wire ends.It is OK to fill the entire skull cap with the bondo.This adds strength to the connection and also gives support to the skull cap.
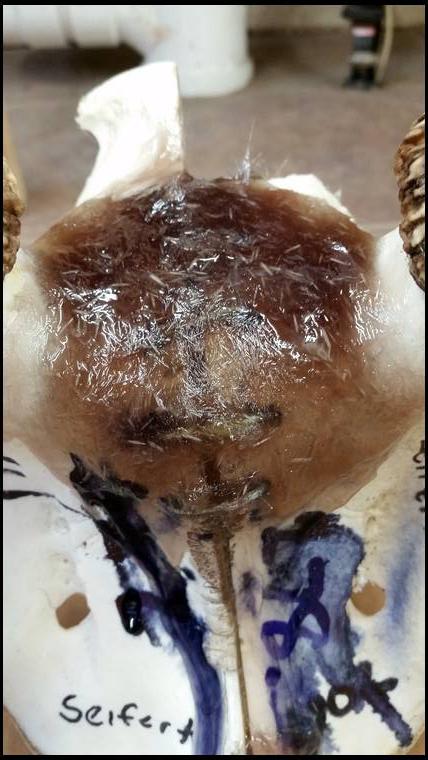
After that I cover the top of the skull cap with a couple layers of fiberglass cloth and resin.This makes a very strong skull cap which is important as antlers are often used as carry handles and there is a lot of leverage on long,caribou antlers with a relatively small skull plate.
Nice caribou, they look tasty. Congrats
Done it several times with deer. A wad of bondo under the skull cap, in the brain cavity does the trick.
Yep... Jim B explained exactly how to do it. Ed F
Measure the inside spread before the split and cut a spacer before the repair.
-Joe
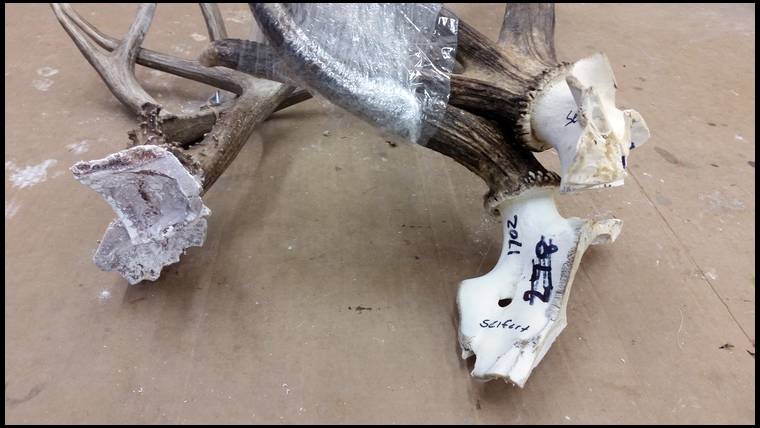
Also don't cut all the way through. Stop 1/4" from completing the cut and snap off. That will give you a male and female chip to piece back together perfectly.
Does anyone have a picture you are willing to post on the steps Jim B describes above on splitting and then wiring back together? Heading up this year and trying to figure out the best way to split the skull, then fly back to the lower 48 on Alaska air and repair them when I get home. Euro mount is my preferred method.
On another note, is there any way to realistically keep the velvet in tack or should I simply plan to strip it off? We hare heading in mid August.
Euro mounts are difficult if you want to save the velvet since it's best to force blood out from the tips toward the skull and the openings for that blood are in the brain pan. You must have a way to cut that open from below. I did one with formaldihyde but that's tedious and takes a lot of time and you have to take hypos. This one was shot in 96, mounted about 05. As you can see the house is still in the build stage. Pic taken 14. Skull was capped.
Jim has it right. I have a stag and a mulie in the studio to do. I'll take a few pics today as we put them together.
Crazy glue. Worked great on my deer. Was testing how strong it was by pushing the antlers together and ended up breaking the skull in a different spot, the glued spot was still fine. Now I have a skull plate glued together in two different spots. Not real sure of how it will hold up long term but figure it will be fine. Really quick and easy fix.
Jim has it as that is exactly how I have repaired a few broken skulls. On a cut skull (I have never done one) would you also add a small spacer the width of the saw blade used to cut it?
Dennis - This will be interesting, thanks for sharing...
Try to post all the pics whole on lunch.
Glue is to just tack it in place. It is a high quality glue called tech bond.
After work I'll post the final steps and show the finished skull plate.
This is the process Jim and others mentioned.
I think my memory might be worse than I thought. Not sure if you need the brain pan clean to get the blood flow out of the velvet.
Put a whitetail together with plaster. Lasted till I dropped in on a move.
Used foaming gorilla glue on second repair but I was joining the staggered natural seam, not a saw cut.
I think you would be better off to saw part way then break to have some guide when you rejoin.
I used fiberglass and chop.
You might consider measuring the spread before splitting and then placing a board to get the correct spread as the bondo sets.
Great tutorial, thanks for posting Dennis and others above.
...great post......thanks...