New trophy room build
General Topic
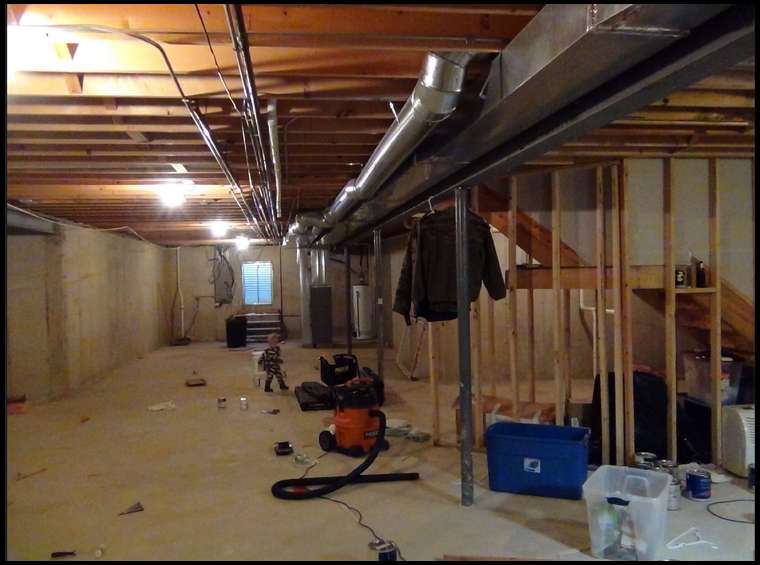
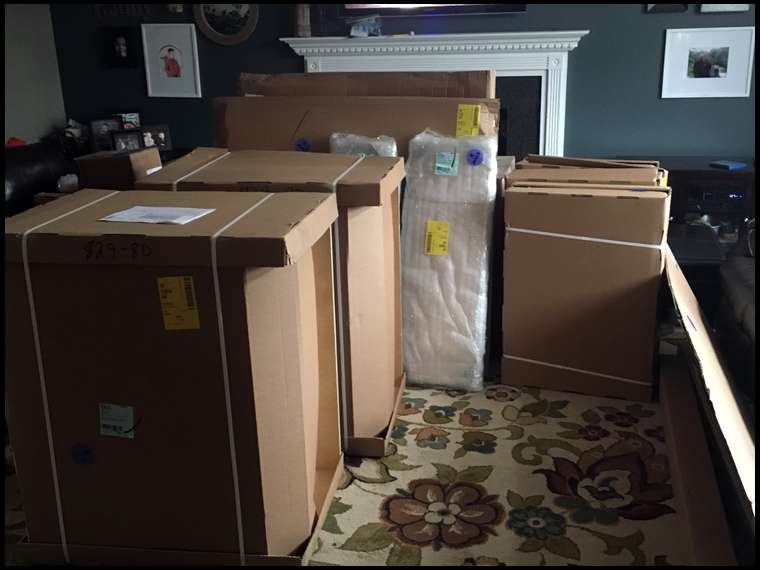
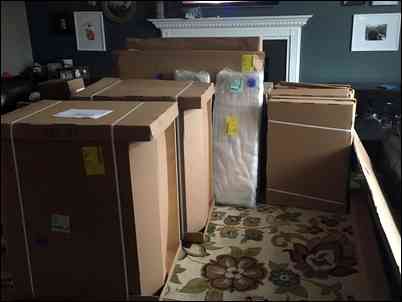
I thought it would be cool to show my trophy room build from start to finish. We moved into this house a while back and I have been planning this build for some time. I have the run of the basement, lots of ideas, little money, and not to much time with three little ones. Here we go,..........
More pictures of what I have to deal wth
My plan is to do a decent sized bar, a bathroom, storage area with a nice workbench for work on both my bow and firearms, a pantry area ant a tv area. The entire space outside of the storage, pantry and bathroom will be used to showcase my love of the outdoors.
My plan is to do a decent sized bar, a bathroom, storage area with a nice workbench for work on both my bow and firearms, a pantry area ant a tv area. The entire space outside of the storage, pantry and bathroom will be used to showcase my love of the outdoors.
Good luck...I see an indoor archery range in your future man cave.
Been there, good luck. It's been said before, but wall space, wall space, and more wall space. Believe it or not no matter what, it's what you'll run out of.
Good luck Mike..One tip,,I'm a Framing contractor,, actually were Framing a basement this weekend,, before you stand any exterior walls against the poured concrete walls...Hang 4 mil plastic from the bottom plate of the floor joists downtown the concrete slab..It's easy and helps greatly with mosture control.alot of $$$$ in those future mounts...Another tip do not cut your studs extremely tight,,lots of times the poured slab is up and down...If your top plate is an 1\8 or 1\4 short..Simply shim it before you nail and plumb it..None of your walls are load bearing...Give er hell buddy.... Pat
How big will be your room at the end? I am planning to do mine and just looking for size comparision
Others have added plywood/press board behind drywall so they can hang anything anywhere, rather than have to utilize studs at specific locations. I always thought that sounded like a good idea.
Yes I agree putting on a layer of plywood first is an excellent idea..
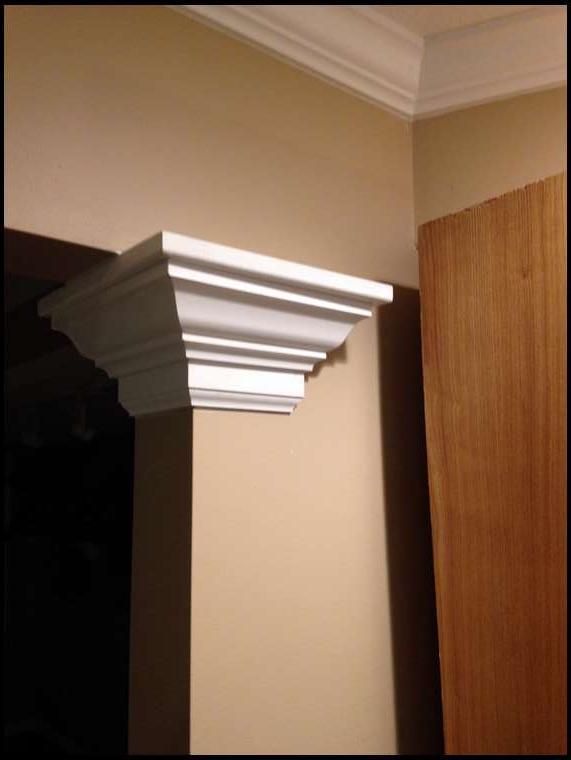
I have refinished about 20 basements in the last 5 years (I rehab homes and have helped friends). If you want I can make some suggestions. Here are two things I like to do. FOne is top for posts (not exactly a post in pic but you get the idea) really easy and cheap and dresses them up. It is just upside down base, then crown then 1x poplar.
Other pics is really sweet and people LOVE it. Costs maybe $100 extra ($200 tops). TV area with what I can "windows" on either side. Added small can lights in windows on a separate switch.
Thanks guys for the tips! We had moisture problems with water coming over the sill plate, we corrected it by re tucking the exterior and re flashing the lower three courses of brick, I also injected a few cracks with epoxy just a precaution. It's been dry for a year now.
The epoxy is the only fix for poured concrete walls like you have. Keep your eye on shut off valves and heat vents. Also I make every door a 36" door, almost no cost increase and NICE for moving things like an elk head!
Toby it's going to be right at 1200 sq ft
Crack in the I beam pocket to the outside where the bay window bump out is, I grinded thi out and injected the heck out of it with epoxy.
Thanks for the advice Don
Looking forward to seeing your progress. I have a basement to finish as well and my floorpan is constantly changing. The one thing that hasn't changed is an archery range on one side. I can shoot 23 yards but I may make it shorter to about 15 yards.
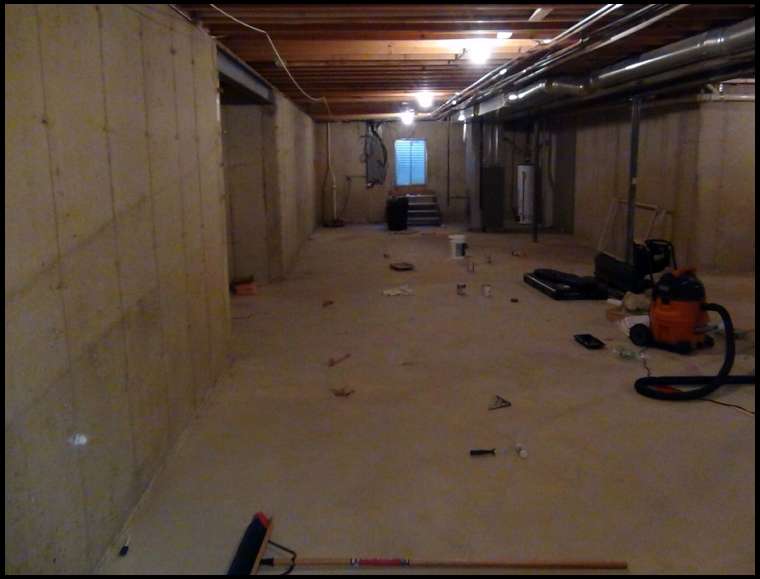
I stripped my basement to the concrete walls and floors.
And I used the advice to put 1/2" ply on all the walls before sheet rocking. Very happy with that! It's more cost and work, but you'll be glad you did when it's done and you're hanging stuff up.
I also used a product called Dri-Core on the floor before laminate. It's basically very dense 5/8" chip board with a plastic, raised dimpled sheet on the bottom. So far, very nice for warmth and water can run underneath without soaking the floor.
From my previous post. I don't know why the pic didn't post this is the i beam pocket on the exterior, we ripped the deck off the house to fix this and replaced it with a paver patio.
Another thing I plan on doing is tearing this wall out to allow for an open arched walkway to the basement to match our upstairs.
Can anyone tell me why my photos are not posting? When I click edit on my posts the photos are on there, I then click submit and the post is there but no photo, if I again click edit the photo shows but will not post.
I am having trouble posting pix too.
Same as you but sometimes they don't show all the pix.....
I'll try PM for advice and maybe the pix will come thru that way.
Your project is going to turn out fine!
Good luck, Robb
PS= Just click on my Handle and you can see the finished project.
Lighting is one of the most overlooked items in a trophy room and it is even more important when utilizing a basement. Put quite a bit of forethought into where mounts might be hanging and allow as much flexibility post-construction as possible. Can lights in areas where you are sure to have mounts hanging and adjustable track lighting in areas where you aren't sure. Variety is good.
Good luck and keep us updated on your progress.
Can lights

Basement

Basement

Archery work room

Archery work room
Good plan Michael. If you're still looking for ideas, here's a couple photos of my basement shooting range & 60 foot photo/critter wall. 1/2" plywood with aspen tongue and groove. The shooting backstop is 1/2" plywood with rubber conveyor belt screwed on. The other photo is my archery work room.
I have to second the can lighting and track LED lighting.
The plywood walls under drywall allows for great versatility in placing mounts, especially as you add new ones over time. Does anyone have any suggestions on material other than drywall over the plywood. Can some type of texturing be applied over the plywood? How about a textured wallpaper or even burlap-like covering? Something other than having to drywall and tape and texture which seems like extra expense and effort. Just looking at alternatives. Any ideas?
Would T&G directly over the plywood work?
T&G would be a great material.
In my trophy room I went with Faux Stone work on one wall, with some cutouts for mounts to be inside, and then Barnwood installed in patterns on the opposite wall.
Can't change your ceiling heights, but the higher the better, I wish I had 12' rather than 10', but mine was also in a basement rather than a complete build-
My wife always reminds me "less is more". I pretty much want everything hanging but her "wise council" has helped greatly in presenting a display pleasing to the eyes of others rather than just mine:) Good luck, always a fun project. C
bowonly (Rich), I have 2x6 walls so I attached 2x4's inside on both sides and then 1 1/2" of plywood (2 layers) between the studs. Did this starting 4' above floor to within 2' of ceiling line and adjacent walls where I figure I would not be hanging anything. It came out real nice, more cost for material and more time for labor but I wanted a wll that would hold anything I put on it.
You can buy finished tongue & groove to cover the plywood. Do a search for Menards. I had trouble attaching the link. You'll be able to attach just about anything with that set-up. Looking forward to seeing this project develop. You've got a tall task ahead to fill those walls with mounts.
I've never had any problems with hanging mounts due to weight- I have used a lot of those 75# drywall screw-in threaded holders for things up to the size of caribou. We do have heavier grade drywall though.
Only real issue has been bison, Moose, and anything with large habitat that hangs, in which case I just make sure I have a lag bolt into a stud on those. Having Barnwood over drywall also helps as a screw or "L" bolt goes through the barnwood and the drywall, which makes it very strong. I was at my dad's a few weeks ago and re-positioned a bunch of his mounts. Seems whenever you get a few things back, you need to re-examine the layouts.
Thanks for the replies to my question. The T&G paneling certainly is an option. I have done that over 5/8 plywood in my basement To be more clear in my question, instead of a second layer of drywall or T&G or panel board over the plywood, does anyone know of a texture application (like on drywall) or wall paper-like covering which goes right on the plywood. In a large trophy room with lots of high wall area, I would be trying cut down on materials and labor spent on drywall or T&G.
I hope this is not "highjacking" ml335's thread!
For sure T&G over your plywood, no need to waste $$$ on sheet rock.
I prefer the Aspen T&G myself.
+5 on the Track lighting.
Good luck, Robb
Anyone have a bar in their room? We're looking at doing ours similar to this with stone on the endcaps,
This photo above is the wall I was talking about earlier, I'm going to take it out and open the well up into the basement
Can't wait to see the final project!
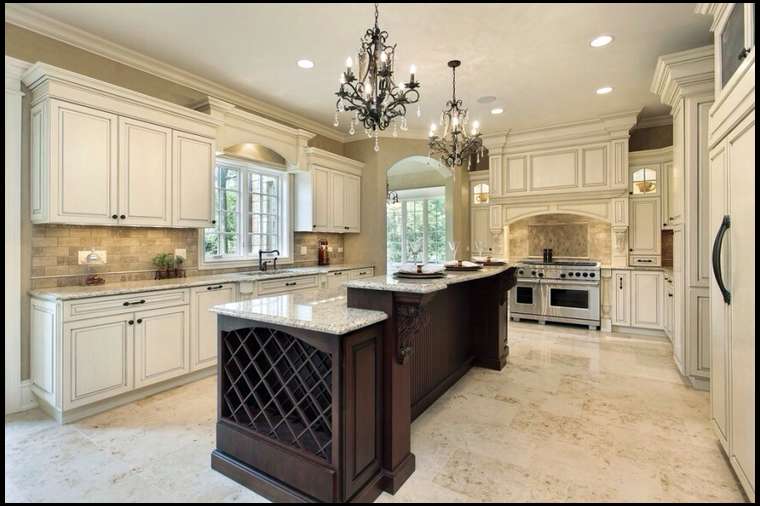
Nice kitchen pic
Good luck, Robb
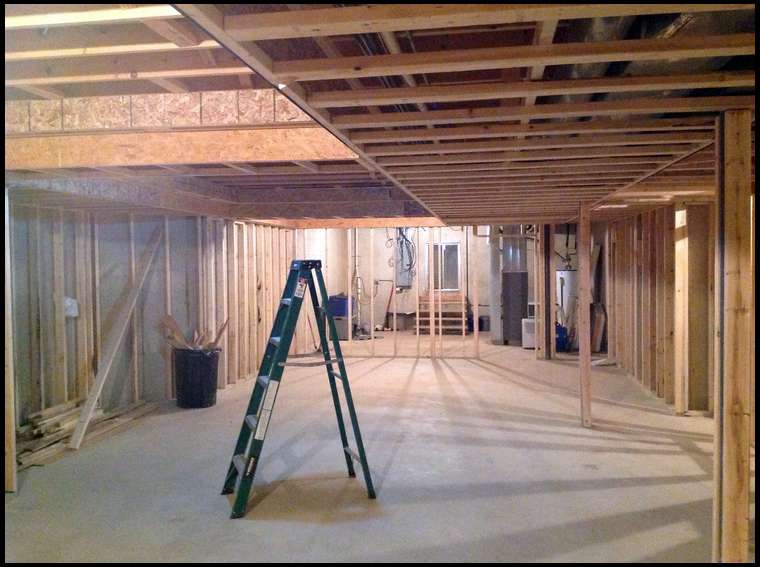
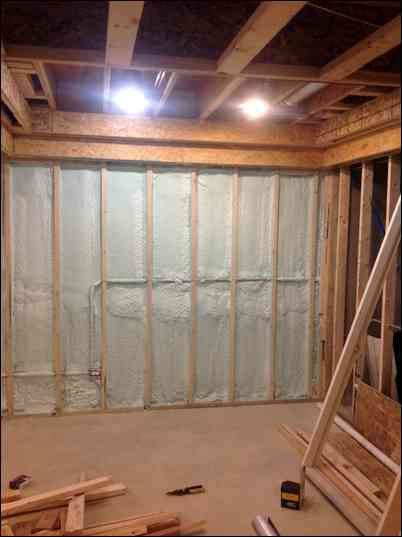
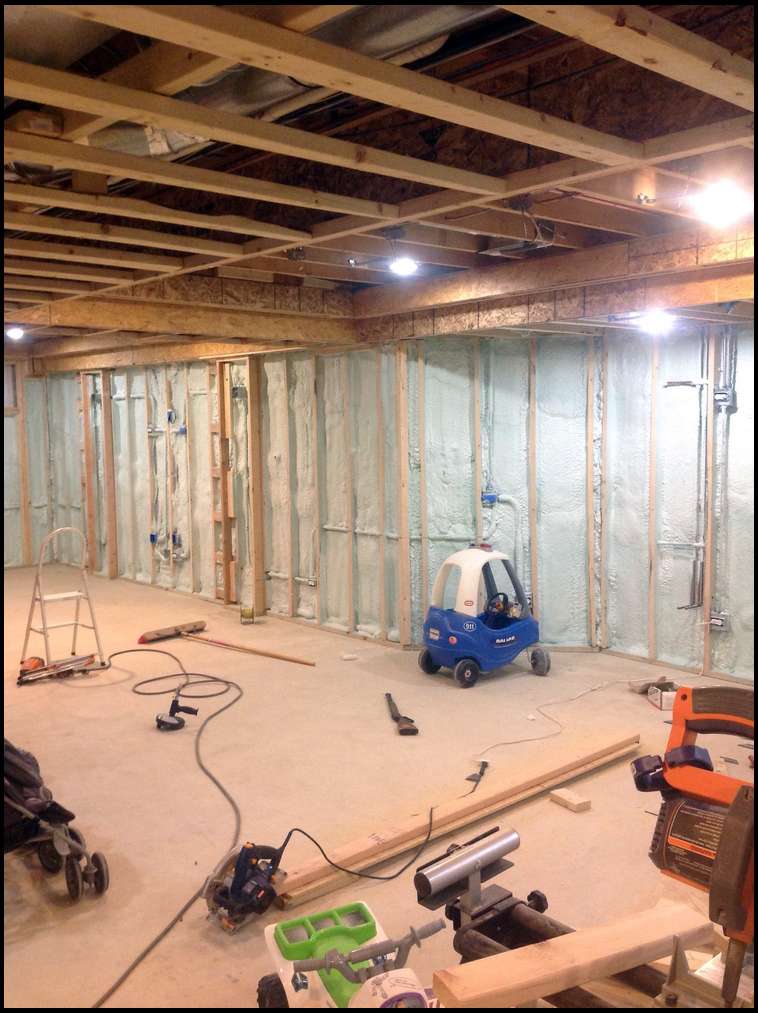
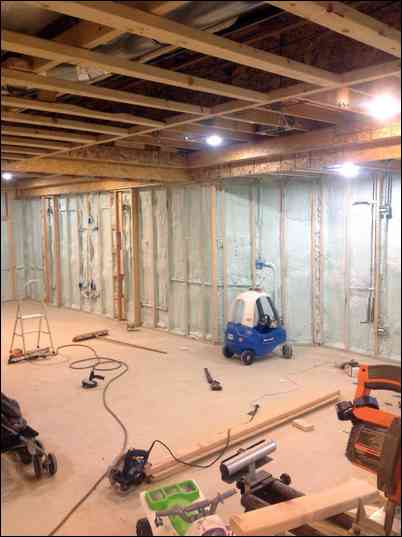
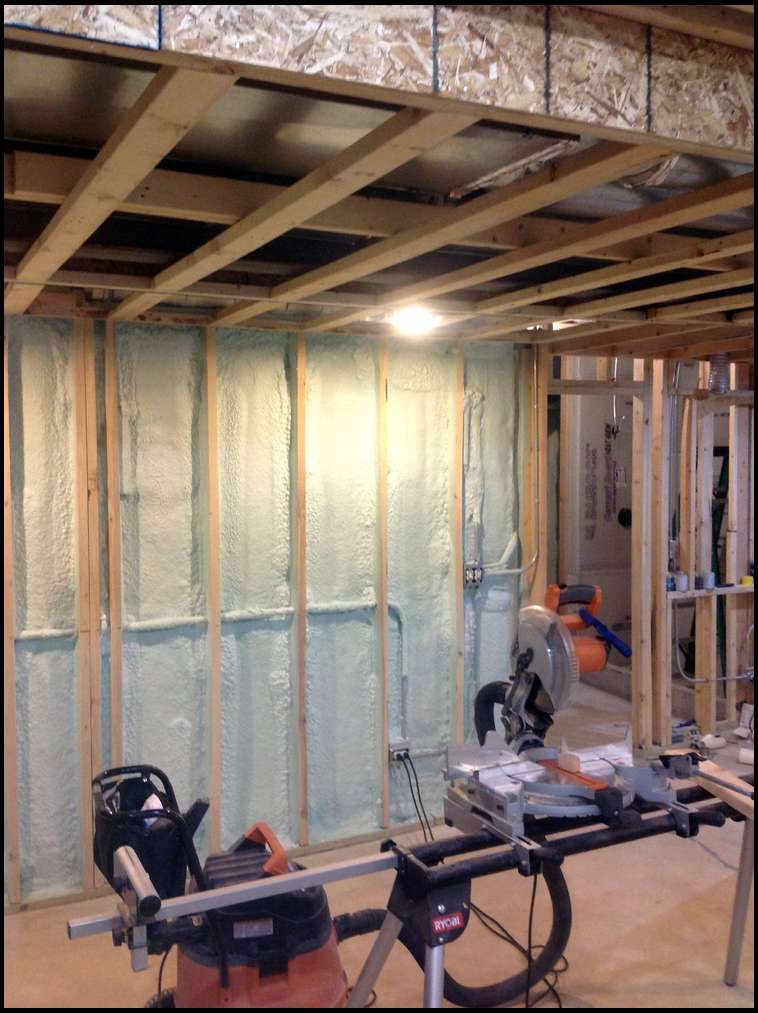
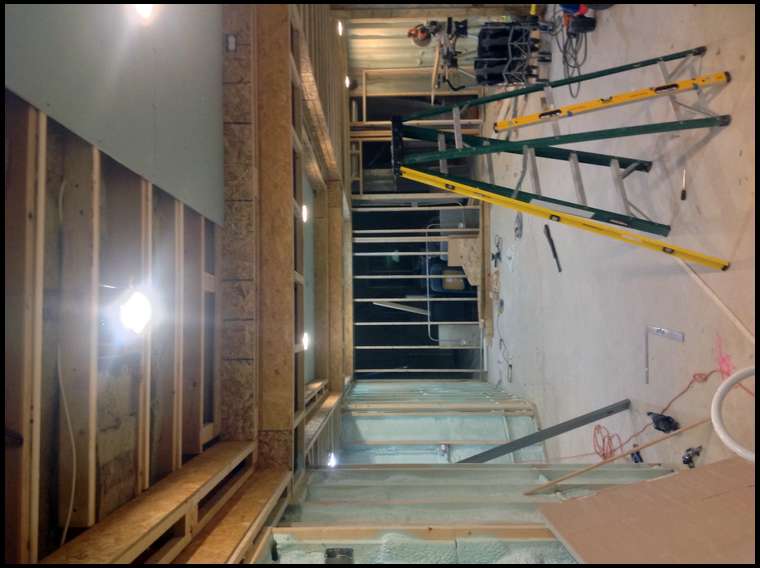
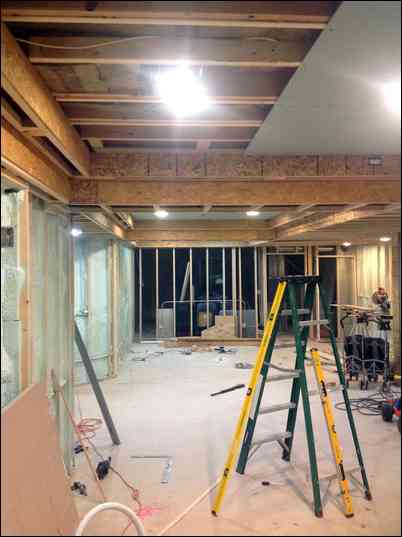
Progress, electric and spray foam to come next.
You are making very good progress.
Falling into place well
Good luck, Robb
Man all of those are awesome....I need to hit the Powerball to keep up with you guys....LOL......
Good looking framing bud....Keep at it!!
Good looking framing bud....Keep at it!!
Toasty Warm

Toasty Warm
Not sure if you are doing a fireplace or not but I wanted one in this room but didn't have the option for gas----so I went electric----very nice after all.
Good luck, Robb
335.... ,
Please supply spray foam insulation pics , procedure tips , and thoughts.


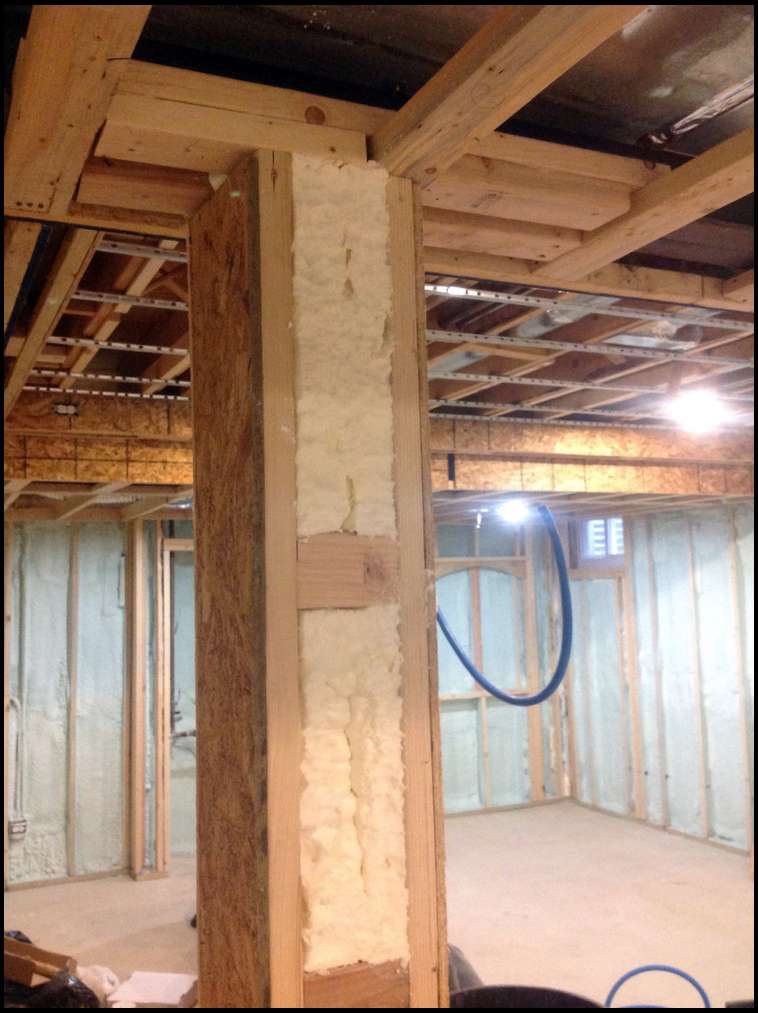
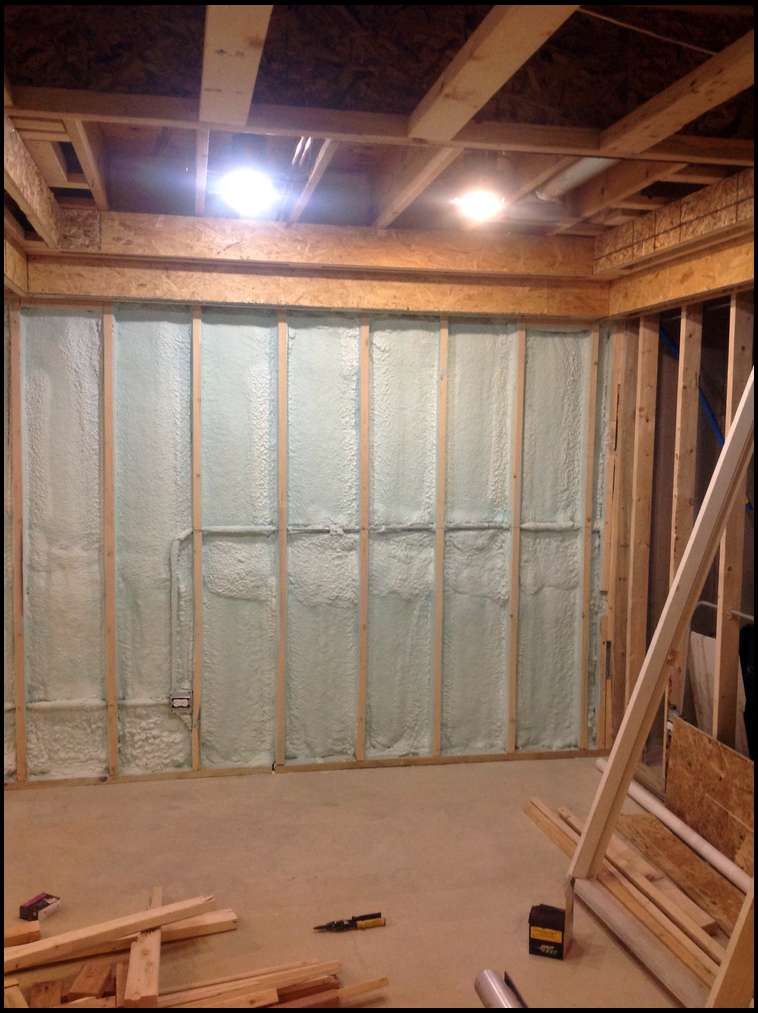
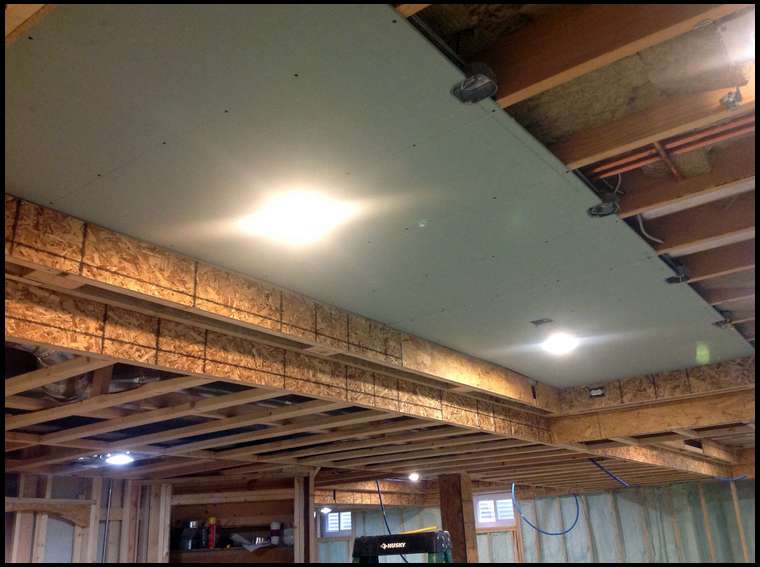
Progress is coming along nicely. Electric is all done. I had to have a new panel pulled for the basement. Lighting is al.ost done I may add some more can lights.i hired out the spray foam portion of this to a company out here. Bill I went with the spray foam for several reasons, mainly to have something on the walls that would be a vapor barrier and that would fill the rim joists pockets and sill gap completely. I hate drafts and I thought this old work out perfectly. I re ran a new smoke sector line as well as pulled water for our bar. The drain for the bar is going to be done via a sump pump to the ejector pit. You can see the vent and waste lines run in one of the picks I'm going to post. I am going to have a bit of a problem in the future with my floor joists being a bit off. They will creat a wavy ceiling. My fix will be leveling them with 2x4 sister end to the joists and then channels to try to cancel out the sound transmission to the first floor. I'm also going to add some roxul stone wool insulation to fill the joist bays to keep it quiet. Last minute touch ups going on before drywall. Im sealing all the hvac ducts with mastic as to avoid any leaks. I ran chase tubes for my theater system. I'll keep you all posted as we progress.
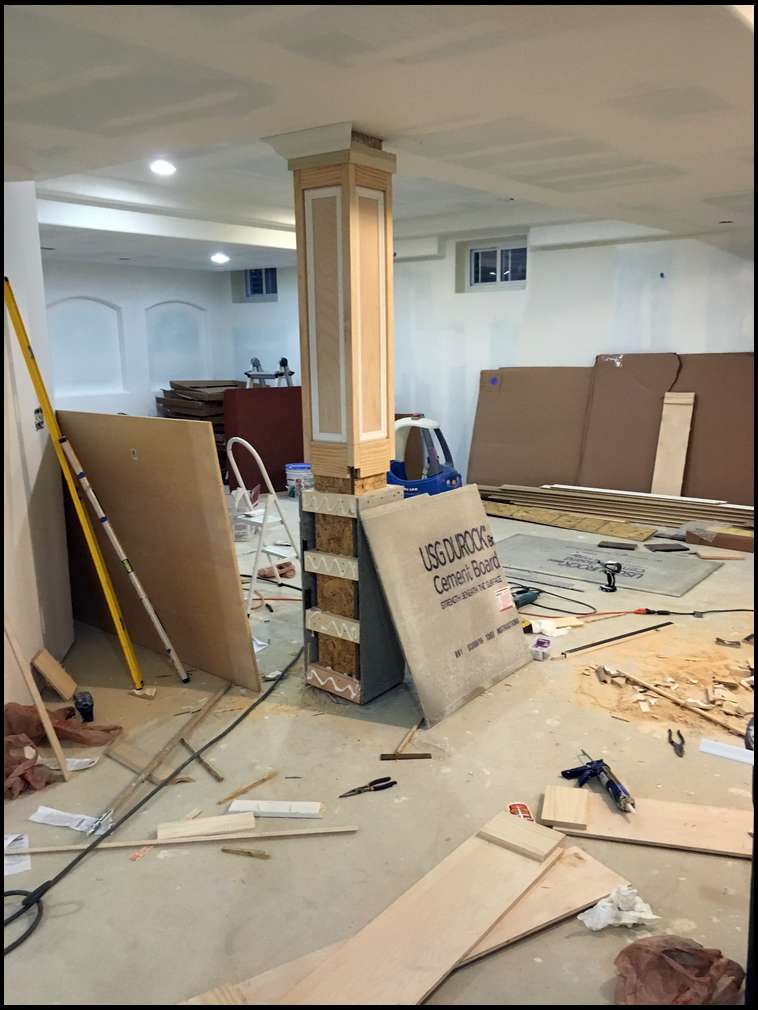
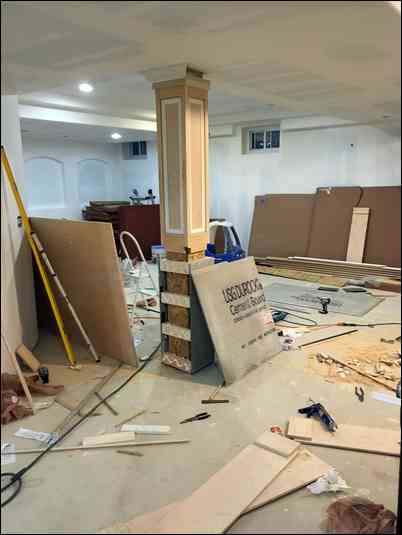
Wow I just saw all my spelling errors on my last post. I appologize. I plan on framing around the lolly columns with a box out and stone work. That being said I was worried about sound transmission to the first floor. I framed them in and had them also sprayed with foam to absorb some of the sound waves.
Coming along real nice.
You are going to be very happy
Good luck, Robb
Don't skimp on can lights, I wish I would have added more. Also, if you go with anything besides drywall over the plywood, paint the plywood black. This will create a good background for any imperfections in the wood that you would be able to see thru.

Let's see if this post the right way
Let's see if this post the right way
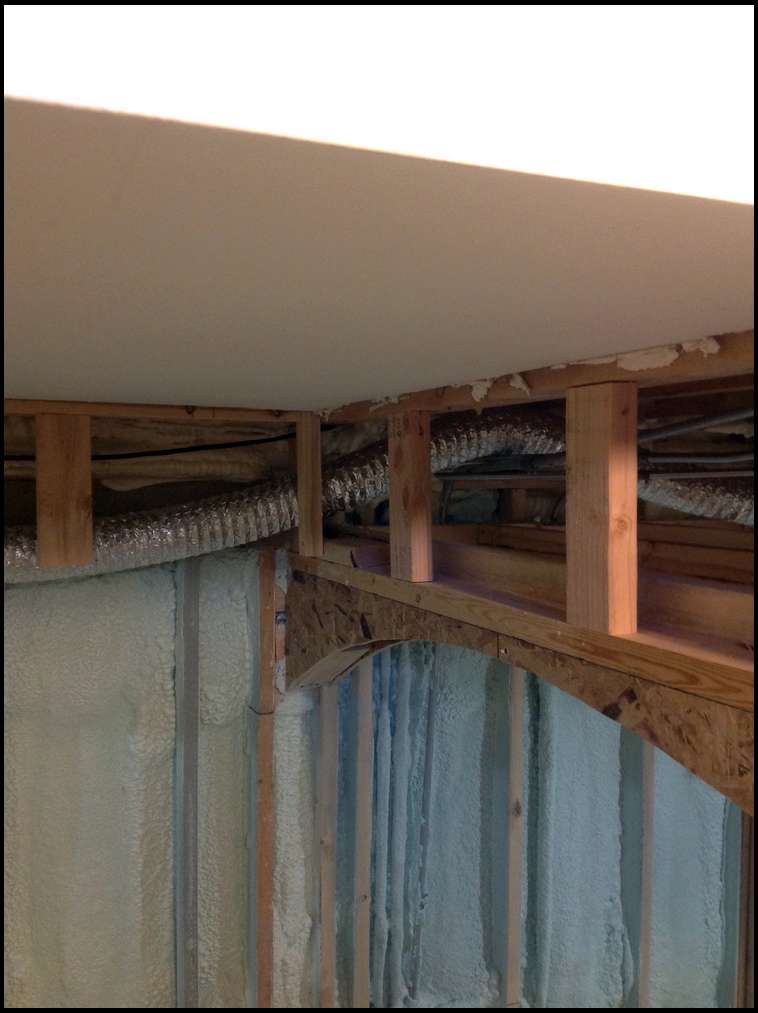
Drywall progress has been going on very well. I got stalled up due to some sagging floor joists but I sistered on some 2x4's to each joist and leveled it all out. Moving 120 sheets through the house and downstairs reall taxed me but myself and a good friend did it in a few hours. I also took out the wall as you enter the basement that helped with getting things down there.
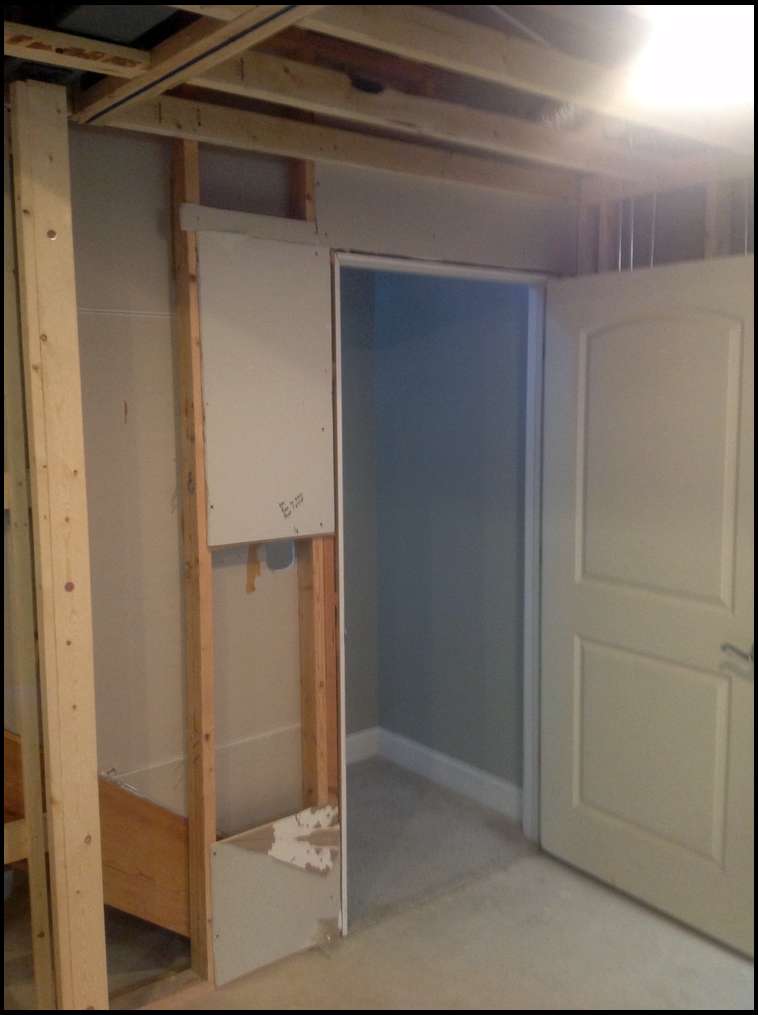
Kind of a cruddy photo but this is where the door was, I took out the wall and made this arch to mimick our upstairs.
This was it before

This was it before
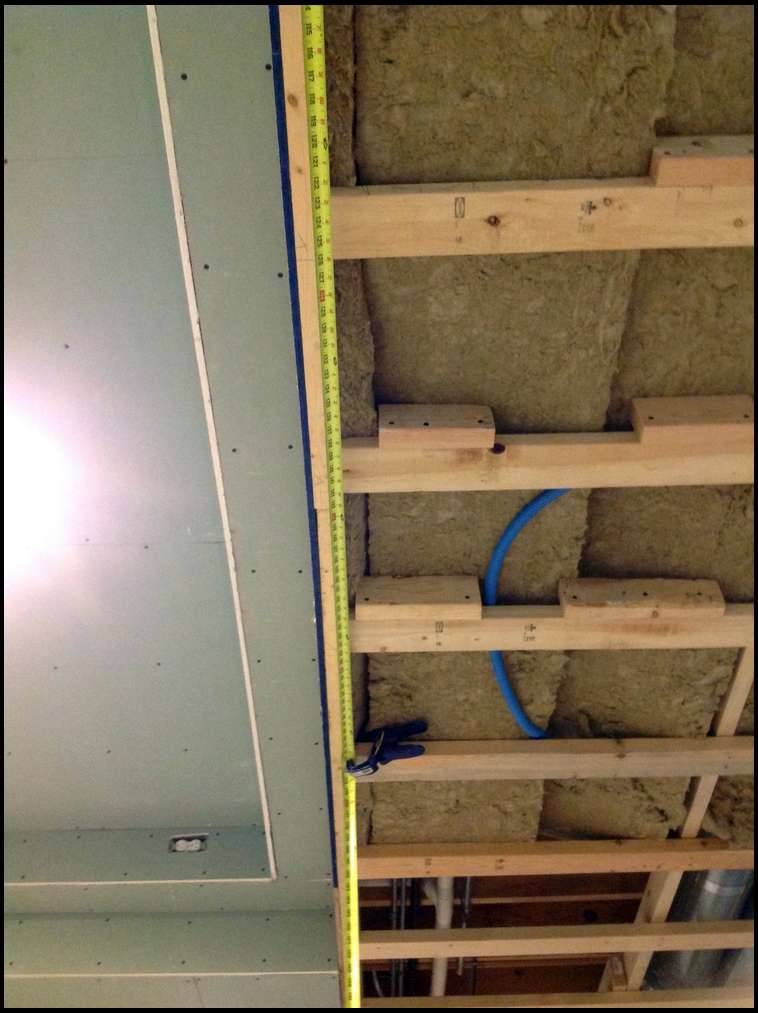
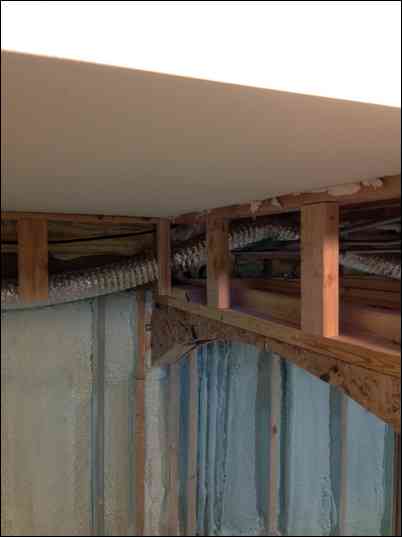
Stone wool insulation and drywall, I also ran a tape with photos of everything in case I need to open the ceiling up

Stone wool insulation and drywall, I also ran a tape with photos of everything in case I need to open the ceiling up
Kind of a cruddy photo but this is where the door was, I took out the wall and made this arch to mimick our upstairs.
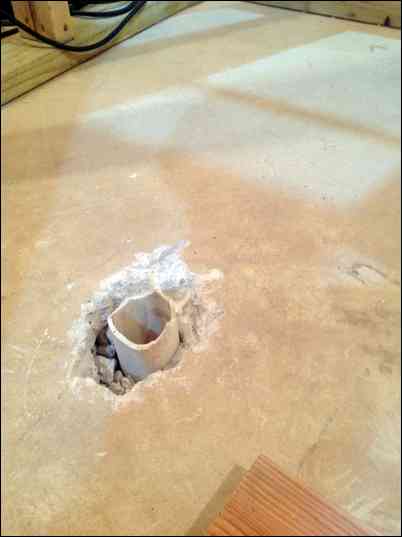
I'm so ready for the drywall dust to be gone!!!!!! I've also finished the plumbing rough in the bathroom including the pan for the shower. There was originally a rough in for a shower but the contractor did not put a trap in, I had to cut the concrete to get at the pipe, install a new trap, and then center the drain where I wanted it. What a pain, and myself being a cheap a*#, didn't want to rent a concrete saw so I did it all with a hammer drill making about a thousand holes then smashing it out with a cold chisel and hammer.
That 'arch' is going to certainly add some character to your area.
Very nice
Good luck, Robb
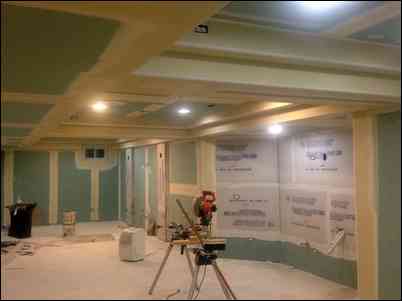
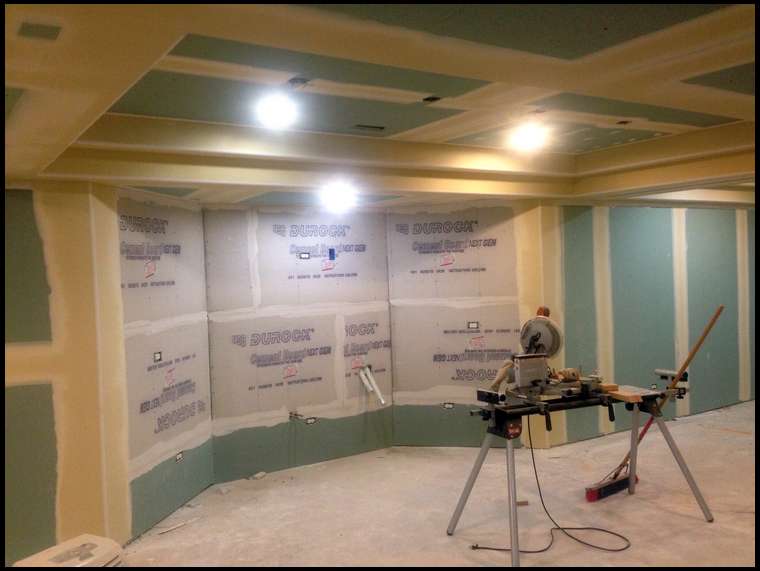
Drywall nearly complete just some sanding and final touch ups
That is very nice indeed!
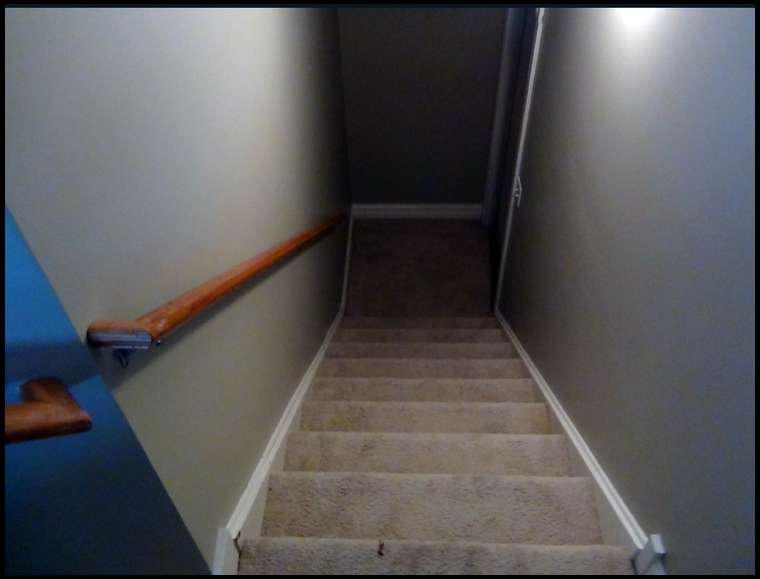
This is looking fantastic!! It looked to me as tho you might have some trouble getting mounts down the stairs but the modifications at the bottom of the stairs is gonna be both aesthetically pleasing and functional!!!!
Following this since I will be doing the same as soon as my kitchen remodel is finished.
I looked at this kinda late. Your project looks great. The only thing I would have done different is the ceiling. A hung ceiling is far more practical in a basement. All that plumbing, wiring and duct work may need to be addressed/fixed at some point. It's also much easier to run additional wiring, ethernet, or coax cables when you decide to remodel, or as a selling point when that time comes.
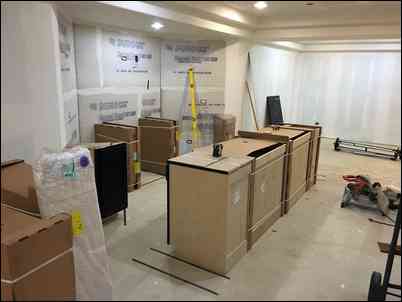
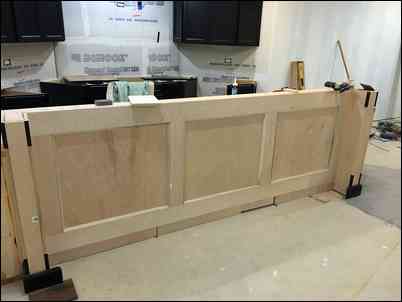
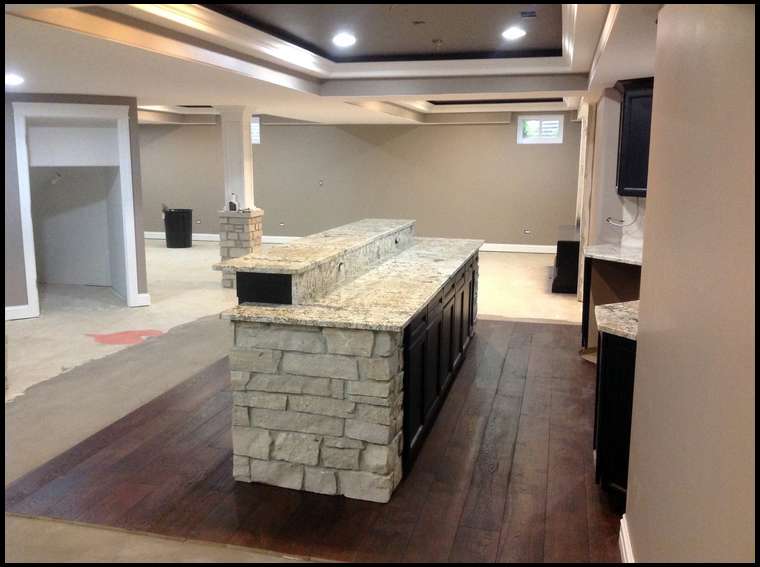
Lots to update on, I went through and primed up all the new drywall, what a pain, it took nearly 15 gallons to cover it just kept soaking it up. I thought this would be the end of my dust story, not to quick though more on that in a bit. Cabinets for the bar all arrived. I've moved them all down stairs and placed them where I want them. On some of the pictures you'll see black tape outlined on the ground to show the bar layout. After putting the cabinets in place I framed up the back bar support and the pony walls for the end caps. I've decided to go with real limestone on the end caps and the Lolly columns. I boxed both of them in for this also.
Man, I hear you on the drywall dust. I can't stand that stuff, or even the texture of drywall paper. I prime everything as soon as the drywall finisher's are out of the house and prime any finish material again afterwards if it's going to be paint grade. Looks great.
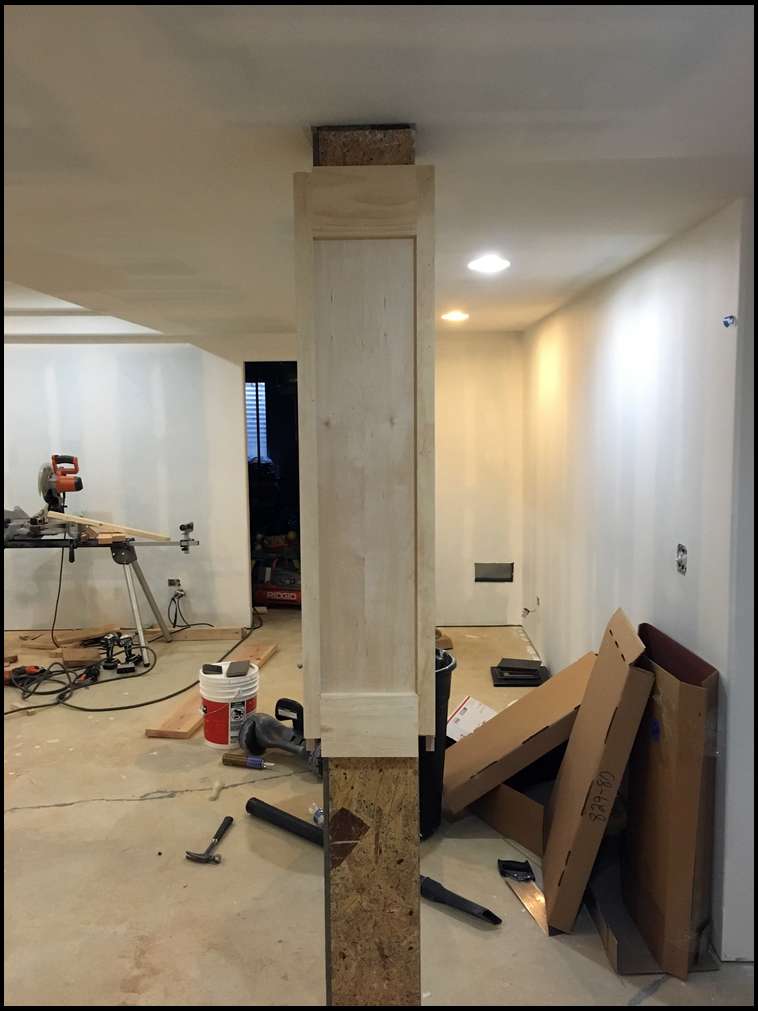
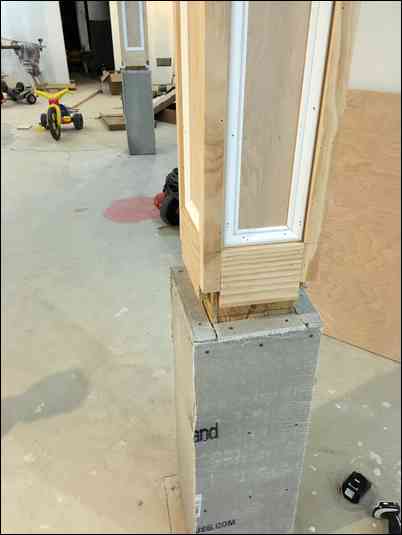
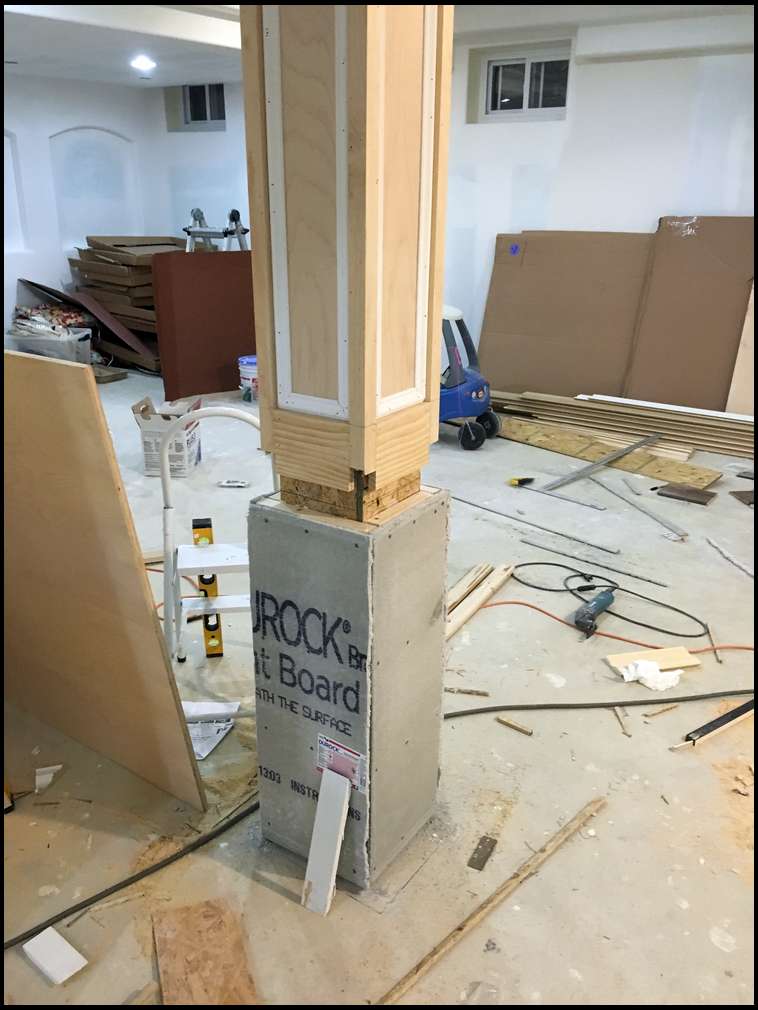
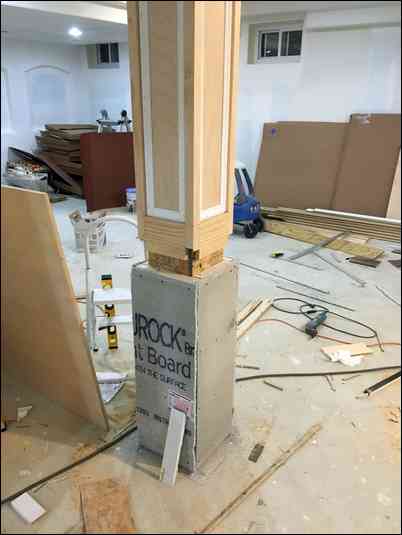
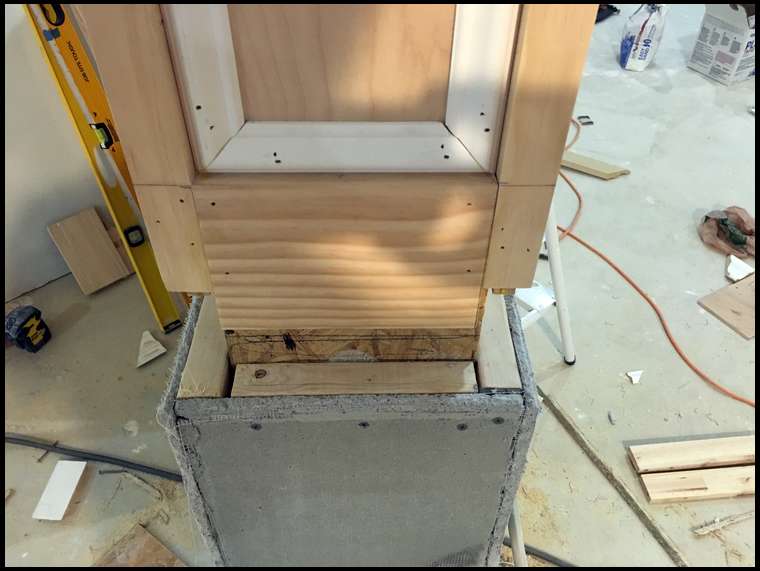
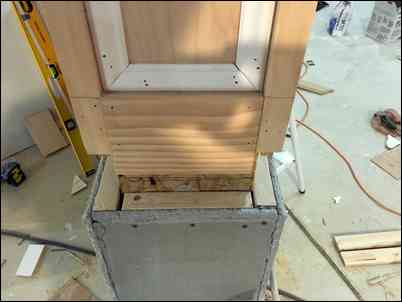
Lolly column being boxed out

Lolly column being boxed out
Ben I hear ya! After getting the bar into place and framing it out I realized that I needed to run electric to it to be code compliant. So myself in my ever cheapest way used my angle grinder to cut the concrete to make a chase to lay conduit in in order to get power to the bar. You want to talk about dust! This was the worst.
Ben I hear ya! After getting the bar into place and framing it out I realized that I needed to run electric to it to be code compliant. So myself in my ever cheapest way used my angle grinder to cut the concrete to make a chase to lay conduit in in order to get power to the bar. You want to talk about dust! This was the worst.
Ben I hear ya! After getting the bar into place and framing it out I realized that I needed to run electric to it to be code compliant. So myself in my ever cheapest way used my angle grinder to cut the concrete to make a chase to lay conduit in in order to get power to the bar. You want to talk about dust! This was the worst.
unfortunately I know all about grinding and cutting concrete in basements. 1st, cut wet if you can, this cuts dust exponentially; even if it's just damp it helps a lot. We use a weed sprayer frequently for this purpose, so it's not a ton of water.
If done one could help with the triple post I'd appreciate it, I can't seem to figure out how to delete one
That is really coming together quite well.
Thanks for sharing
Good luck, Robb
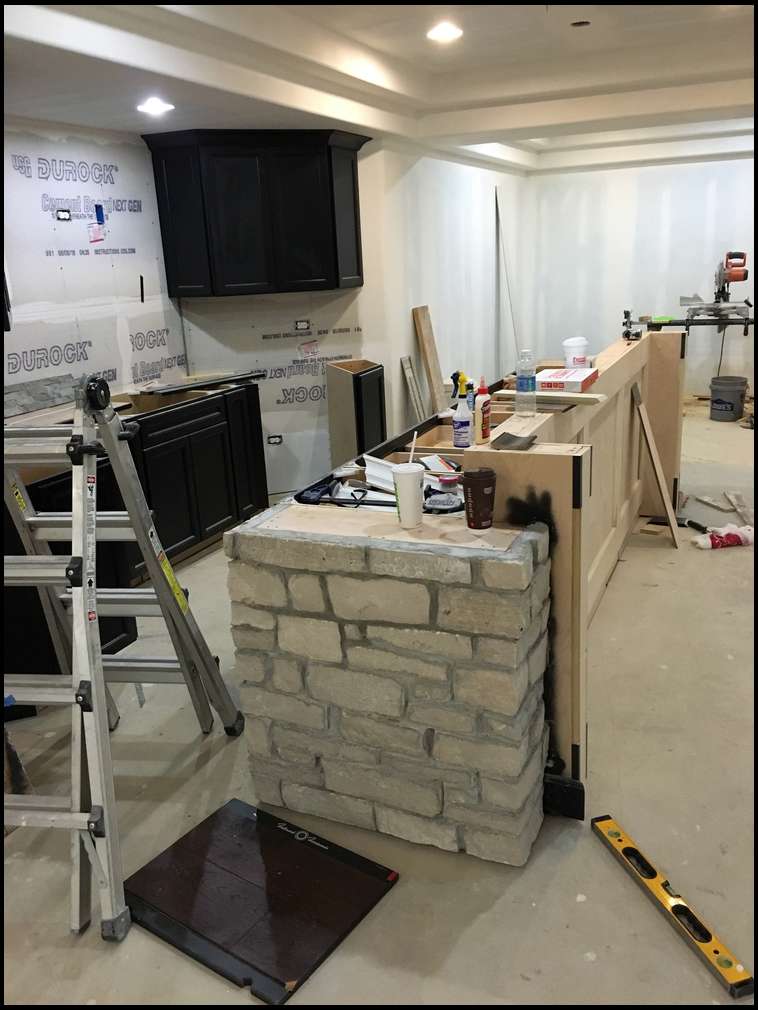
Lots more going on, the end is in sight!!!!! The bar is framed in and faced, ready for finishing, putty, and paint. Steel posts were framed, and then I used concrete board to face the bottoms for stone work. Please let me know your thoughts. Mike

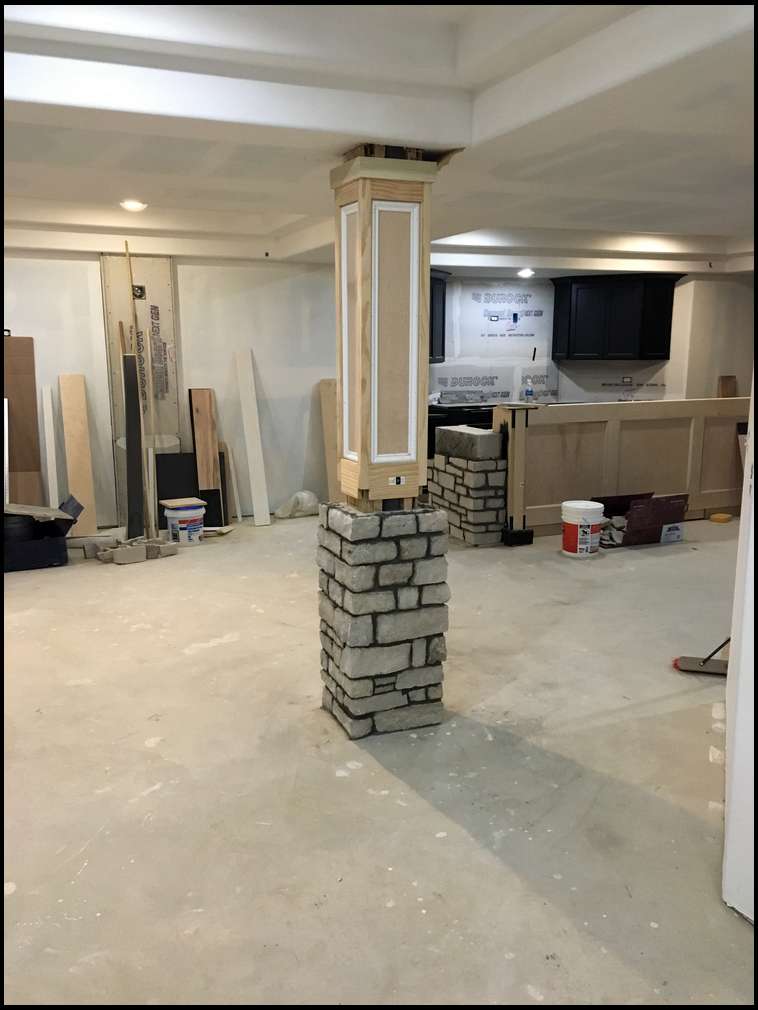
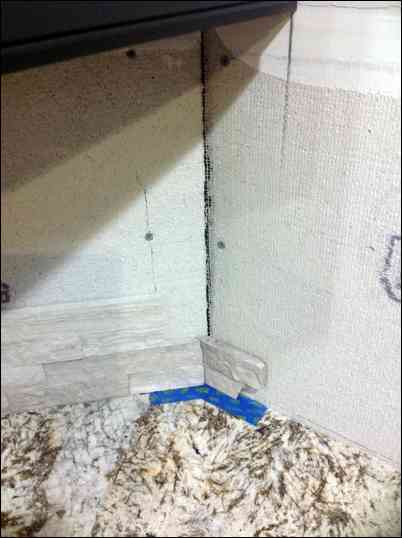
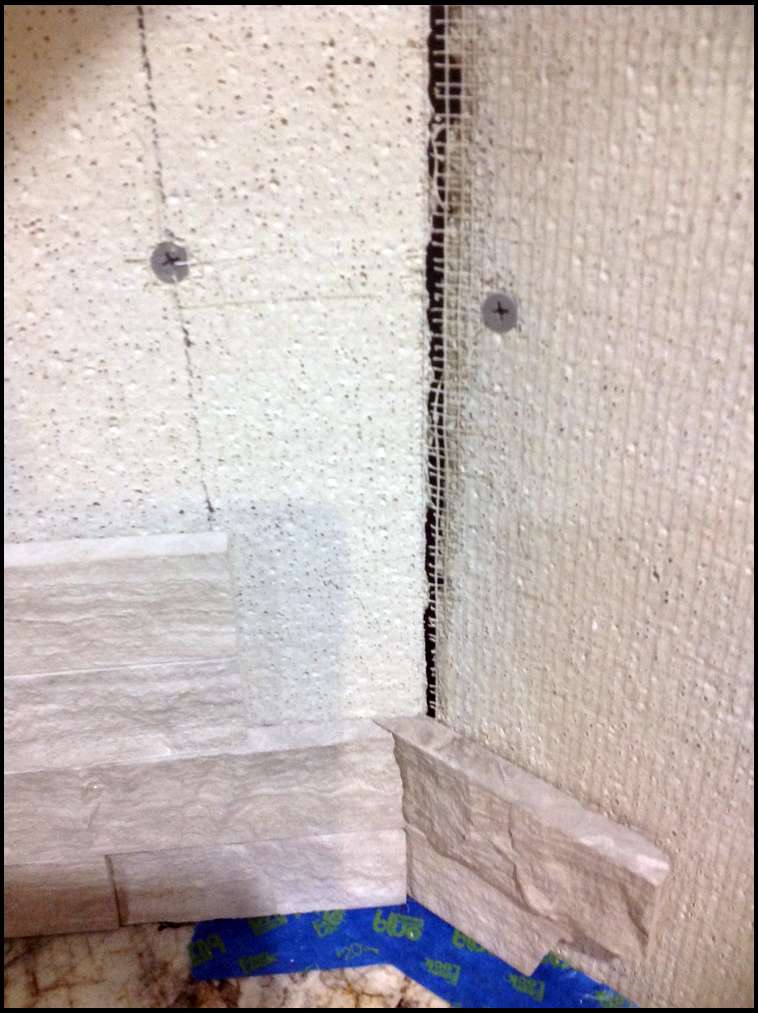
This was the stone I used its real limestone cut about an inch thick. It's awesome

This was the stone I used its real limestone cut about an inch thick. It's awesome
Very Nice!
And creative.
Good luck, Robb
ML , What's your plan for the floor? Are you considering options....
Nice job , I've enjoyed watching this come together.
Bill, i was planning on carpet around most areas and eng hardwood around the bar area. I have three little boys and want them to have something comfortable underfoot to run around on.
Haha scoot it's coming soon

Floor in around the bar area

Floor in around the bar area

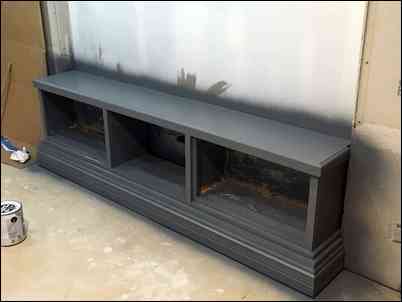
Bar is primed and ready for paint

Bar is primed and ready for paint
Lots more work completed, I've painted most of the walls and trim, I've primed and now painted the bar. I used stock cabinets from Home Depot with some trim and stock 1x2 to design a cabinet for all my tv equipment. The floor around the bar is now in. Carpet will be coming for the rest of the are as will the granite countertops for the wet bar area. The end is closing in!!!!!!

Tv cabinet built and primed for final paint
Tv cabinet built and primed for final paint
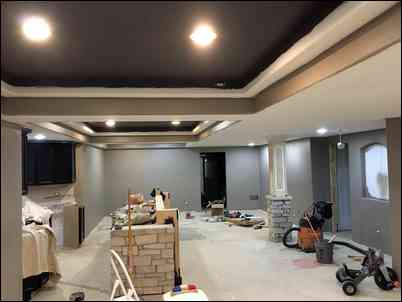
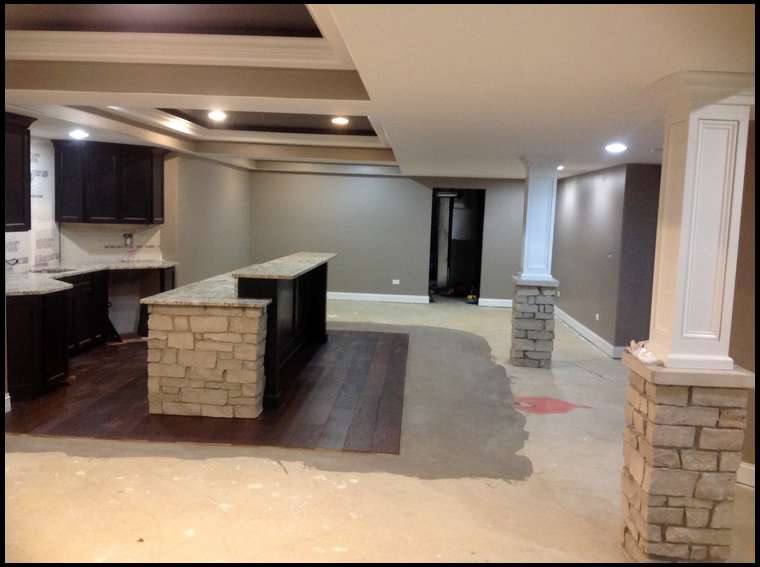
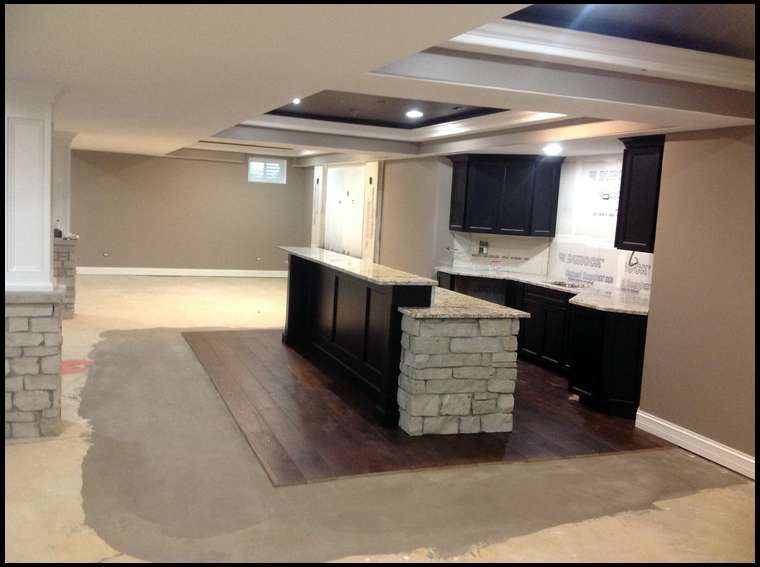
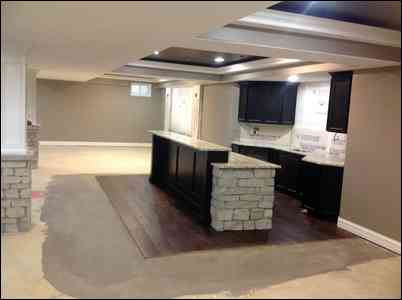
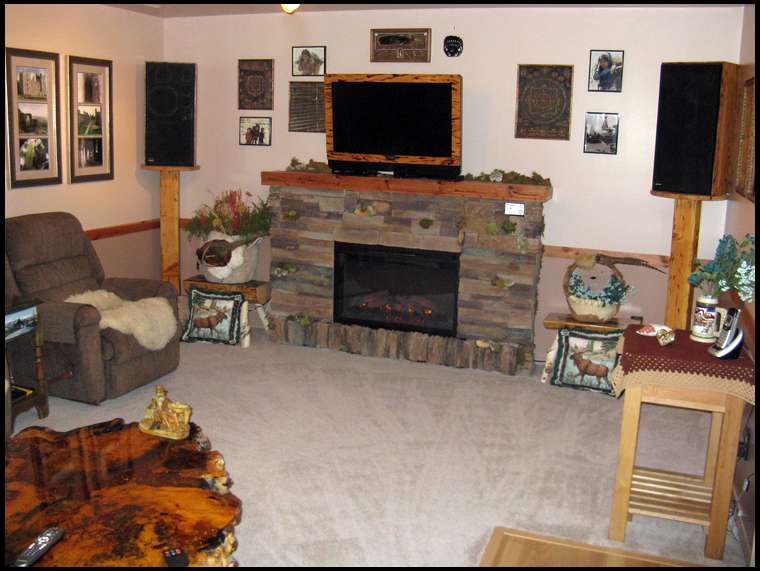
We went with black doors on both the bar and all the basement doors. It will probably be out dated in five years but oh well I like the look. I think the tray ceilings came out very well. I think everything is coming together awesomely, next up is the stone work behind the bar and on the pillars on either side of the entertainment area.
Can anyone explain why I have a picture of some dude with a nice 5x5 where I posted a picture of my tv cabinet? When I open this thread on my I phone I have the picture of my cabinet build. When I rotate my I phone 90 degrees this photo comes up? Weird to say the least, I have no clue who this guy is or where the bull came from , would like to know though.
Maybe he wants to hang it in your new trophy room !!
That's really coming together nicely!
I've always wondered when these photos mysteriously pop up, that they have not been inappropriate pics of some babe or something
Would love to see the update!
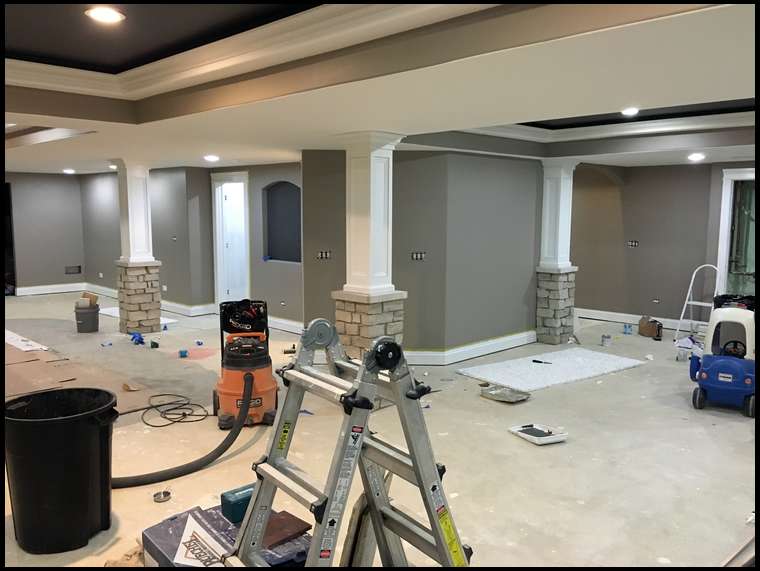
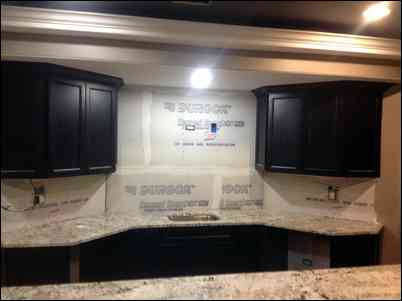
Ha thanks for asking guys! Let's see my last post was in July for this I'm gonna have to post some time lapse photos but here we go. I had the countertops on the bar professionally installed. I love how they came out. The stone work on either side of the tv area and behind the bar took me about three weeks to finish working on it here and there. I used some awesome reclaimed lumber behind the tv area. Couldn't be happier with the out come. And the carpeting is in!
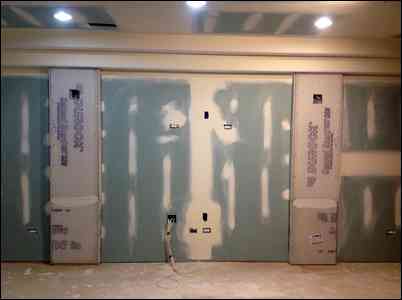
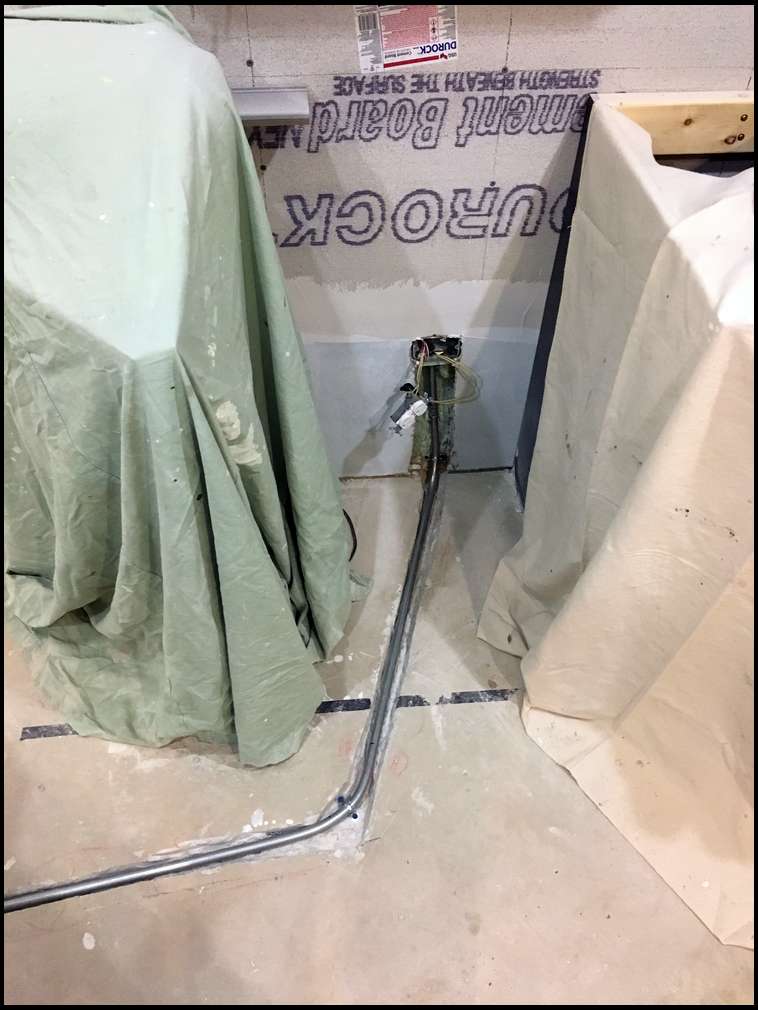
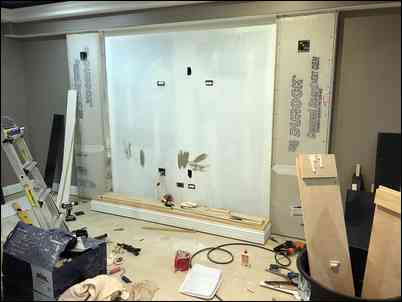
I ran the electric also for the under cabinet lighting. You can see the cutouts in the durock with the flexible cable hanging.