Kifaru Duplex frame & ILBE pack bag
Equipment
Warning, Kifaru purists may want to avoid this thread!
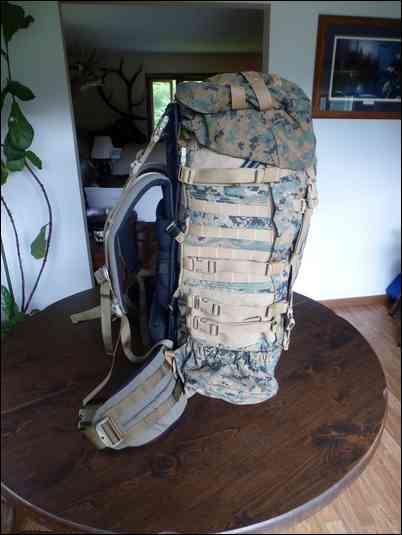
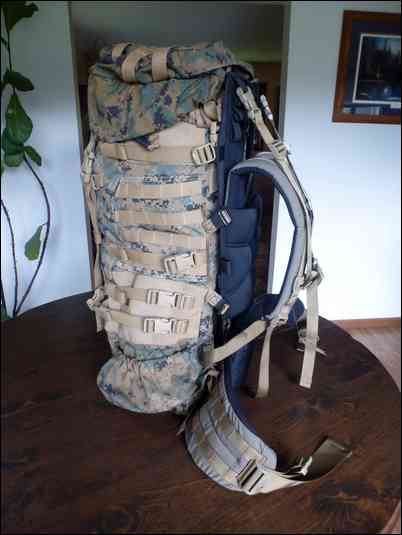
For the last several few years I’ve been using a military surplus ILBE pack for elk hunting and it has worked well but I’ve decided it’s time to start upgrading to the world of Kifaru. I recently bought a 26” Kifaru Duplex frame and I plan to buy a Kifaru pack bag sometime in the future but for now I adapted an ILBE pack to fit the Kifaru Frame.
I bought my original ILBE pack off of eBay for about $40 and last year I bought another ILBE pack without shoulder straps or hip belt for about $15 plus shipping.
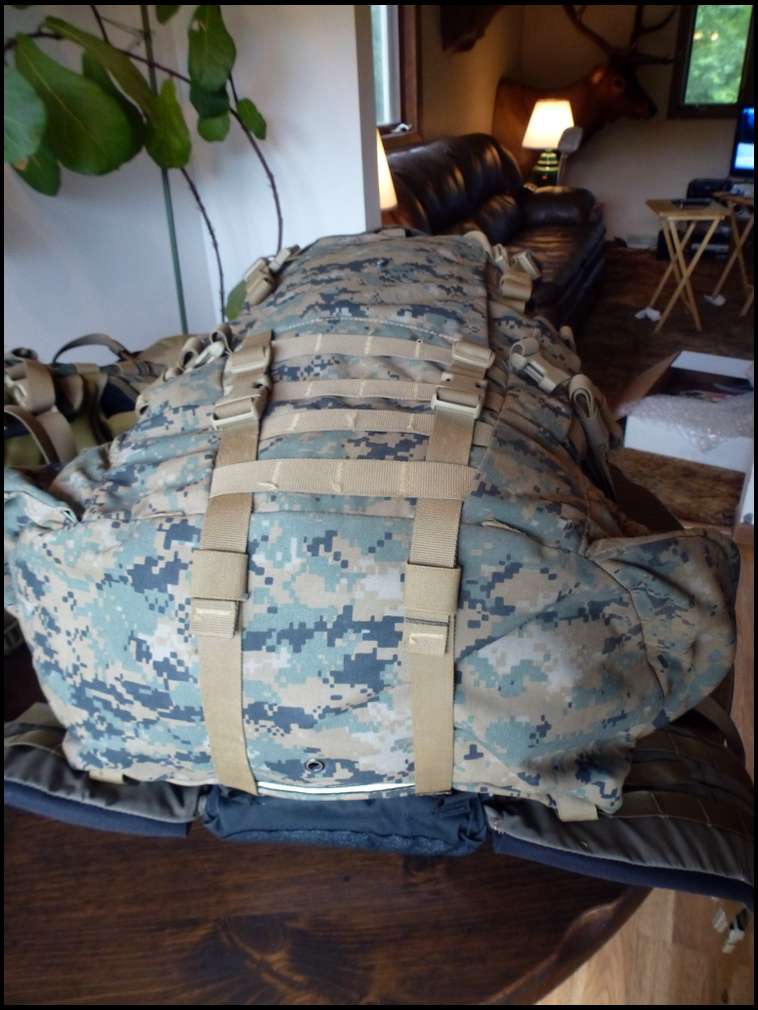
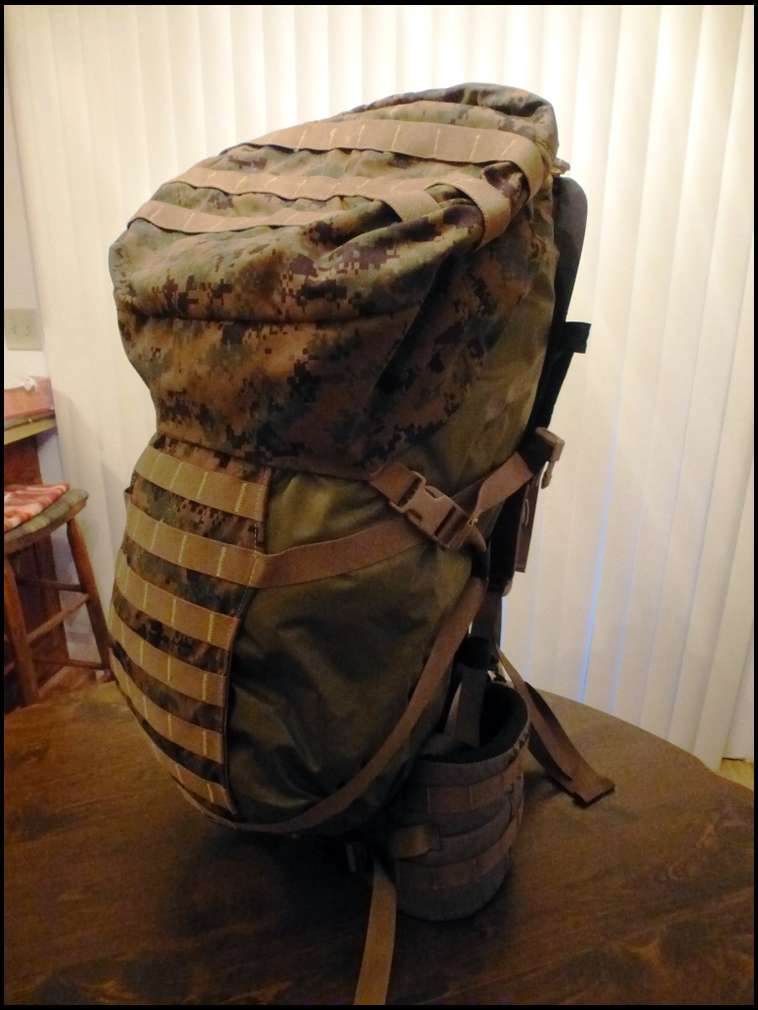
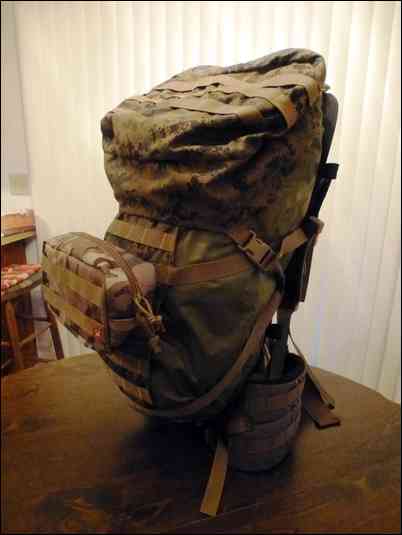
Here are photos of the ILBE pack on the Kifaru Duplex frame.
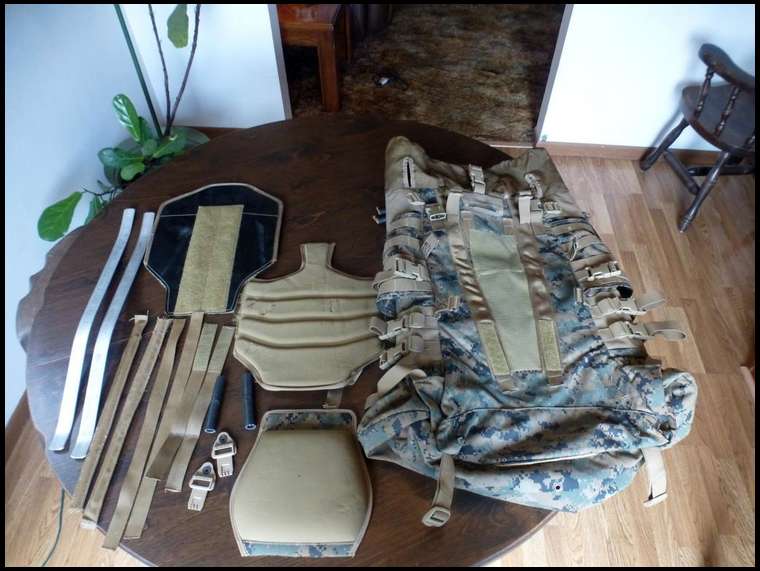
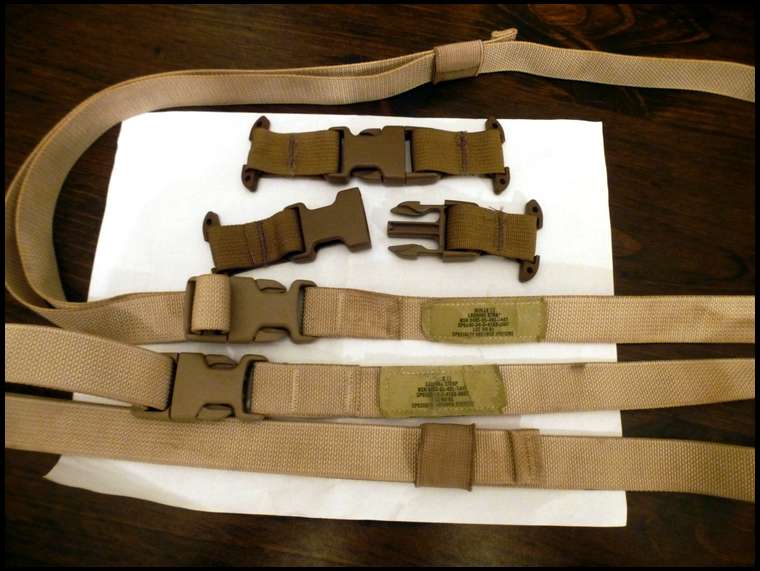
First thing I had to do was trim and/or remove all of the unnecessary padding etc. from the ILBE bag. This photo shows the stuff I removed.
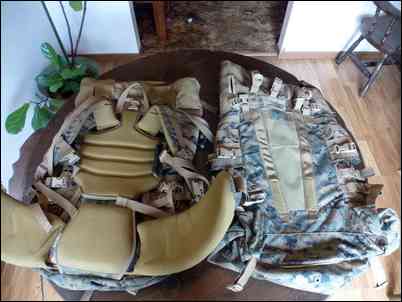
This photos shows the complete ILBE pack on the left and the stripped down bag on the right.
A 26" Duplex Frame weighs 3 lbs. 5 oz. The larger capacity Kifaru bags that are similar in size to the ILBE weigh about 3 lbs. without a lid. So total weight of a Kifaru frame and bag without a lid is about 6 lbs. 5 oz.
My stripped down ILBE bag weighs in at about 4 lbs. 5 oz. So total weight of my Kifaru frame with stripped down ILBE bag is about 7 lbs. 10 oz. without a lid and my scale verified that.
A Kifaru Guide lid weighs 11.5 oz. whereas my ILBE lid weighs 1 lb.
So total weight of my pack with the Lid is about 8 lbs. 10 oz. compared to a Kifaru frame, pack and guide lid which is right about at 7 pounds.
I could probably trim another 1/2-1 lb. off of my ILBE if I removed some of the straps, PALS webbing panels, heavy zipper pulls and elastic pouches on the bottom sides, but having used the ILBE for several years I know that I like all of those features so I will put up with the extra weight.
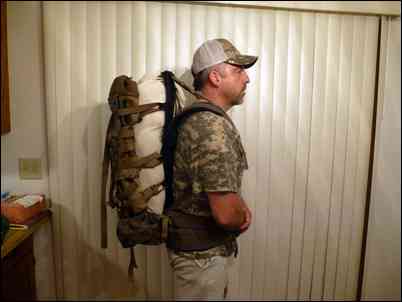
I think it worked out really well and it will be a very functional pack at only a little more than 1 ½ pound heavier than an all Kifaru setup and at a substantial cost savings.
I took a lot of detailed photos of what I trimmed and modified to make it work so if anybody want's me to post additional detail just let me know...
That's like having a pretty girlfriend and putting a bag over her! But I get it! Bags a bag, the frame is the important part anyways!
Mike, your a flippin' genius!!!!!!
The IBLE pack is no slouch as a pack. Especially since they are affordable. But, this was a great idea. I was looking at mine the other day, as I too just bought a Kifaru frame, wandering what I as going to do with it. NOW I KNOW. Good stuff. I would have never thought of this. I did rob the lid off of IBLE to use on the Kifaru Mountain rambler before reading this though :^)
Pretty cool idea even if you put a bag over the hot framed girlfriends head.
My first pack was an ILBE. Very functional pack for sure.
I'd like a link where I can get an ilbe without shoulder straps for $15.
Very smart!
Looks like it rides real nice too.
Good luck, Robb
Thanks guys! It was a fun project and not too difficult.
Here you go Griz34, this one is sitting at $11.99 plus shipping. It doesn't matter that the padding is ripped if you're going to cut it off anyway.
I tried to add a link but it wouldn't let me so you can copy this link and paste it to your browser:
http://www.ebay.com/itm/USMC-ILBE-MARPAT-Main-Pack-Body-GEN-2-ArcTeryx-Pack-Body-Only-FC/172773732066?_trksid=p2047675.c100005.m1851&_trkparms=aid%3D222007%26algo%3DSIM.MBE%26ao%3D2%26asc%3D44759%26meid%3Da508bd1db2b64a7f97305bf033b7f848%26pid%3D100005%26rk%3D5%26rkt%3D6%26sd%3D401361382629
Or here is a link to a bunch more ILBE packs. You can get brand new packs for $37-$40 plus shipping.
http://www.ebay.com/bhp/usmc-ilbe-main-pack
Here's one with a "Buy it Now" for $12.95
http://www.ebay.com/itm/USMC-ILBE-MARPAT-Main-Pack-Body-GEN-2-ArcTeryx-Pack-Body-Only-FC-/401141581500?hash=item5d65e6c6bc:g:V5kAAOSwzJ5Xa1CU
Thanks, I'm gonna try this.
I used an ILBE for a few years before upgrading to Kifaru. Cheesehead Mike you're a genius! This is a good way to save money for sure.
Now, you need to add a few pockets to the belt.
Thanks again guys.
Yep elkstabber I've already researched some cheap belt pouches, this one is $14 on Amazon... :^)

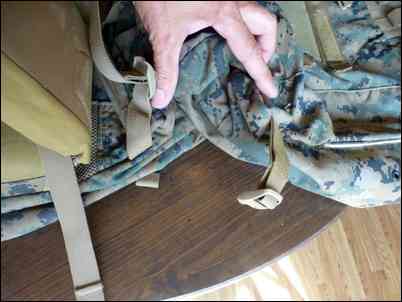
I removed the top strap from the buckle and pushed it through the frame loop.

I removed the top strap from the buckle and pushed it through the frame loop.

Then I re-threaded the strap through the slider buckle

Then I re-threaded the strap through the slider buckle
It sounds like some of you guys are going to do this to so I'll post some more detailed photos and explanations.
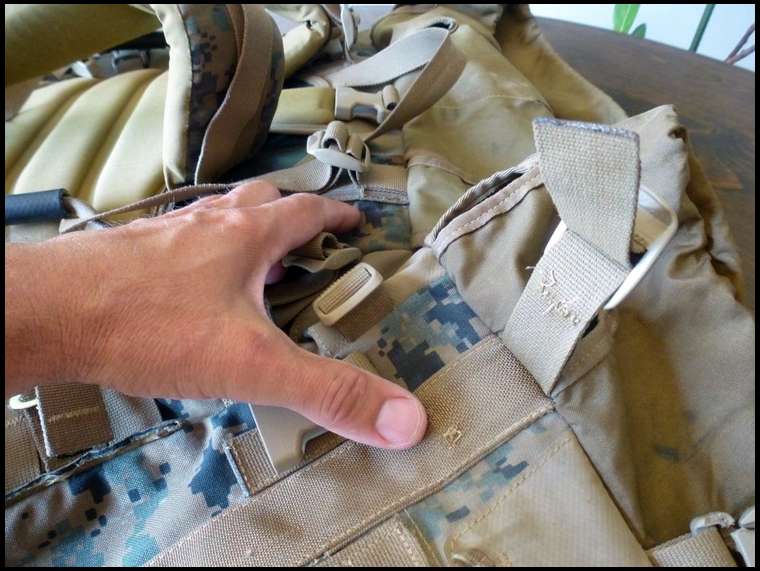
The upper attachment point on each side of the pack was done by sliding the plastic buckle for the top strap through the top black loop on the frame.

This photo shows the uncut strap on my other ILBE in the background. I cut through the rubber hose and strap at the midpoint, attached 3-bar sliders to the straps, tested for fit, and stitched.

This photo shows the uncut strap on my other ILBE in the background. I cut through the rubber hose and strap at the midpoint, attached 3-bar sliders to the straps, tested for fit, and stitched.

Here are the 3-bar sliders I found on the internet.

Here are the 3-bar sliders I found on the internet.

This is the awl I used for the stitching. Thanks to another Bowsiter for the tip on the awl a while back!

This is the awl I used for the stitching. Thanks to another Bowsiter for the tip on the awl a while back!
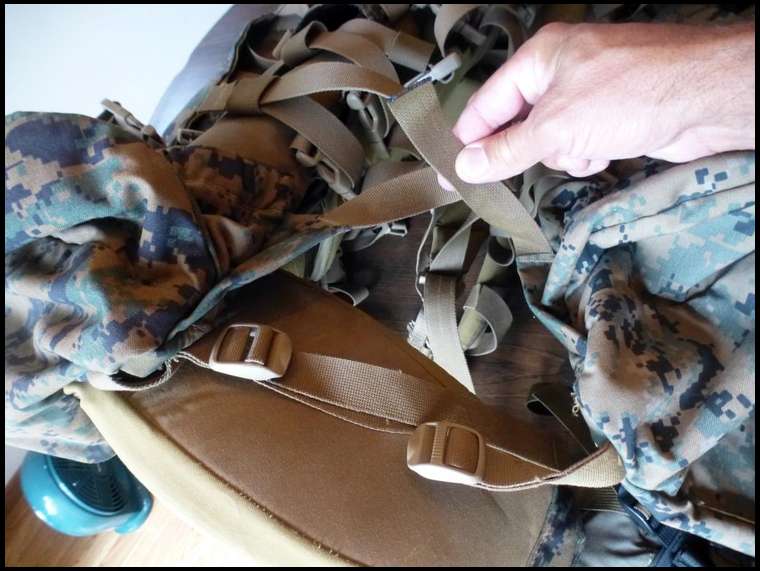
For the two side attachment points I cut the rubber hose handle and strap that's inside of the hose in half and attached 3-bar sliders to the 2 halves of the strap
This photo shows the 3-bar slider attachment points made from the strap that was inside of the black hose.
It’s fairly difficult to slide the 3-bar sliders through the frame loops but they’ll go, you just have to work them through slowly. You also need to make sure that your straps are sewn short enough so the pack will be tight to the frame. I test fitted everything before sewing and I marked the straps with a pen after I test fit and had the right length so I could line up the pen marks again before sewing.
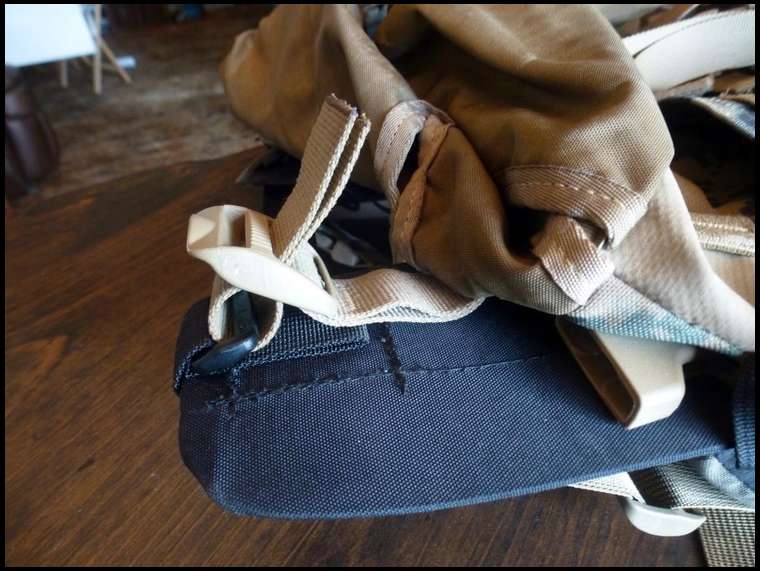
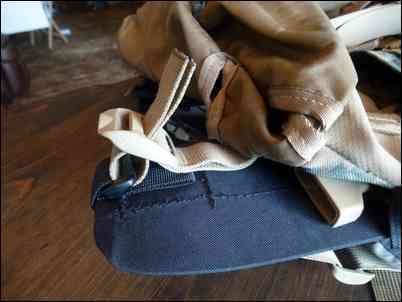
In this photo my index finger is pointing at the spot where the load lifter strap is tack stitched to my other ILBE pack and my thumb is pointing to the stitching that I cut on the donor pack.

In this photo my index finger is pointing at the spot where the load lifter strap is tack stitched to my other ILBE pack and my thumb is pointing to the stitching that I cut on the donor pack.
I used a piece of strap that I cut off of the pack to attach the load lifter buckle to the frame.
I used a piece of strap that I cut off of the pack to attach the load lifter buckle to the frame.

Feed the strap through and pull it tight.

Feed the strap through and pull it tight.

Here are both load lifter straps attached to the frame.

Here are both load lifter straps attached to the frame.
For the attachment points on the top of the pack I used the load lifter straps.
The straps are attached to the top of the pack and then tack stitched in a second location a little lower on the pack.
I cut the lower tack stitching to free up the load lifter strap and used a piece of excess strap to attach the load lifter slider buckle to the rectangular plastic loop on the top of the frame.

This photo shows my other ILBE on the left with my index finger pointing at the strap that I cut free from the pack and my thumb pointing at the strap cut free from the donor pack.

This photo shows my other ILBE on the left with my index finger pointing at the strap that I cut free from the pack and my thumb pointing at the strap cut free from the donor pack.

This photo shows my finger and thumb pointing at where the straps were cut free and also shows them relocated to the plastic loops on the frame using 3-bar sliders.

This photo shows my finger and thumb pointing at where the straps were cut free and also shows them relocated to the plastic loops on the frame using 3-bar sliders.
This photo shows the bottom straps passing through the bottom row of webbing and re-buckled into the buckles.

This photo shows the bottom straps passing through the bottom row of webbing and re-buckled into the buckles.
For the bottom of the pack I cut the two lower vertical straps off of the pack and attached them to the rectangular plastic loops on the bottom of the frame using 3-bar sliders. Then I ran the straps up through the bottom row of webbing, fed them back through the buckles and re-buckled them to the original buckles.
These straps will now help support the bottom of the pack and help keep it firmly attached to the frame.

This photo shows my thumb pointing at the spot where the stabilizer strap is tack stitched to the other ILBE pack and my index finger pointing at the stitching I cut to free up the strap on the donor
This photo shows my thumb pointing at the spot where the stabilizer strap is tack stitched to the other ILBE pack and my index finger pointing at the stitching I cut to free up the strap on the donor
I’m holding the shoulder straps near where they attach to the packs with the complete ILBE on the left and the donor on the right. The shoulder strap is cut shorter because not much length is needed

I’m holding the shoulder straps near where they attach to the packs with the complete ILBE on the left and the donor on the right. The shoulder strap is cut shorter because not much length is needed

Once through, flip the buckle over, feed the shortened shoulder strap down through the top web, feed through the buckle and pull tight.

Once through, flip the buckle over, feed the shortened shoulder strap down through the top web, feed through the buckle and pull tight.
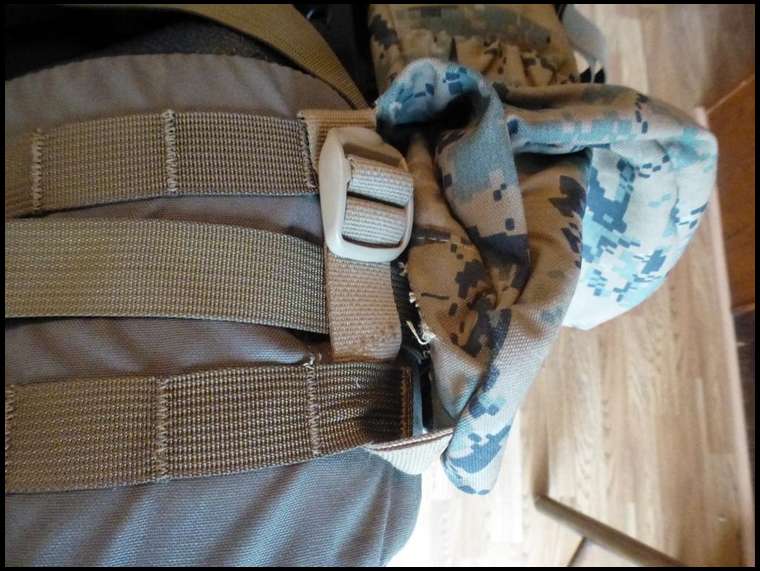
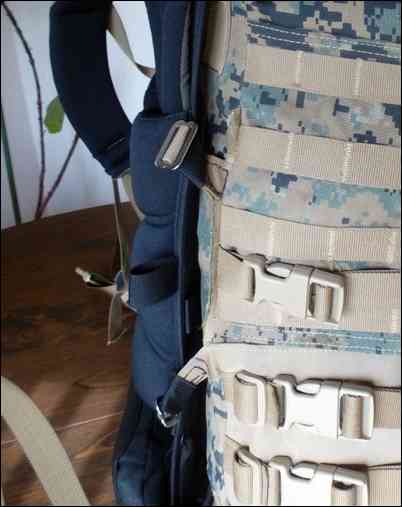
The completed attachment to the Kifaru hip belt.

The completed attachment to the Kifaru hip belt.
For the two lower outer attachment points I used the ILBE hip belt stabilizer strap and the bottom part of the ILBE shoulder strap to attach the pack to the Kifaru hip belt.
First I had to free up the ILBE stabilizer strap which was tack stitched to the pack similar to how the load lifter strap was tack stitched.
Then I fed the buckle from the freed up stabilizer strap through the Kifaru hip belt webbing, fed the trimmed shoulder strap through the webbing and attached them to each other.

This photos shows the buckle from the freed up stabilizer strap being slid (upside down and backwards) through the inner most loop in the webbing on the Kifaru hip belt.

This photos shows the buckle from the freed up stabilizer strap being slid (upside down and backwards) through the inner most loop in the webbing on the Kifaru hip belt.
I missed one photo in my sequence above so here it is.
That's about all there is to it...
I did the same thing with my Eberlestock J104 a couple years ago. Cut it up big time and it worked out great for the year I planned on using it that way. Felt really good cutting it up because that dang pack never fit me well. I'd recommend picking up a Grab-It II for the duplex frame. It's great for securing meat and the head on the way out. This pic is my Eberlestock bag squished between the duplex frame and the last load out using the Grab It attached to the appropriate spots on the frame.
FWIW - The Awl-for-Awl tool comes in very handy.
Thanks for the links Mike.
I have 2 dozen oval tri-glide's on the way
Cheesehead Mike..Thanks for the ideas. I know this about saving money and I know it could add to the cost but could you just by the K clip compression kit or guide lid kit from Kifaru to attach the bag to the frame? The kit could be balanced against the price of a donor bag. The webbing looks to be in the right places. Again great thread. D.
I almost forgot... has anyone said what the CI of the ILBE is, for like a day pack, 3 day bag or 5 day etc.? D.
You lost me at step 3. Mike you need to make a YouTube tutorial. ;) I might have to give this a try.
Bull-Tipper,
You're welcome. I don't know if the K clip kit and the guide lid would work, I don't have any experience with them.
The ILBE is 75L which converts to 4576 CI.
Sorry if I lost you LINK. I've never done a YouTube video so I don't really know how. I think if you have the pack and frame in your hands and look at my photos you'll be able to figure out what I did.
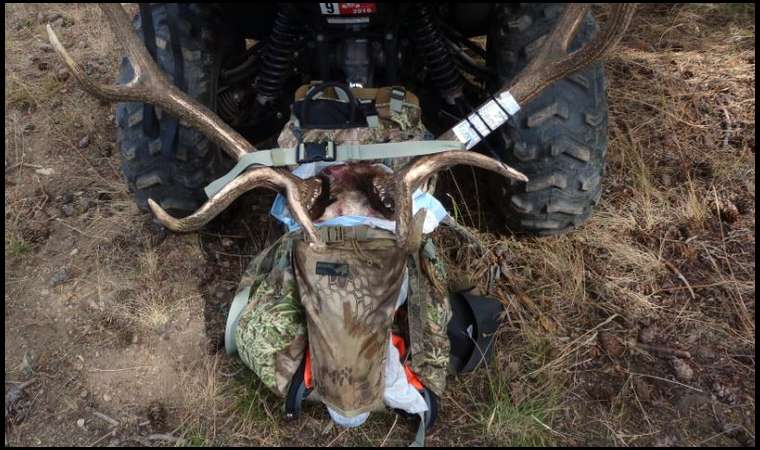
Well its easy to post pics from my phone but I can't edit from the computer. If anyone could turn me clockwise that'd be great. If you look closely you can see I have the meat pinned w/ the grab it and have the head snugged down with the guide lid. Worked pretty well, don't know how many pounds but it had a little sway in it due to the weight.
Am I correct in assuming you cannot loosen the bag from the frame in order to haul meat between bag and frame ?
If it is possible to use two compression k clip kits you can use it just a Kifaru expanded meat shelf. You would need a minimum of 6 k clip straps and snap buckles.
If it is possible to use two compression k clip kits you can use it just a Kifaru expanded meat shelf. You would need a minimum of 6 k clip straps and snap buckles.
Buskill, if you are asking about hauling meat between the ILBE bag and the frame you are correct. You would not be able to do that but I would just haul the first load out in the bag and then maybe remove the bag from the frame for the following loads.
***SEE MY UPDATE BELOW***
I clicked on this thinking it was a rainbow colored bag or something..... =D
Great job figuring all that out and posting it for everybody. Love those frames, but none of it cheap, they are pretty proud of their bags. I like the custom concept. Thanks.
You're welcome TD.
Here's an update. After Buskill asked the question about hauling meat between the bag and the frame I started thinking about it so I messed around with it a little last night. I'm happy to report that by just disconnecting the two 3-bar slider attachments on each side and reconfiguring some of the existing ILBE straps I was able to pull the bag away from the frame and insert a meat bag.
In this photo I have a game bag stuffed with pillows for testing. I believe it will work well.
I have these MOLLE lashing straps and buckle attachments that allow you to attach a buckle anywhere on the PALS webbing

I have these MOLLE lashing straps and buckle attachments that allow you to attach a buckle anywhere on the PALS webbing

Here the buckle attachments are circled in red. These allowed me to run a MOLLE strap up through the two plastic loops on the frame and secure the top of the pack to the frame.

Here the buckle attachments are circled in red. These allowed me to run a MOLLE strap up through the two plastic loops on the frame and secure the top of the pack to the frame.
I did add one strap to the top, although it's probably not necessary.

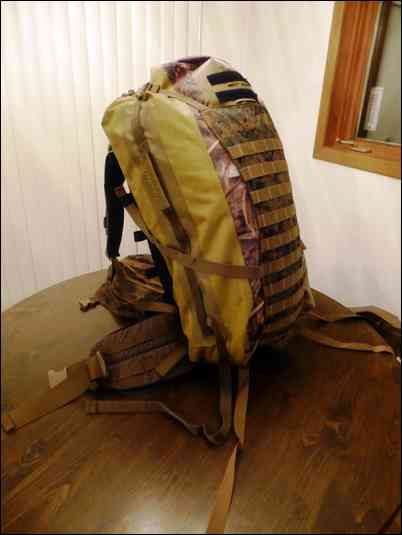
Here is the Kifaru frame, ILBE Recon Tail (cargo panel), dry bag and ILBE lid

Here is the Kifaru frame, ILBE Recon Tail (cargo panel), dry bag and ILBE lid

Here's the dry bag, cargo panel and Kifaru frame

Here's the dry bag, cargo panel and Kifaru frame
Here it is with the ILBE lid

Here it is with the ILBE lid
Okay, so I was messing around a little more and committed more Kifaru blasphemy.
I have the ILBE version of a cargo panel which is known as the "ILBE Recon Tail". I also have the waterproof ILBE dry bag liner made by Sealine.
I experimented using the Recon Tail, dry bag and ILBE lid to come up with a lightweight pack option.
The Recon Tail cargo panel weighs 8 oz., the dry bag weighs 13 oz. and the ILBE lid weighs 1 lb. so total weight is 2 lb. 5 oz. plus the frame.

Here it is with an added pouch
Here it is with an added pouch

Here it is with a 6000ci Browning dry bag
Here it is with a 6000ci Browning dry bag
Awesome ingenuity Mike! loving the ideas. Probably gonna give it a try. Thanks for posting.
Mike, you really are the man. I said that earlier but, I really mean it now. :^)
Where'd you get the hardware to use in the pals system like that? And, what are they called?
I have some open ended female buckles I'll send you if you need them for the loops along the length of the frame. It would allow you to plug the male buckle right in and cinch either the bag or the panel down tight. I couldn't tell by the pics but, it looks like you are threading the male buckle through them. If so, I can spare 6 of the open ended female buckles to make it work like a charm.
Thanks Joe and Justin!
Here's the link for the PALS hardware. I tried to include the link but it gave me an error so you'll have to copy and paste to your browser.
http://www.ebay.com/itm/2-Pack-Multicam-Military-Tactical-T-ring-Molle-Tee-Mount-Adaptor-for-Pals-tring/221391627572?_trksid=p2047675.c100005.m1851&_trkparms=aid%3D222007%26algo%3DSIC.MBE%26ao%3D1%26asc%3D32474%26meid%3D9af1d011b22a4c4ba9e2a545bd75d159%26pid%3D100005%26rk%3D1%26rkt%3D6%26mehot%3Dpp%26sd%3D321186687733&rt=nc
And you are correct Justin, I just fed the straps through the loops on the frame and reattached the male buckles to the straps. Thanks for the offer but I already have a set of 10 buckles on the way. See my link.
***EDIT - DON'T ORDER THESE BUCKLES, THEY ARE 1 1/2 " RATHER THAN 1". SEE MY LINK BELOW FOR THE 1" BUCKLES. ***
Here's a link to the ILBE Recon Tail (cargo panel)
Here's a link to a source for oval metal sliders from a Canadian Company. I just ordered a pack of 25 to have some on hand and the total was only $10.20 with shipping. The oval sliders are kind of hard to find and this was the cheapest I found them.
Well, the new buckles arrived yesterday and I discovered that I ordered 1 1/2" buckles instead of 1", oops!
I ordered the correct 1" buckles this morning. If anybody else is doing this, order the buckles at this link rather than the link I posted previously.
Thanks Mike. My recon tail arrived yesterday. I like it better than my other cargo panel. Just the right length. Gonna order the t brackets tonight for the pals system. That recon tail with a large and medium pouch, coupled with a hanging Water bladder is the definition of a lightweight day pack with the ability to carry out a huge load of deboned meat. Thanks again Mike for all the info.
God Bless men
You're welcome, I'm happy to help and I'm glad that my experimentation has helped you as well. I was very pleased with the size and weight of the Recon Tail too. I think it adds a lot of flexibility and capability. Even if you have a different day pack configuration on the frame, at only 8 oz. you can roll the Recon Tail up and stuff it in your daypack and only deploy it as a meat hauler if necessary. It would probably work as a great addition to many packs.

I used Blackhawk Speed Clips to take up some of the excess length in the Recon Tail panel.

I used Blackhawk Speed Clips to take up some of the excess length in the Recon Tail panel.

The shortened Recon Tail now lays flat against the frame.

The shortened Recon Tail now lays flat against the frame.
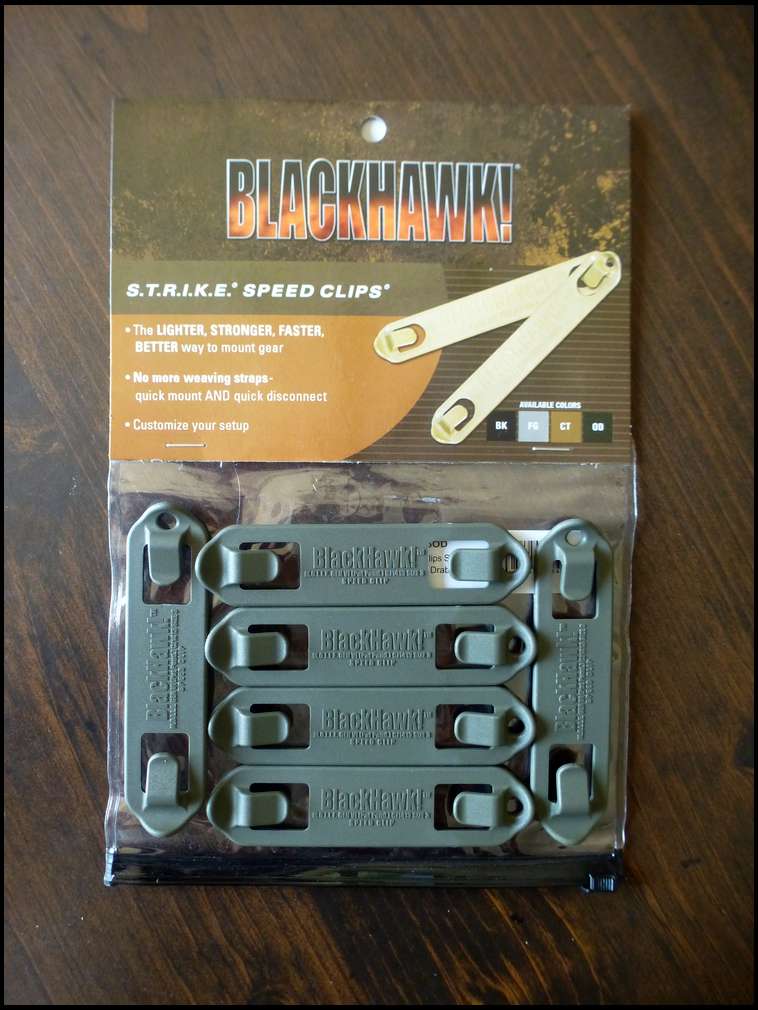
These come in various lengths. See my link.
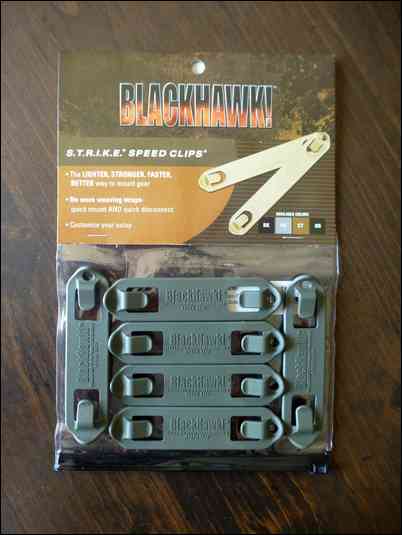
These come in various lengths. See my link.
Cheesehead Mike's Link
Here’s an update on my latest experimentation:
I got the correct buckles to attach the Recon Tail to the Kifaru frame but when I attach it it’s a little too long to lay flat against the frame. So I used some Blackhawk Speed Clips (which are normally used to attach accessories to the PALS webbing) to shorten the Recon Tail.
Now the Recon Tail lays flat against the Kifaru Frame.

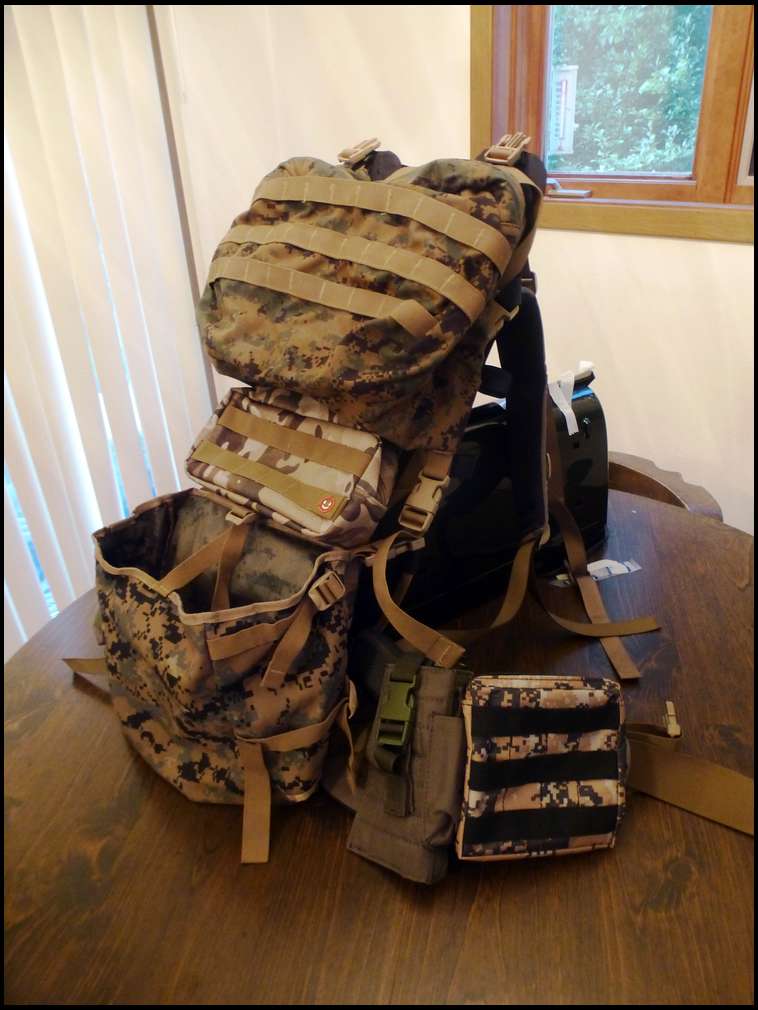
Kifaru Frame with Recon Tail, ILBE lid, 2 rear pouches, 2 small belt pouches and MOLLE holster.

Kifaru Frame with Recon Tail, ILBE lid, 2 rear pouches, 2 small belt pouches and MOLLE holster.
Next I added the ILBE lid and attached a couple pouches to the Recon Tail. With the combination of the ILBE lid, rear pouches and belt pouches I should have plenty of capacity for daypack mode. After I kill something I have the option of removing the Blackhawk Speed Clips and expanding the Recon Tail to haul meat between the frame and the Recon Tail. I could also increase the capacity and use it as a bivy pack by expanding the Recon Tail and using the Seal Line dry bag between the frame and Recon Tail.
I attached open-ended female buckles to the male buckles on the Radio Pouch and attached them to the Recon Tail straps.

I attached open-ended female buckles to the male buckles on the Radio Pouch and attached them to the Recon Tail straps.
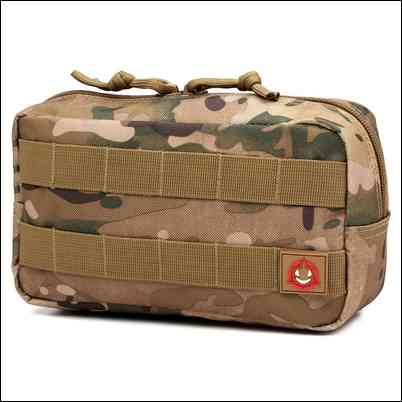
Next I buckled on the ILBE Radio Pouch which serves the same purpose as the Kifaru Grab-It.
This should be a versatile system allowing me to pack into my spike camp with the Kifaru frame and ILBE Main Pack and then remove the Main Pack from the frame and attach the Recon Tail, lid, 1 or 2 rear pouches and the Radio Pouch for use in day pack mode.

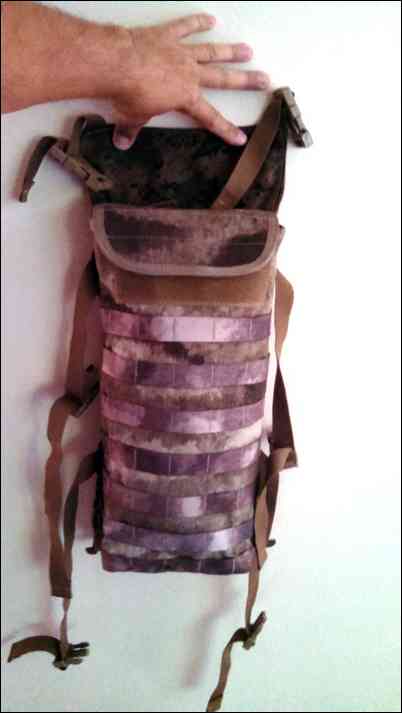
Side view of the Hydration pack attached the Recon Tail
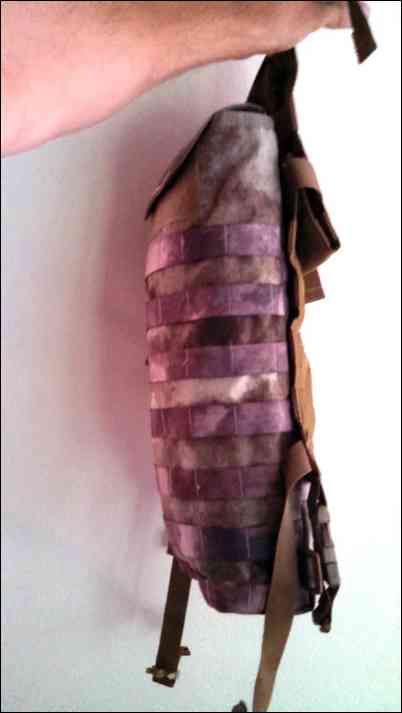
Side view of the Hydration pack attached the Recon Tail
One more update...
I picked up a Voodoo Tactical Hydration pack from Camofire. I removed the shoulder straps and attached it to the PALS webbing on the Recon Tail and it fits very nicely. This pouch will hold a hydration bladder as well as quite a bit of other gear. I think between this pouch, the ILBE lid, a couple small belt pouches and possibly one of the other larger pouches attached to the outside of the Hydration pouch I should have plenty of capacity for daypack needs with the ability to expand the Recon Tail to haul meat.