Arrow Building Tips
Equipment
Howdy Folks,
I’ve been working on building my own arrows and I was wondering if anyone had small tips or tricks they could share (my current process is cut, square, dry fit insert, spin, actually glue insert, fletch)
Specifically fletching tips would be appreciated- I always wipe the excess glue off with a q tip but there always seems to be a small residue left/some of the q tip fibers get caught on to the glue and I have to take them off. If you have a better way to do that, it would be much appreciated.
I have built my own since 1975.I hope you are using a cut-off saw and not pipe cutters. Anyway;you will soon learn not to use an excess of glue;excess can be wiped off with a rag dipped in acetone. Only real problem I have had is with Blazer vanes;had to use Super glue for them to stick.Also wipe down your shafts before gluing with acetone.
Try fletch tape, it does the trick for me.
How far down the rabbit hole do you want to go? Watch the gold tip series on YouTube on arrow building. I forget the tall guy that does it.
Could try fletch tape if the glue is an issue. I don't sweat the excess glue and also add a drop to the front and rear of the fletch to help with not getting stripped when going through or coming back out of targets. I'm fletching feathers and shooting trad so not quite the same. I use blue top Gorilla super glue.
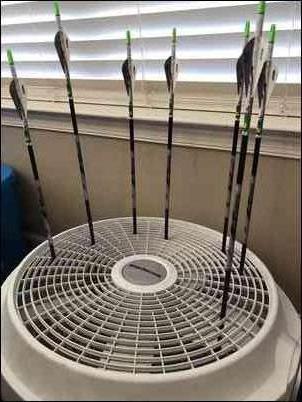
A nice trick I’ve found for removing excessive glue....if you are using arrow wraps. After you peel the wraps from the backing paper, cut it into small little squares, and bend them into a U-shape. With the glossy side down (helps to slide better along vanes), use the U as a type of “scoop” to remove excess glue. I’ll sometimes take the excess and dab a little on the front and rear edges of the vanes, as Glunt suggested. Also, an unplugged floor box fan works great as an impromptu arrow drying rack! Have fun, and fletch away!
All of these are good tips!! Thanks everyone.
I do have an actual arrow saw and a G5 ASD to square arrows. The saw I have has two pieces you can put on the saw to spin test, but I’ve been thinking about building a smaller, more compact arrow spinner since I don’t want to have to take my saw out to spin arrows (I don’t have a workshop or anything).
I try and use the excess glue to tip my arrows- especially since I’m a whisker biscuit guy.
Keep em comin folks! I’m eventually going to start weighing each component to keep all the arrows within 1-2 grains as a goal.
Also I got a bitzinburger- when I very first started I got one of those cheap bohning jigs. It helped to learn at first but I invested in a Bitz and it’s a noticeable improvement, little bit of a learning curve adjusting the clamp to fit on the FMJs I’m fletching since they’re thinner
PA......I can see some dope having a major catastrophe with your drying rack....lmao. You should specify...."make sure the cord is unplugged.
I put a very small drop on each end of the vane, then one in the middle, or two depending on length of the vane. I will then drag the glue bottle tip the length of the vane to spread the glue evenly over the length of the mating surface. Then stick the vane to the shaft in the jig. One of the easiest and quickest jigs is the AZ EZ Fletch, I have used them for years for quick refletch jobs.
Boatman, that’s exactly what I’ve started doing. It’s helped cut my excess glue by more than half but I can still be a little heavy handed at times. I don’t know if there’s only a little bit that comes out on the sides how much of a difference it makes.
Don't use last year's glue. Seriously. And don't prep your shaft for a wrap - direct fletching contact, sure - but removing a wrap from a "properly" cleaned shaft will be an exercise in eye gouging tediousness.
After the fletching process is completed, drop a dab of glue on from and rear of vane. This helps to ensure adhesion of fletching to shaft/wrap.
I used a superglue on the vane base. Keep the tip clean at all times so it lays a slim bead down the vane base. Then after it's dry, a small drop of Fletchtite glue at the front and rear of each vane (especially for a WB rest).
Of course the most important part is the prep. I clean the shafts with hot water, Comet, and a Scothbrite pad. Here's a simple test... run water on the back of the arrow shaft. If it beads up your fletching will not adhere properly. If it sheets off(or looks completely wet), you're good to go. Just don't touch them with bare fingers.
I like to pop the knock off and cut carbon off both sides of the shaft before fetching. From my understanding, it helps with the straightness of the arrow.
Franklin....how do you think I square my arrows? :)
I like the shrink wraps better. Put them on the arrow and dip in hot water. Then fletch with a Bitz. To take them out, just take a sharp knife an slid it up the shaft lightly. You will get about an 1/8 strip of wrap off. From there, you just peel off the wrap and vanes. Just like a banana. Then clean. done
I use the Arizona ez fletch and i use toothpicks to spread the glue. Just one drop on each fletch and use the toothpick to spread the glue evenly on each fletch. You can also use a toothpick to remove excess and apply on the fletch ends for a little sumtin extra. Never reuse a toothpick. Its what works for me. Good luck.
Use wraps and Loc-tite super control gel. If you have to refletch just put the wrap end in boiling water. They will peel right off the arrow.
I weigh all my components and mix and match til they all weigh the same before assembling them. More variance than you might think between inserts, shafts, etc.
Lee
Lee
Bumping this up because I have another question.
I've been fletching my arrows with a slight helical, and sometimes one end of the vane (usually the back) will look completely level with the other vanes, but then on the front end look like it's slightly not level with the others. Two questions:
1. Has anyone who has experienced this noticed a significant accuracy/flight straightness disparity? 2. is this just my eyes playing tricks on me because of the helical?
Tried glue gel this year... and I used very little on each vane with exceptional results.... but I use wraps, not sure how it works on the bare shaft, all with a Bitz.
I like vanes for the rips and tears from hitting them, just remove and re-wrap and re-fletch.
You started out in the right place, this is where I learned, and through excess glue and vanes falling off and ect.
lots of great tips ^^^^^^^^^
With the AZ E-Z Fletch, run the glue from front to back and drag to shift the vanes backwards. Bad alignment fore to aft can be an issue when reversed.
To be honest, the fletching is mostly there to act as a parachute, keeping the tail of the arrow as straight in line with the front of the arrow as possible. Otherwise you could end up with an arrow that cartwheels like a throwing knife. The spin created by offset and helical keeps the arrow going from point A to point B when there's a wing up front(broadhead).
To answer your last question...it's pure aesthetics to have all the vanes or feathers in perfect symmetry and alignment. Within reason of course. If your setup is poorly tuned and your BH does not spin true, then you will need as much drag and spin as possible.
Trad guys & fingers shooters need many times more drag and spin than modern compound/release shooters. For example... my hunting setup needs only 3" low profile vanes at a straight with slight offset arrangement. A couple of my club members torque their bows so bad that they need 5" full helical just to get within 3" of their field points at 20 yards.