Ped moose mt with detachables
Moose
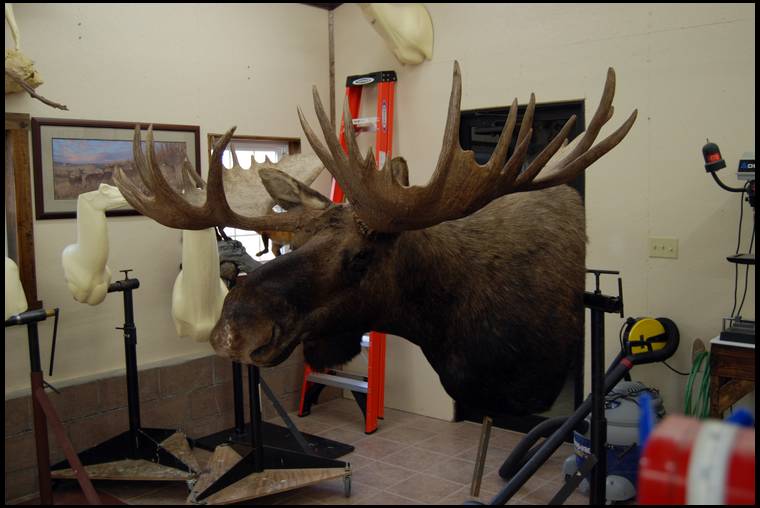
I get a lot of questions on how I do some of my custom work. I thought it would be cool to show how I mount a pedestal moose w/detachable antlers. Over the next few days I'll post pics of the process. Feel free to ask any questions and I'll do my best to answer.
Razza's Taxidermy Bowsite sponsor
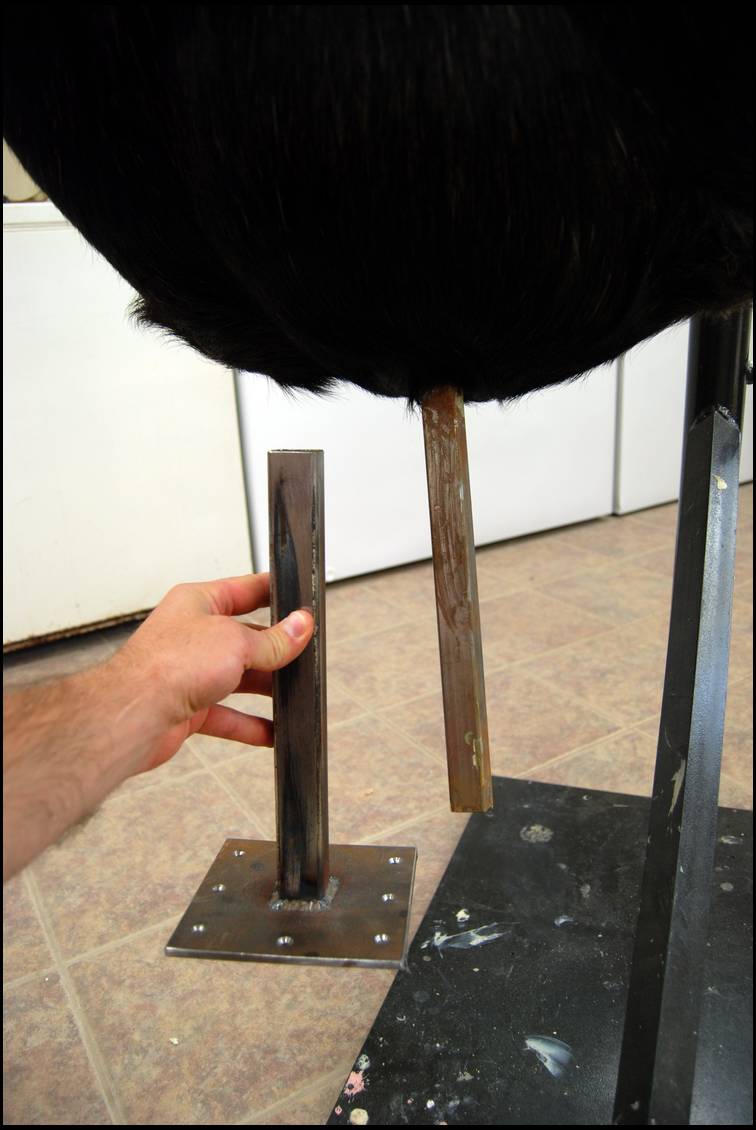
first I weld a heavy duty support rod and attach to the back of the form. This will give a strong anchor to the base. I foam and shape the back to give a nice shape for a finished backing material.
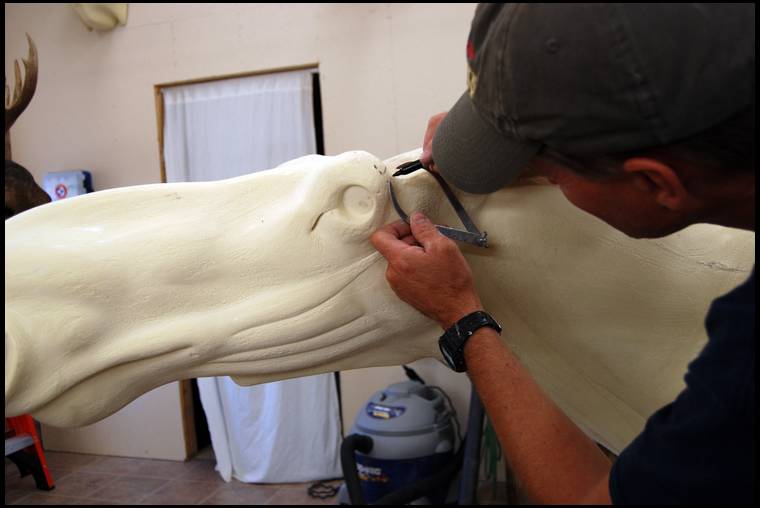
Next, I take a caliper measurement off the eye sockets to set the skull plate. This will help keep the antlers at the right position.
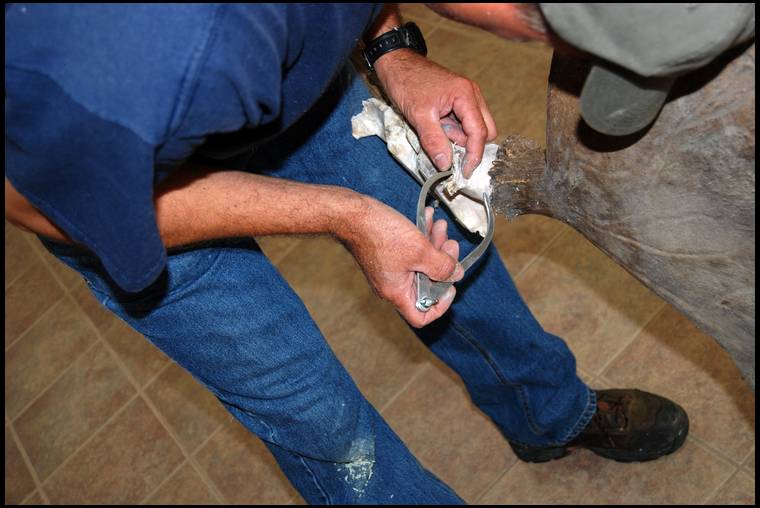
I then transfer the measurement to the skull and cut the skull to size.
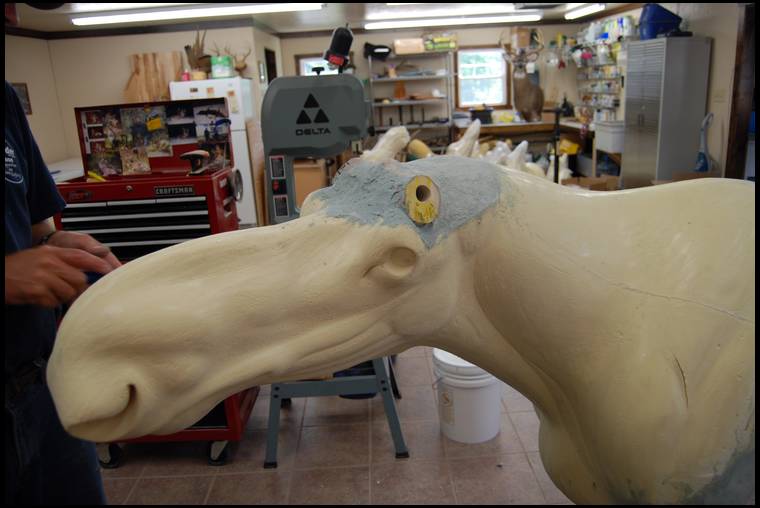
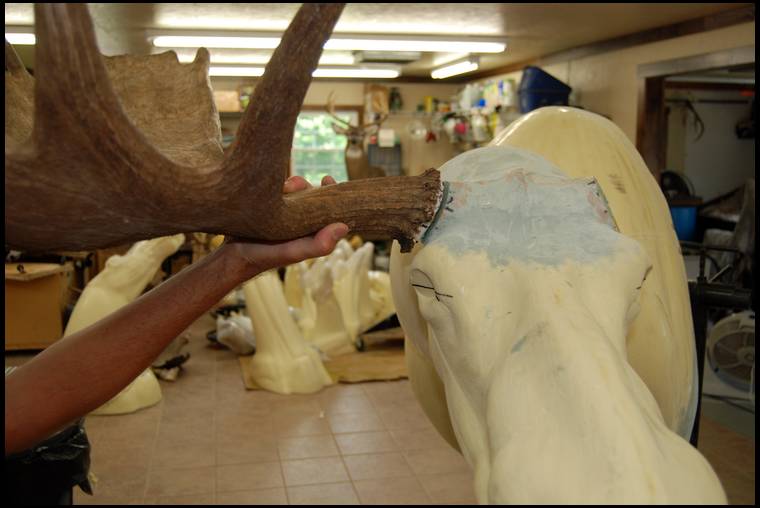
Now I test fit the hide and make sure the skull cap is where it needs to be. If there's any alterations that need to be made I will make them now. Everything fit good on this one.
I'm ready to start the detachables. I will mark the skull just below the base where I will be cutting. I also put key marks, this will help align exactly after I cut them off.
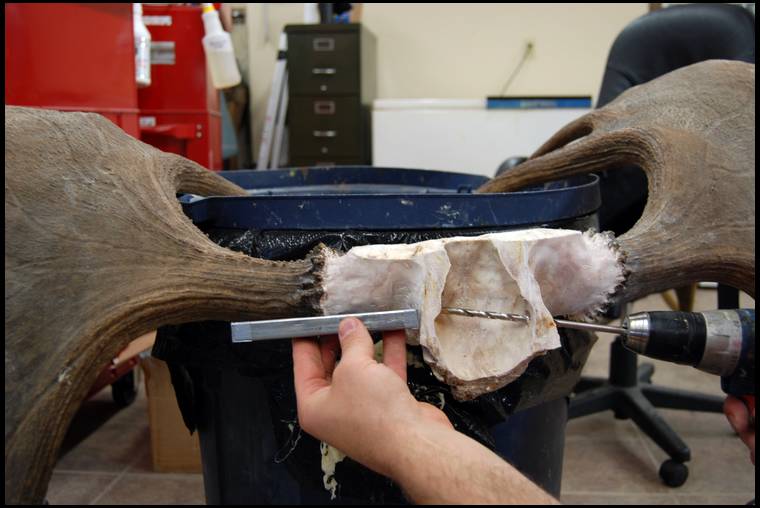
I drill a pilot hole to the depth of the pin. That way when I cut my antler off, The hole will be a good guide. I will be drilling from both sides (the antler and skull). This pilot hole will keep me drilling in the right place so they match.
When I was at Dennis' two weeks ago I saw this Moose just getting finished. 70 inch Spread and just breath taking. Bring it on D.
After I have both sides cut I will set and fasten the skull on the form.
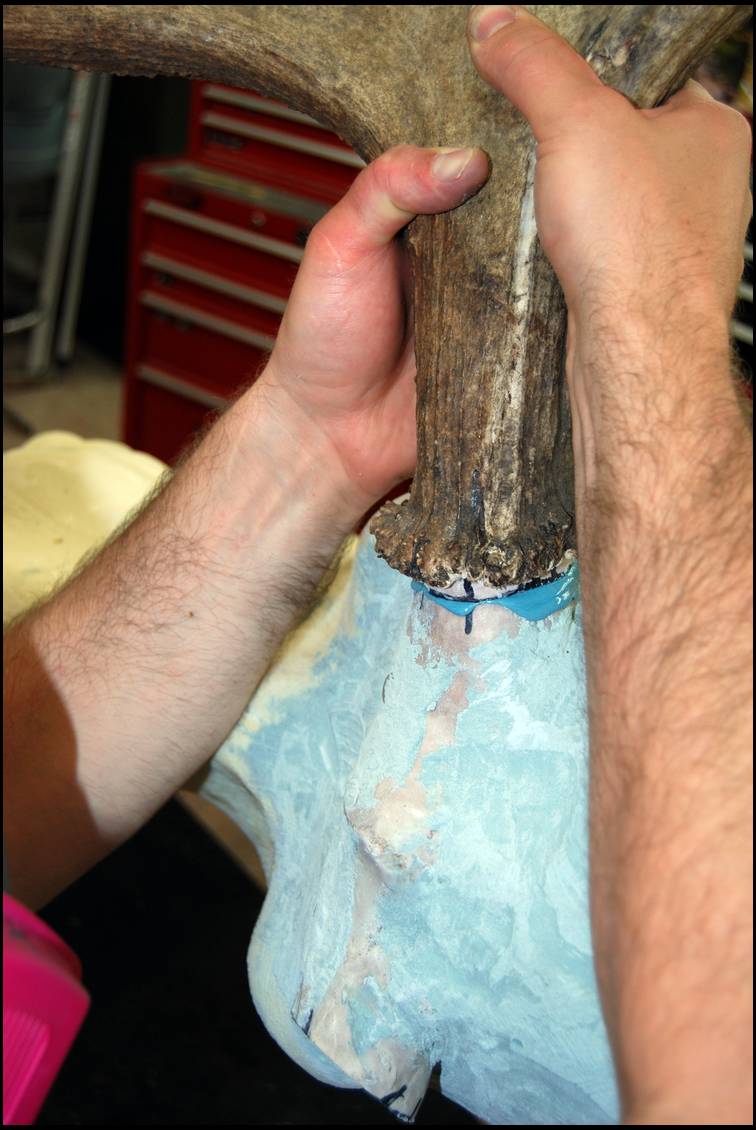
I drill both sides (skull & antler) to receive the male/female pins. Then Attach!
Taking into consideration that it has already been officially Scored....after the 60 day requirement----
That is turning our very nice!
Way nice indeed!
Good luck, Robb
One side finished... I will repeat the other.
Ok, Reed wants to go glass for deer... Have to finish later!
Charlie- Glad you like the deer! I hope it brings back memories of a great season!!
Robb- Luckily I am an OM for B&C and P&Y. This is always discussed before cutting them off.
I measured this bull before mounting him. He just made B&C!! Very nice bull!!!
Thanks, Dennis
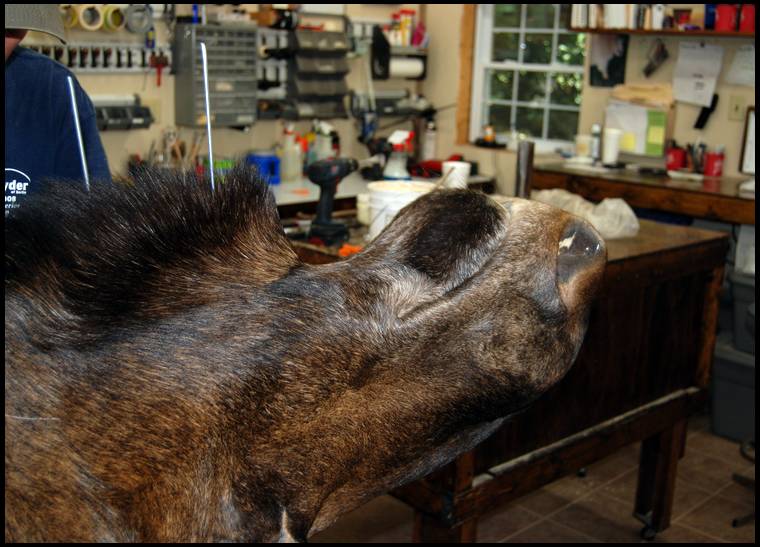
After I have the antlers both attached, The hide & form prepped I'm ready to slip the hide on.
adjusting the skin into position.
I run steel rods through the bell for added strength.
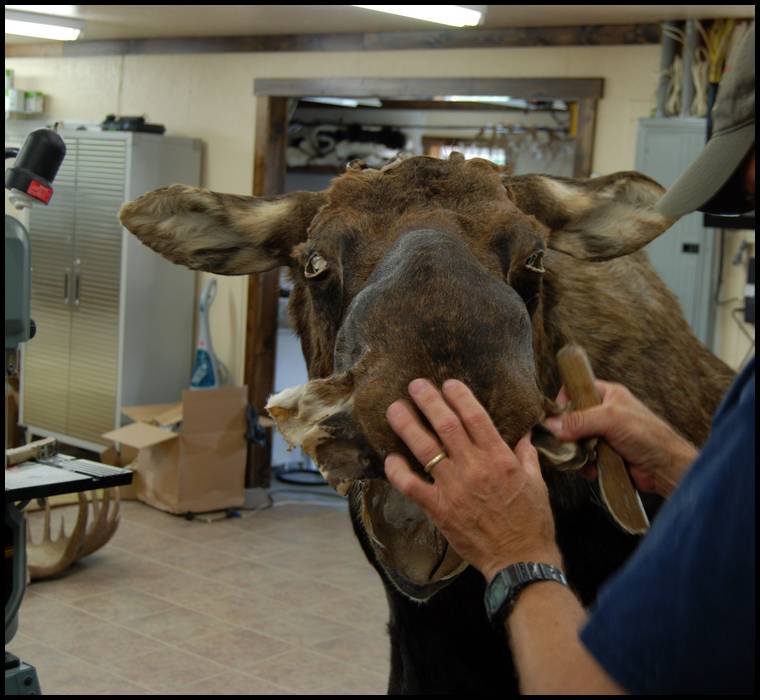
Just about have him roughly adjusted... now I sew!
After I sew him down the back I will go over the mount and do any fine tuning that needs done. I will put the antlers back on and adjust the skin around the bases until they dry.
I'll try to post a few pics tomorrow finished with his antlers on before I get into base work.
looks great. makes it a little easier to get into the house!!
Yes, It also makes it easier to sew... I don't have a big moose paddle in my face!
Finished mount with the antlers on. I have a custom cabinet maker that makes most all my bases... I ordered the base today. As soon as I get the base I will finish up with the habitat process and how we attach to base. Also will show how we crate and ship. Thanks for following!
I took this video a couple weeks ago at Dennis' while picking up my whitetails from last fall. These animals are awaiting customer pick-up. My favorite is the two whities in velvet (soon to be three) on a pedestal right at the beginning!
Dennis: Can you post a picture of the Moose with the black back ground? C
Charlie- I'll post a pic with a black background when it's on the base and all done. Lisa dose this on the computer for me. If I ask her to do this now and again at the end, I may be in the dog house!
Loved this posting... Thank you a ton for sharing..
Dennis, Great work! Can you show a pic of the antler base with the rod? Also a pic of the back of the mount where it attaches to the pedestal?
Thanks, Russ
Phenomenal video Charlie!
Russ- here's a pic of the base
The mount support bracket. I am waiting on the base... As soon as it comes in I will finish in detail with the basework with habitat.
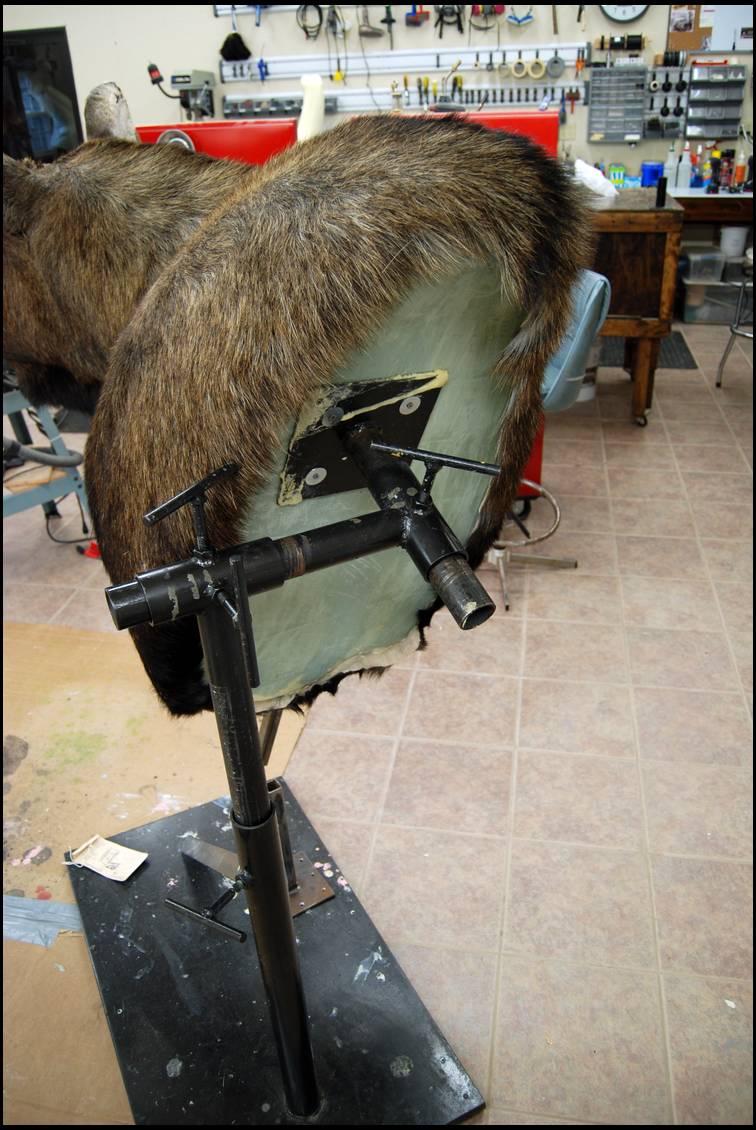
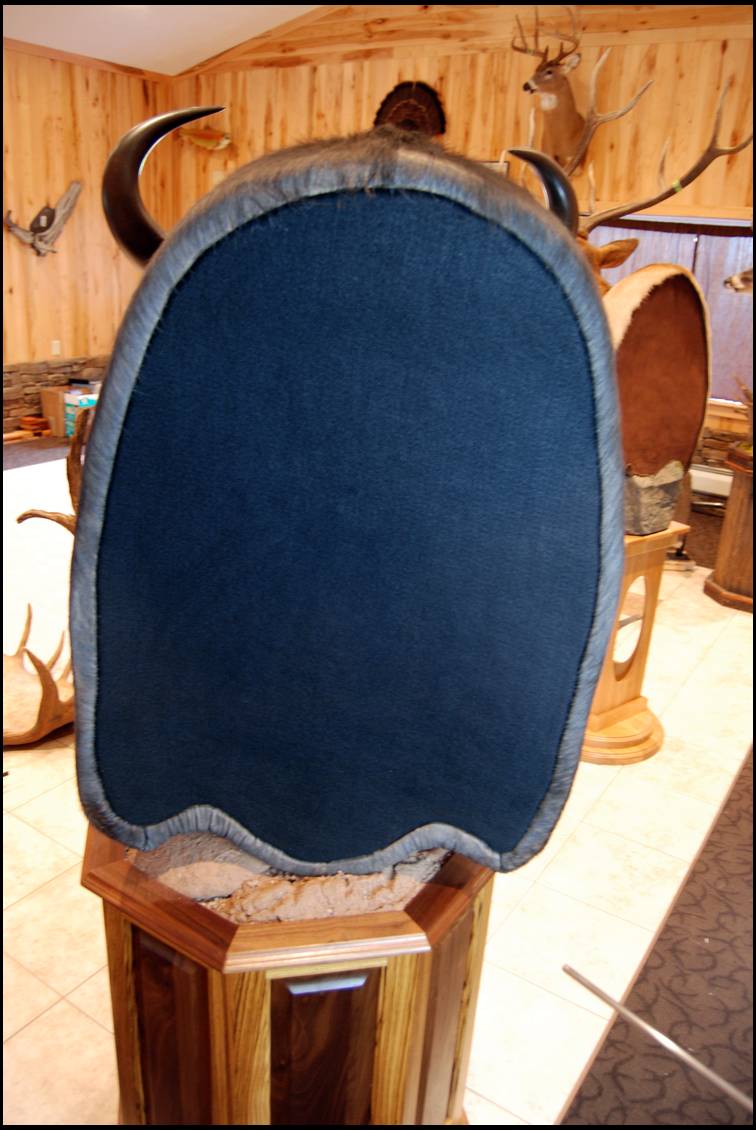
The back unfinished.
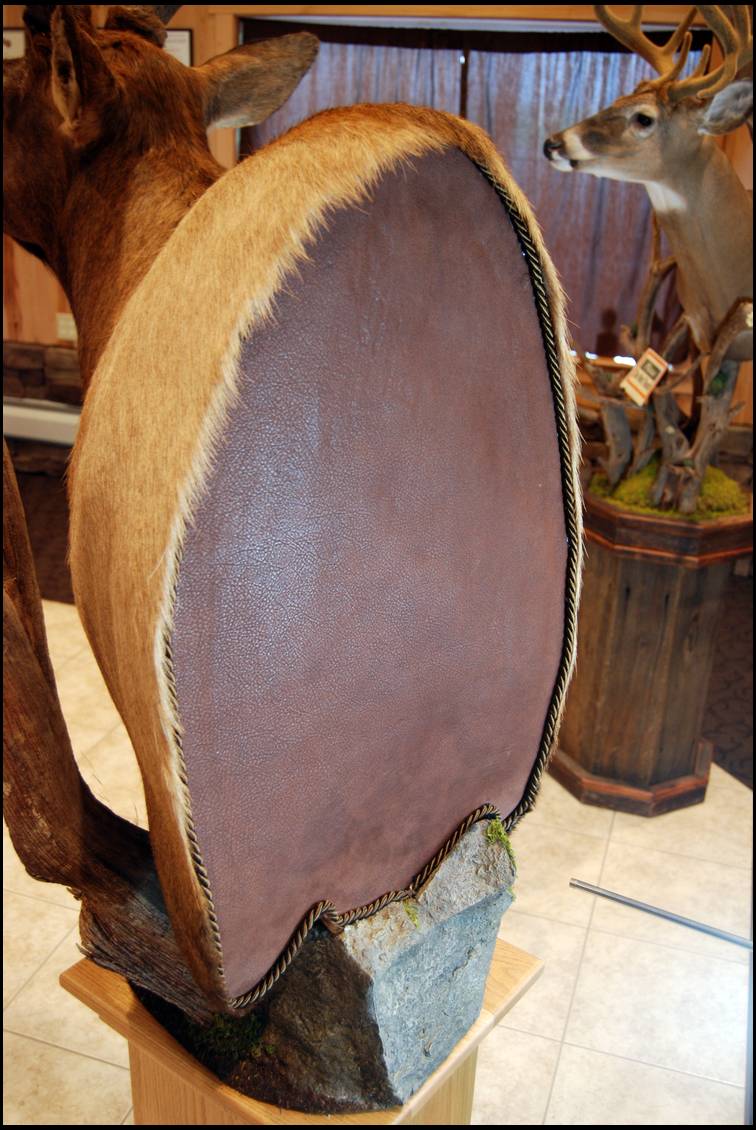
The next few pics are finished backs from an Elk,Cape buffalo,and wt deer.
Wt back
Russ- If you have any other questions feel free to ask. Thanks, Dennis
Dennis,
Very cool. Thanks for sharing! Really like the rope trim around the elk....nice touch.
Perfect Work!!
Goo dluck, Robb
Awesome work Dennis! I see you have an envelope for the judge on the Base for the whitetail. How did he do?
Elkohalic- Thanks, That piece took 1st place at the 2012 Pa state championship.
Great job!
As a taxidermist who has done detachable moose antler mounts you make the whole process look too easy. Getting the pins in place and getting everything lined up properly is an art.
Elk and caribou are a breeze in comparison as you can usually drill the holes for the pins before cutting off the antlers making lining up much easier.
Dennis any tips on how to remove broken drill bits from inside the antlers? This happens far to often folks.LOL
Buckstopper - This is a tough one... especially when they break off below the surface. Sandvik makes a solid carbide drill set made for removing broken bolt, stubs, taps, drillbits ect... They are made for drilling out hardened steel. Hope this helps!!
Good luck! Dennis
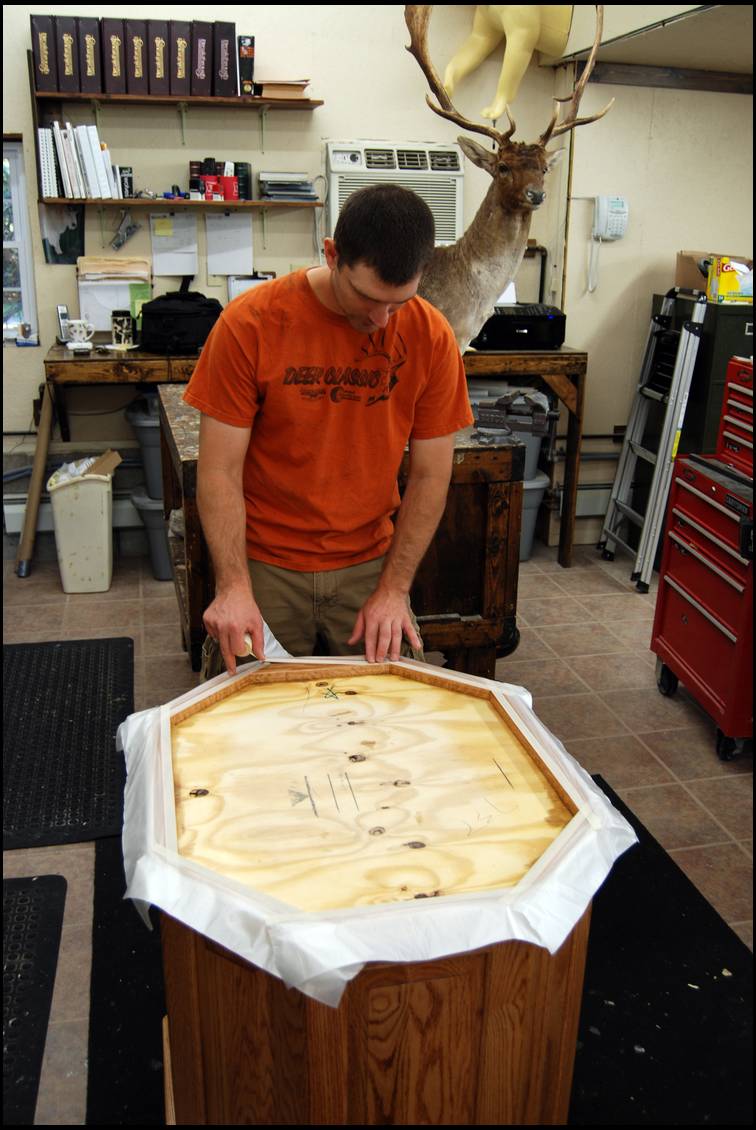
Finally got the base in this week and had a chance to finish.
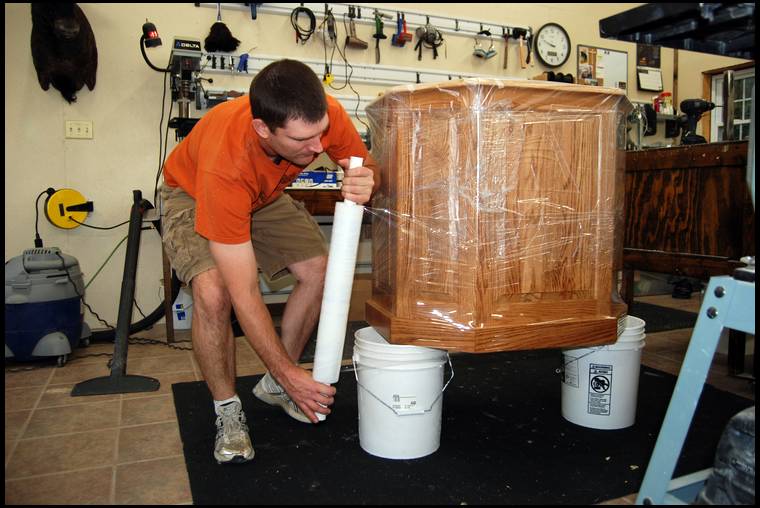
After inspecting the base the first step I do is masking it off.
This will help keep the base clean and free of scratches when I paint and seal my habitat.
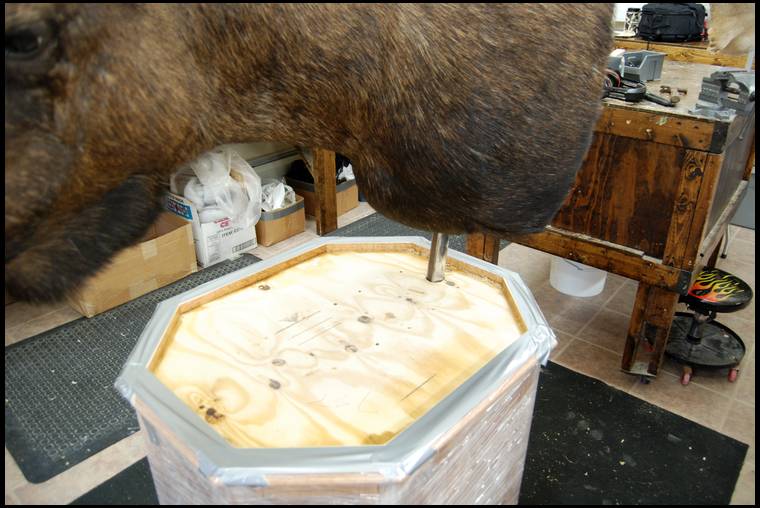
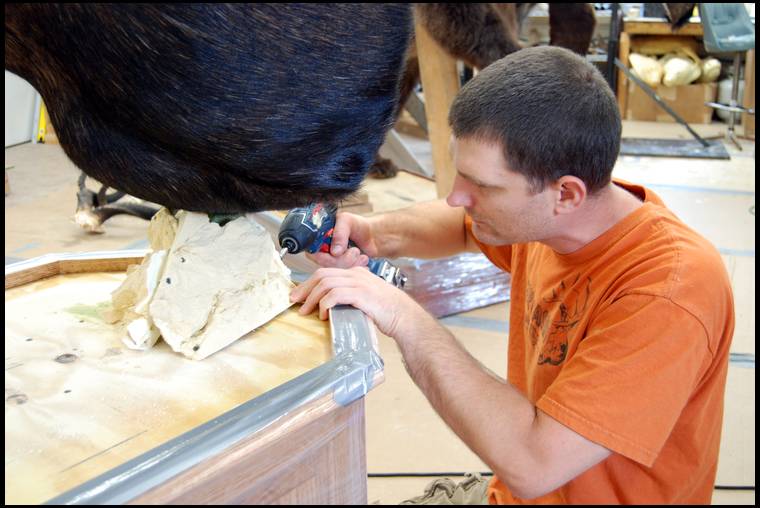
Next I'll drill a hole for the pin to go down through. I put the moose on and level.
I like to attach the Female pin from the under side of the base. It gives more support on the larger animals like this moose. I have to cut shims to get the proper angle I need for the moose.
After I get the right angle I will permanently fiberglass it in place.
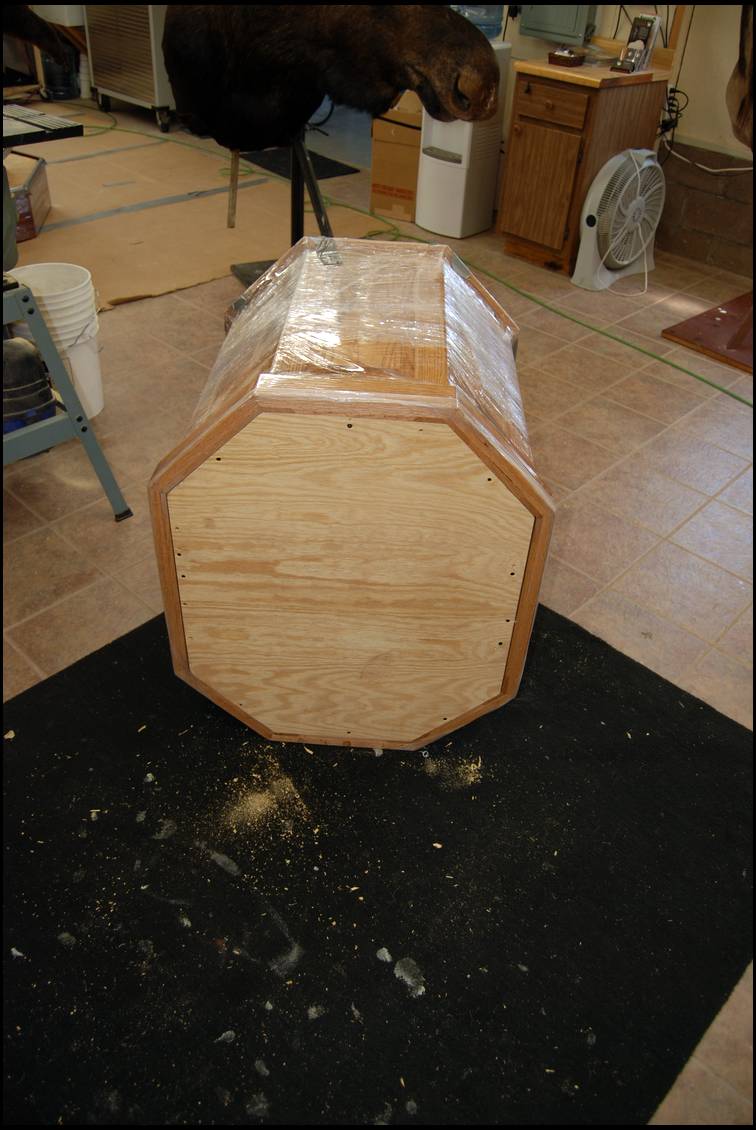
Now I put a finish cover on the bottom of the base.
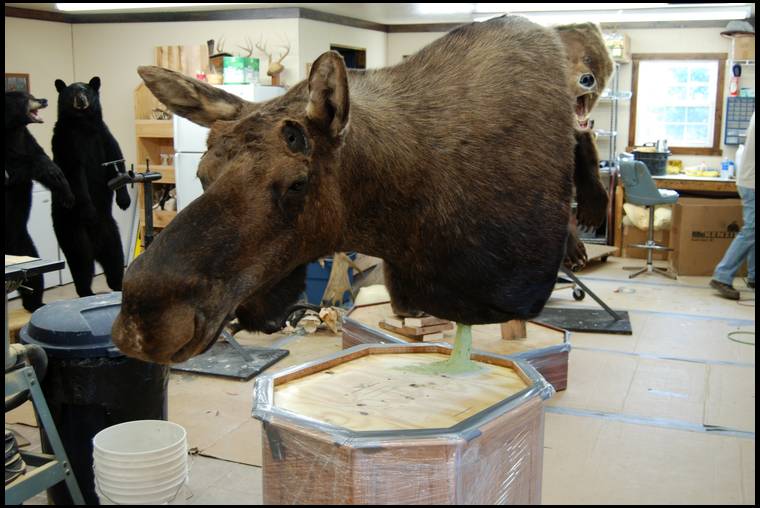
I can now stand the base up and put the moose on.
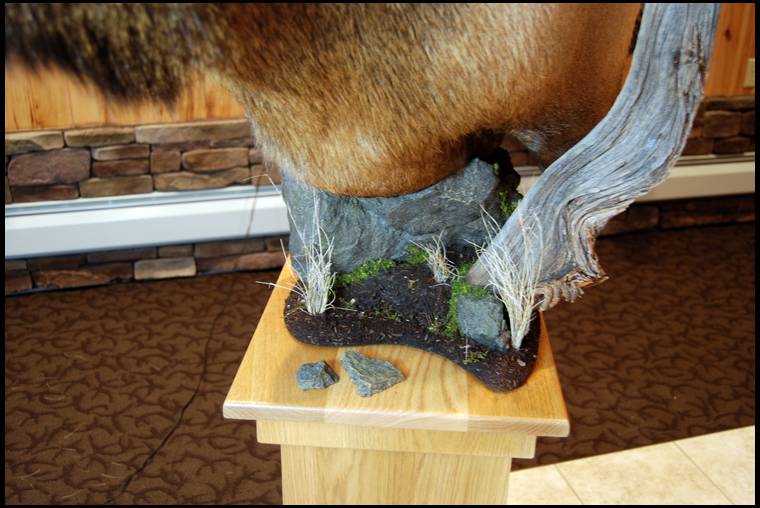
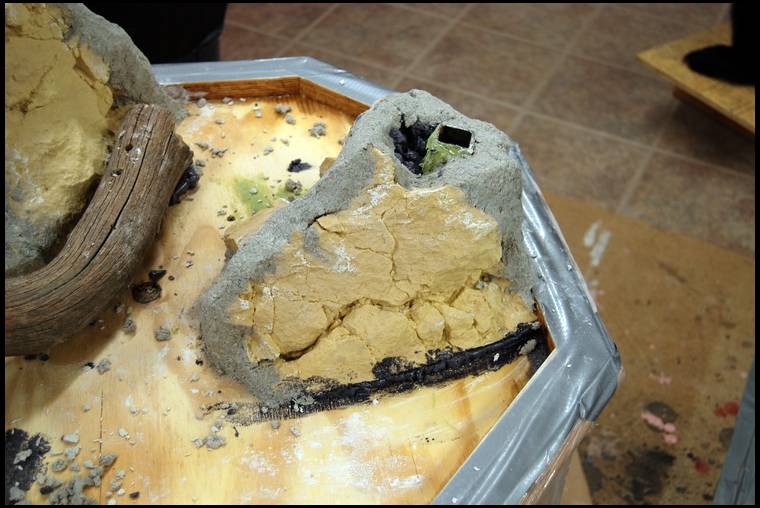
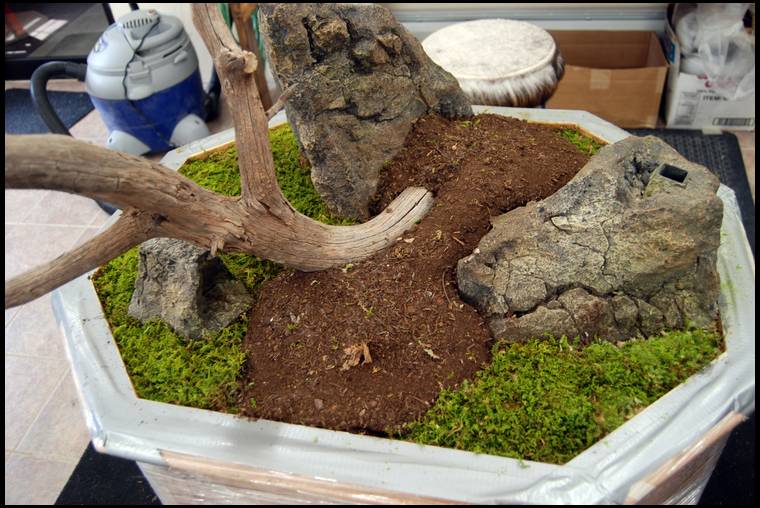
I will start to build my rocks. I will need to put one around the pin sticking up out of the top of the base. This will need to be custom fit to the moose brisket for a nice clean look.
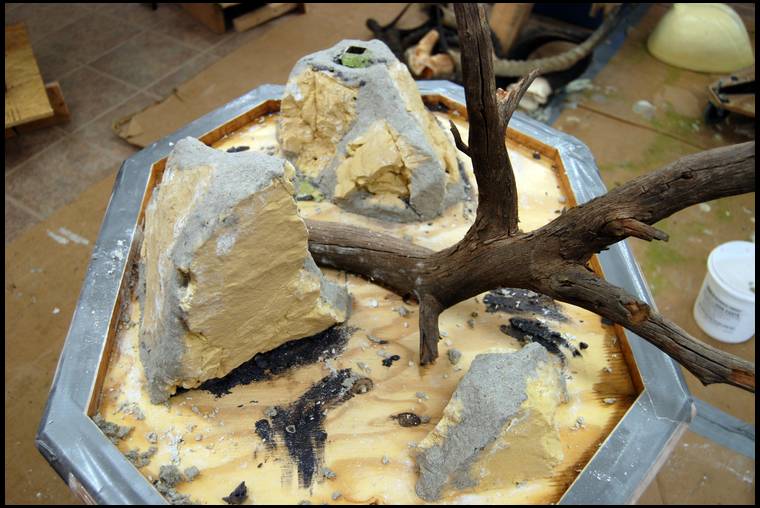
After I finish my rocks and screw my drift wood down I seam the rocks. I start by using a special black foam/glue to insure good seam strength and take up any open area.
putting the seaming compound on.
At this point I need to bring in my little helper! He takes care of all the big decisions in the studio!! Like what snacks we need, makes sure we break every 10 mins, and never lets me miss an episode of phinias and ferb.
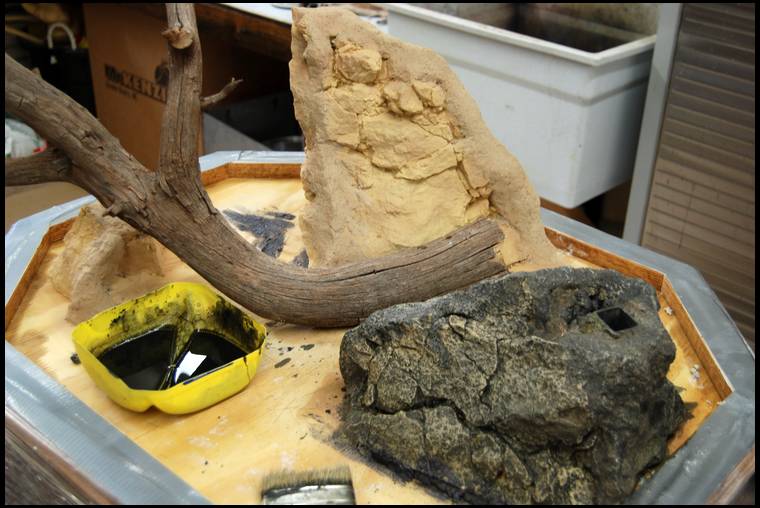
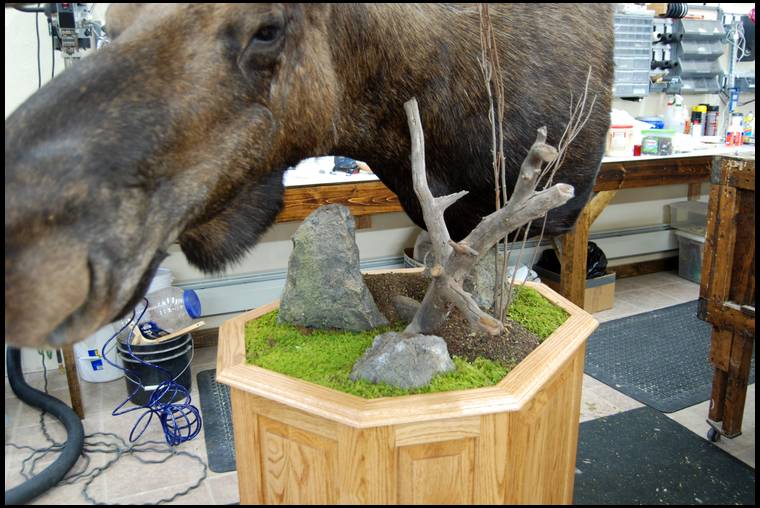
Starting to paint the rocks.
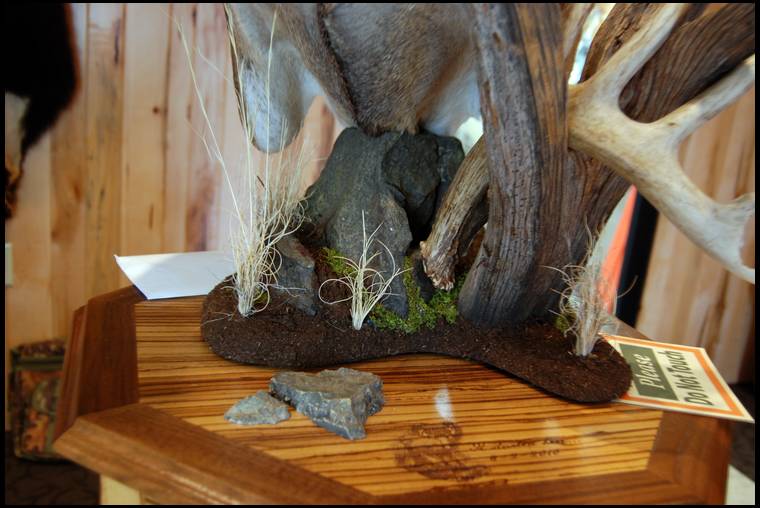
Adding ground cover and depth.
Now I put the moose on so I can do the finishing touches.
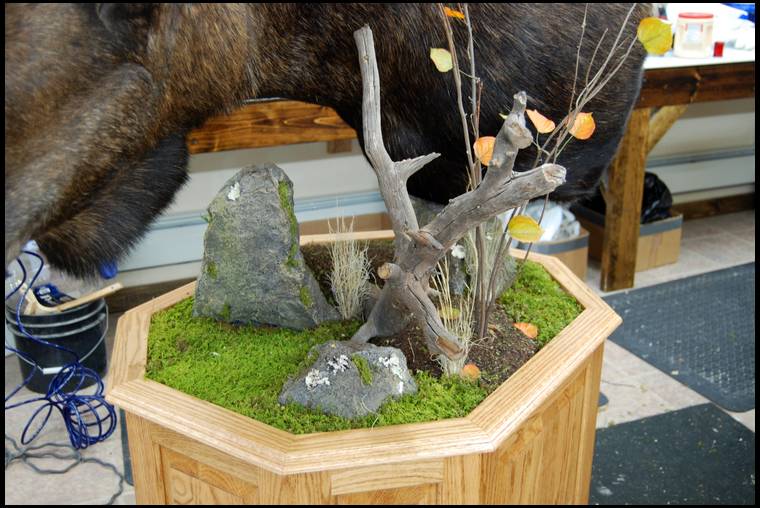
I put artificial leaves on real branches. I will glue them on one at a time. I feel this gives a more lifelike look and will last longer than real leaves that are preserved. Also I put black lichen and moss on the rocks.
All I have to finish is the back. I'll post a finished pic next week. Thanks for following!
Pretty dang fancy!!
At first look---I thought the young fella was sanding that Kudu!!
You certainly do dang good work Dennis.
Good luck, Robb
I love 'bolt' ons! Great mounts....
pic of the finished back.
Thanks for the insight to all the steps. Came out great! I wonder if we are seeing it before the hunter:)?