Contributors to this thread:
I have been wanting to do this for a while. A life size target is out of my price range so o made my own out of insulation foam, liquid nails, scrap wood, and a few cans of spray paint.
The only bad thing abput targets made from this type of foam is youll get reside on your arrows from the friction. It cleans off easily with some thinner though.
You'll be amazed at the improvement in the wild you will get from shooting at a target like this. Shooting at the correct height and judging the real size is very important, especially if you don't can't range them. Now watch, you'll catch one laying down. LOL I think guys make a big mistake shooting targets on the ground...jmho
Looks good. A little more explanation on what you did ?
Layering of foam. The piece behind it is the kill zone reinforcement that I still need to glue on.
This is the first version. I made it to dark. I used another tan, and some browns with more red in them for the finished target.
Finished product.
Finished product.
I got the elk dimensions from bowsite and a few other hunting sites. The height ranged anywhere from 60 to 50 inches at the shoulder and about 6 feel from tail to noise. I went 55 inches at the shoulder. Here is how I made the target: 1. I bought two sheets of 4 x 8 x 2 blue foam insulation from Lowes. Four tubes of liquid nails, a bunch of spray pain, and I used some tape and scrap lumber I already had.
2. On the first foam sheet I drew an out line of the elk from a picture I found on the internet. I'm fortunate to have some artistic skills so drawing it out was easy for me. For those who aren't you can draw squares on the foam and your reference picture to guide you. Basically from the picture you copy what ever is in each square to the correlating square on the target.
3. I cut it out using a hand gig saw.
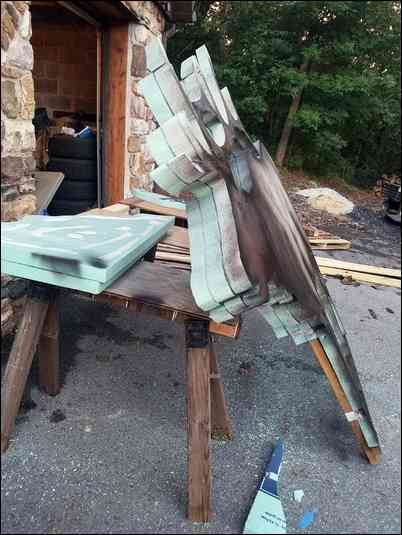
4. Now that I have an outline I used it as a template for the next three pieces. I didn't copy the antlers on the third piece though (figured I wouldn't be shoot at the horns anyway).
5. On the second piece of foam (has antlers) I cut two slots for 2 x 1 x 4 pieces of wood. This is for support and you'll attached the legs to them.
5. Glue it together and wait 24 hours to dry. Tape the edges to help keep them together. I also made four more layers in the kill zone. I had them glued on but it was super humid and three of them fell off. I'll glue them back on tonight.
7. Once it was dried I cut out additional pieces of antlers and the legs. I used dowels, liquid nails, and tape to put them together.
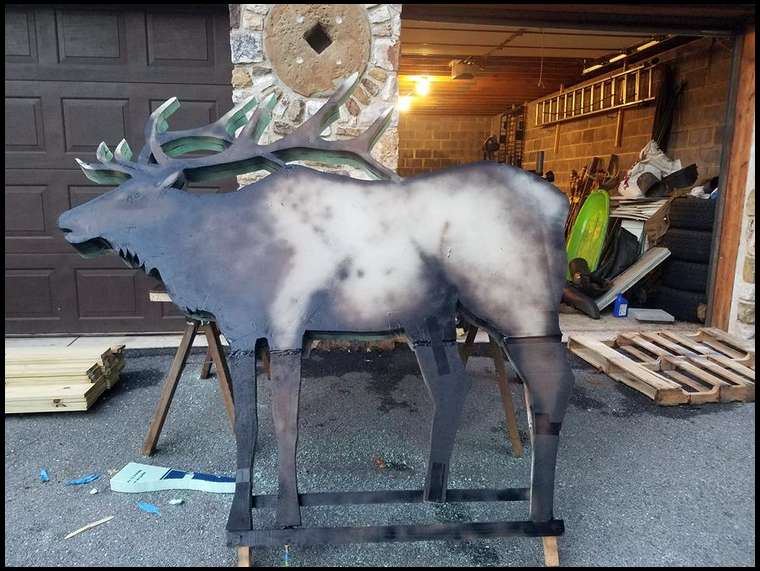
8. I also had to strengthen the wooden mounting bracket with two cross members. The purpose for the second is to attach the right real leg since it was a bit short.
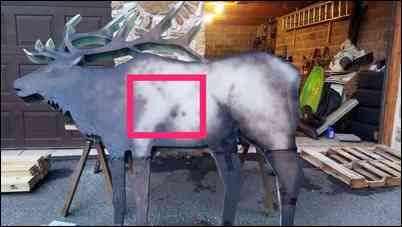
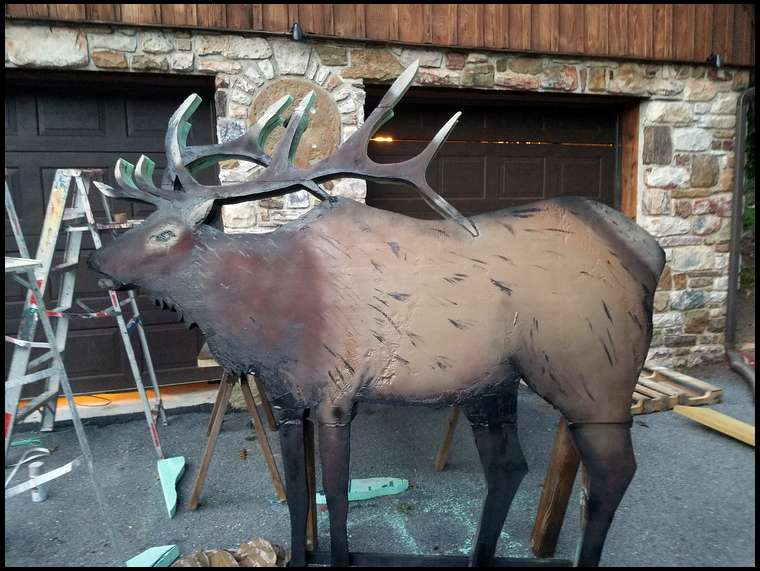
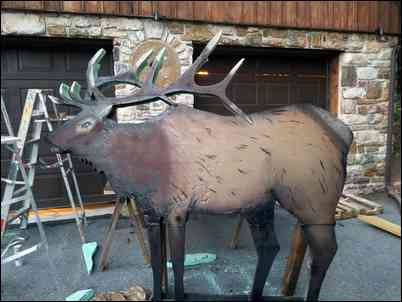
9. Next part is the fun part. Spray paint your elk to look as real as you can get it. My first attempt came out a bit dark, but my second was much closer. I also used a brush to add hair and some detail.
10. Last thing I need to do is make the mounting bracket to she'll stand up straight. I have a cart that I may attach it to. I'll post that picture when I'm done.
I kind of wish I would have made his head and neck a bit thicker, but otherwise I'm happy with it. I have made these before, but not to this level of detail. When shooting into the foam the friction will leave residue on your arrow. I used to clean it off with paint thinner.
That's pretty cool man. Nice job.
I really like your mill wheel, good mason work.
Amazing mate, I wish I could have more passion to complete it as yours.
Nice Work...very impressive!
Best of Luck, Jeff
Can I borrow it? Oh wait, I am leaving on Wed. Nice work Paul
Neat,heck of a life-like target.
Soap 6" of your arrows with a bar of soap and you will not get the residue. I found great stuff works better than liquid nails or PL 300. It also works great to patch arrow holes.
I made a similar one 10 years ago. As I wear it out I cut a hole in it and place a cheap layer target. Then cover it with white duct tape and repaint It. It's on it's third or fourth insert.
A few years ago on third replacement I think.
I planned on doing the same thing.
that is a great looking target. just wondering how long it will hold up before arrow pass thrus. trad bow shooting should last long time.