
Who would want to see....
Contributors to this thread:Equipment
From: RJ Hunt
24-Apr-20


.... my process in which I made this knife? I had a thread going on some of the knives I have made and was asked to see how I make them in my shop. This knife is not for sale as already has a home but would like to ask if anyone would want to see how I do what I do. Chime in if interested and if enough care to see I will take the time to put it together on this thread. Thanks all.
From: Guardian hunter
24-Apr-20
That is an original idea. Go for it.
From: Highlife
24-Apr-20
From: T Mac
24-Apr-20
Bring it
From: molsonarcher
24-Apr-20
Sounds better than anything on TV. I’m in
From: RJ Hunt
24-Apr-20
Sounds good. Will keep on this thread and post up pics as I went along. Some are video and will try to catch a still to gather what I was doing.
From: Huntcell
24-Apr-20
great! thanks so much.
From: Highlife
24-Apr-20
From: Bowbender
24-Apr-20
Oh heck yeah. I'm in!!
From: JohnMC
24-Apr-20
“Forged on Bowsite”
From: bud
24-Apr-20
Subscribed
From: M.Pauls
24-Apr-20
Yes please! I love creating, and with that, enjoy watching others create as well
From: deserthunter
24-Apr-20
Yes please
From: PECO
24-Apr-20
Yes!
From: Bentstick54
24-Apr-20
Would love to see.
From: t-roy
24-Apr-20
Definitely. It’s always interesting to see the process of how something is made, especially if it’s not in your wheelhouse.
From: WI Shedhead
24-Apr-20
Yes. That knife is a beauty
From: jjs
24-Apr-20
Yes, always interested in knife making especially Damascus blades.
From: DroptineDC18
24-Apr-20
?????
From: Fields
24-Apr-20
no need to ask.... do it..
From: elkmtngear
24-Apr-20
Yes please !
From: hdaman
24-Apr-20
absolutely !
From: Marty
24-Apr-20
Yep!
From: nmwapiti
24-Apr-20
You bet. Works of art.
From: Lee
24-Apr-20
I’d love to! You make some sweet knives!
From: RJ Hunt
25-Apr-20


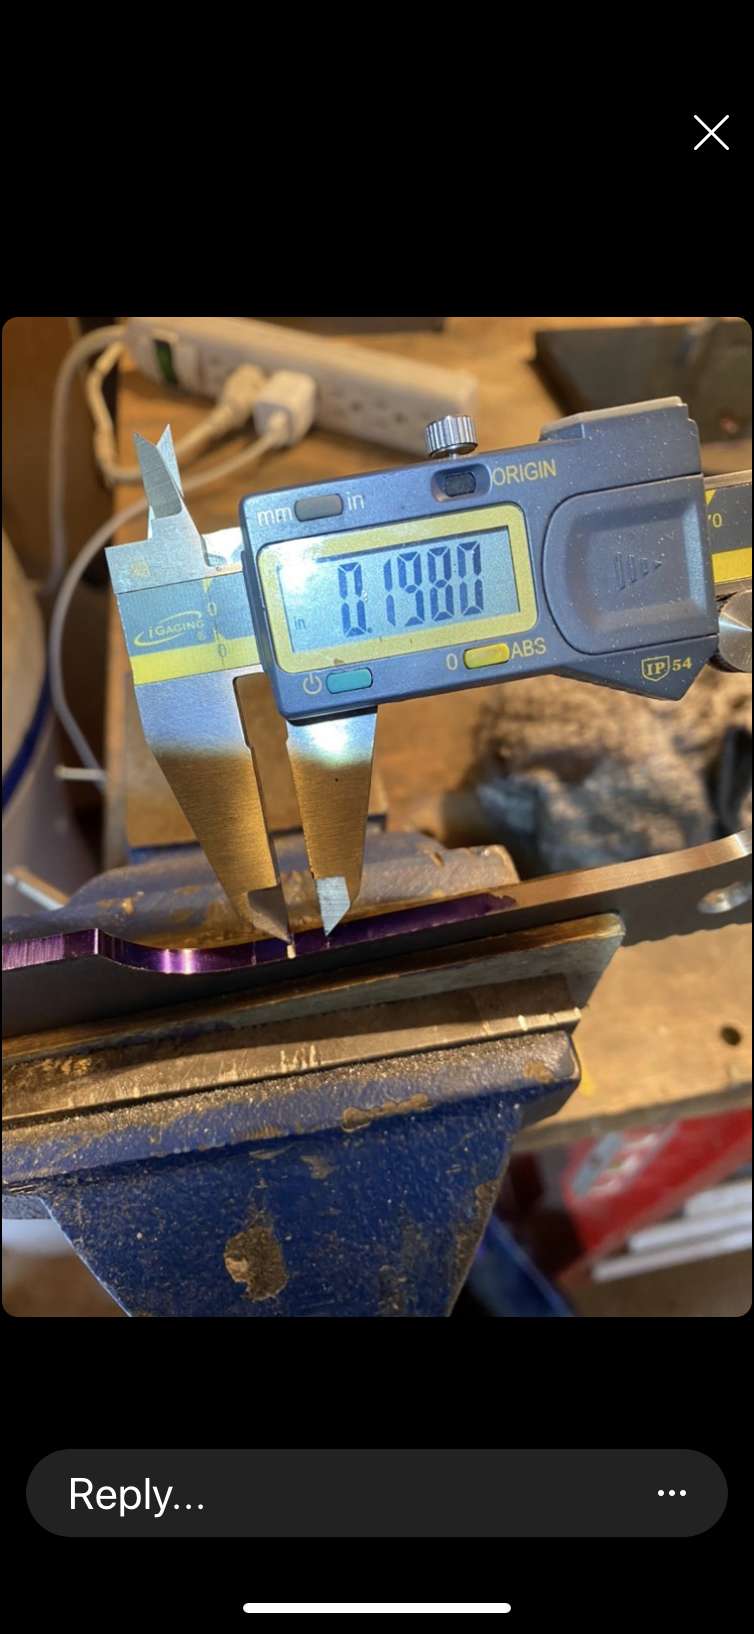
This knife started out of a flat bar of Elmax powdered stainless steel in the anealed state (softened) and still has the 304ss can on the outside that will need to be removed. The bar is .148” thick, 1.5” wide and 39.5” long.
From: RJ Hunt
25-Apr-20
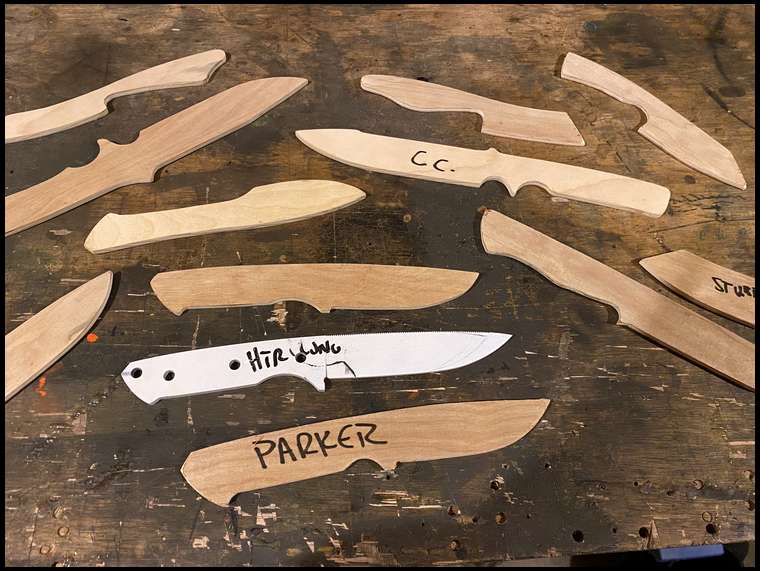

Then I pick through my patterns or draw up a new one to fit the use of the knife. Here I have some plywood shapes I have drawn and cut from wood or steel.
From: RJ Hunt
25-Apr-20

I then cut out on the bandsaw or grind out the blank to the desired rough shape
From: RJ Hunt
25-Apr-20


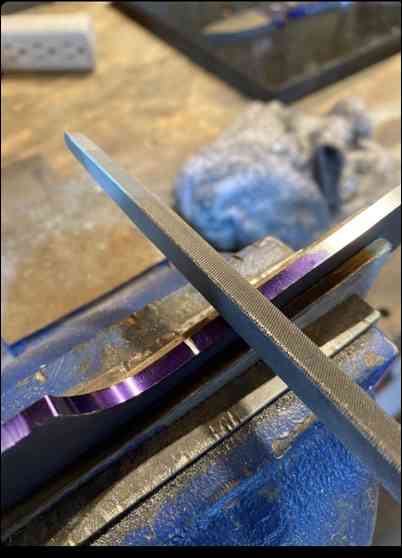
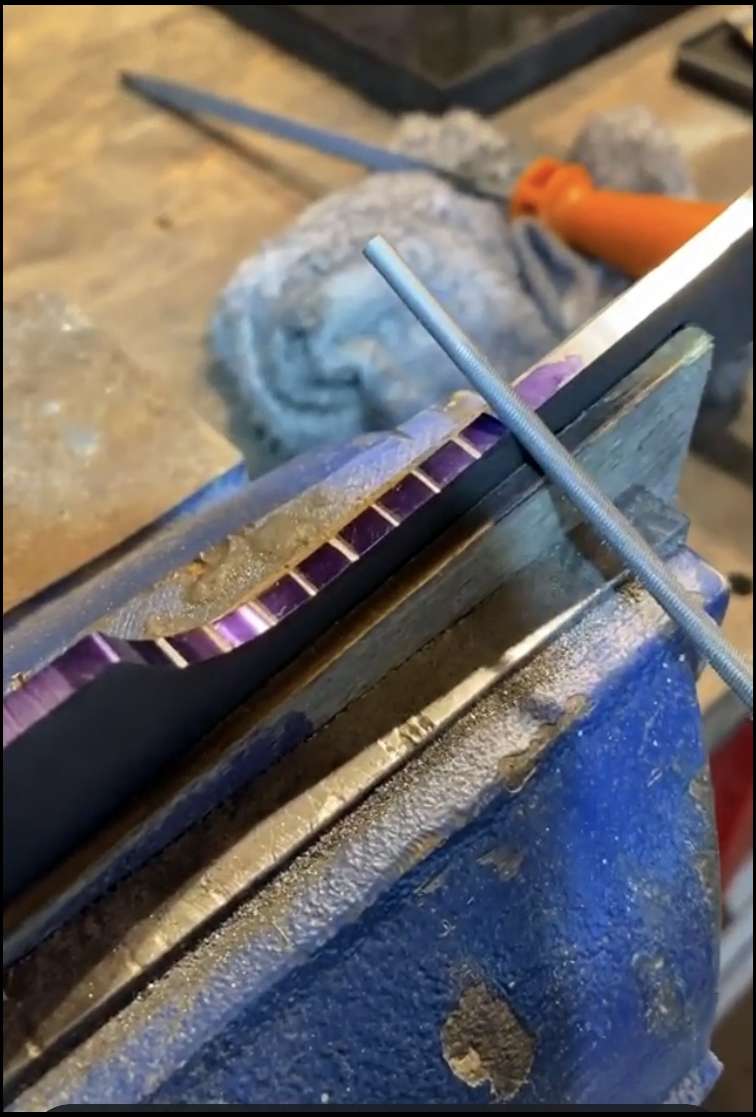
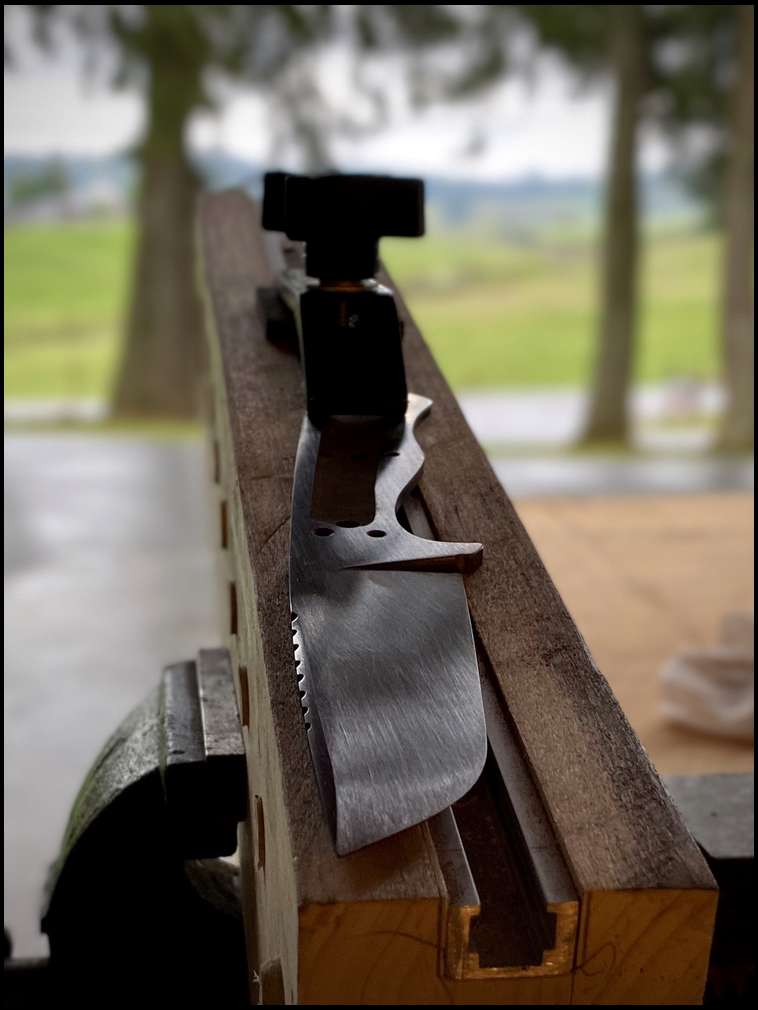
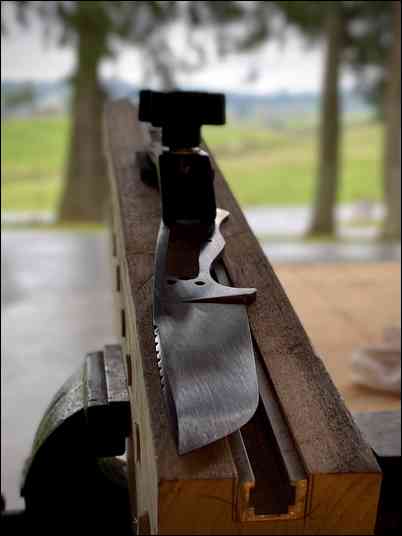
Once I get the profile ground out and the lines of the blade look appropriate I bring out my hand files. With those I apply the grooves (jimping) in the spine of the knife for grip when cleaning game. I also cut the Spanish notch or cheapening notch in the blade. When doing this I am trying to envision the size of the hands of the user (if making for a specific person and how they will use as different uses will require specific hand positions. At this point I can also draw file out any humps or bumps that I see.
From: RJ Hunt
25-Apr-20


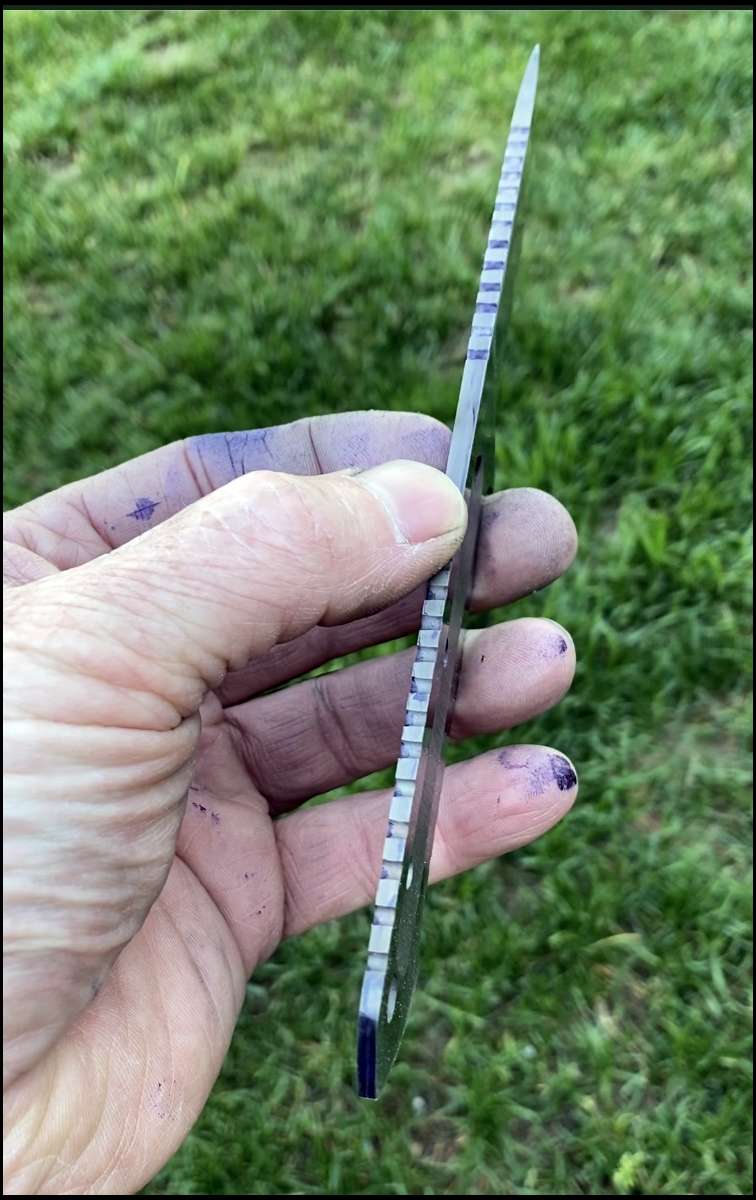
I also use machinists dye to lay out all my lines and holes in tang for pins
From: RJ Hunt
25-Apr-20
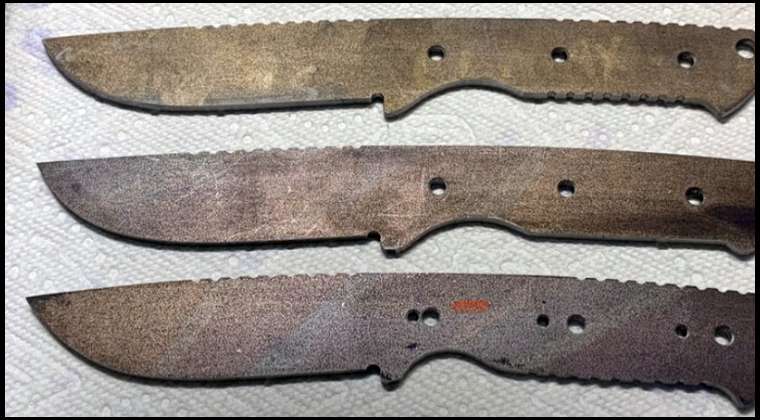

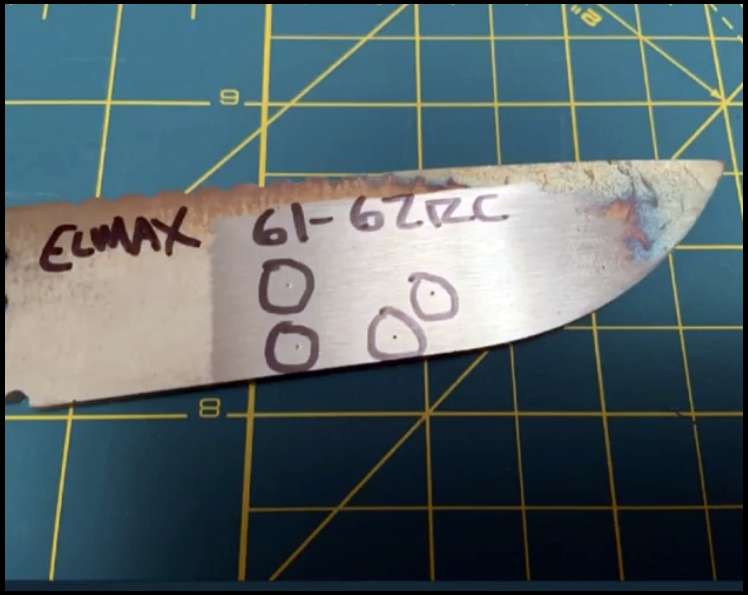
At this point all holes have been drilled, file work done and the blade Blank is ready to be hardened. Once the knife is hardened there will be no file work done or drilling of holes so all that must be done before this step. On these blades (Elmax Stainless) you can see the flat gray coating on the knife as is a non hardening steel coating that will be removed later. Also I have done no grinding on the bevels or tang. I leave all this for after heat treatment as I can remove any small warps or imperfections with ceramic belts on the grinder later.
From: jingalls
25-Apr-20
This is COOL!!!
From: GhostBird
25-Apr-20
Thanks for sharing this. Very interesting. Love your knives, beautiful work.
From: RJ Hunt
25-Apr-20
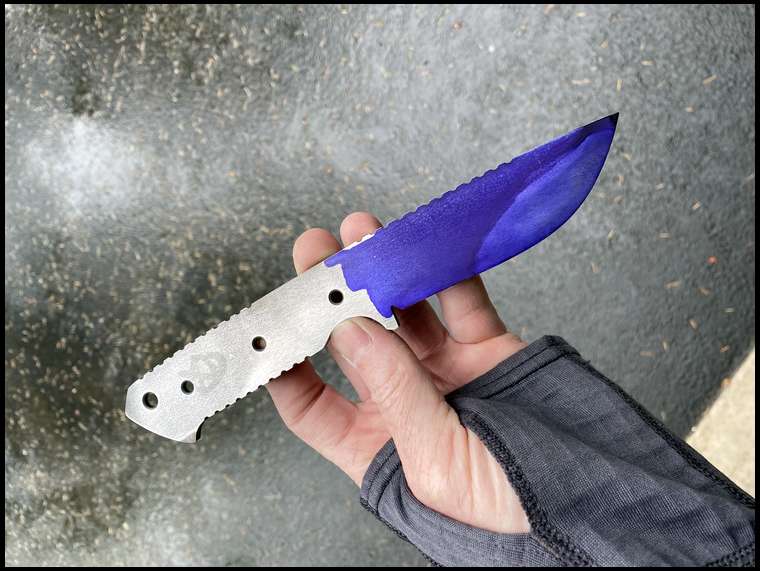
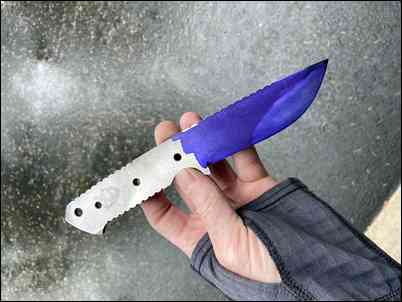
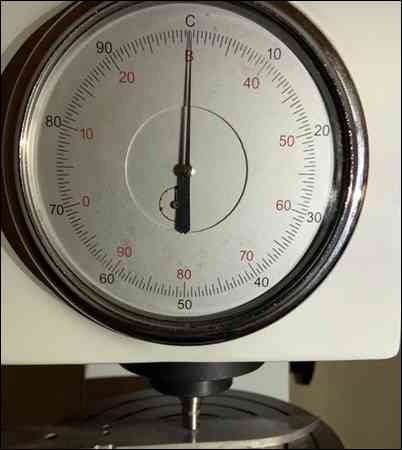
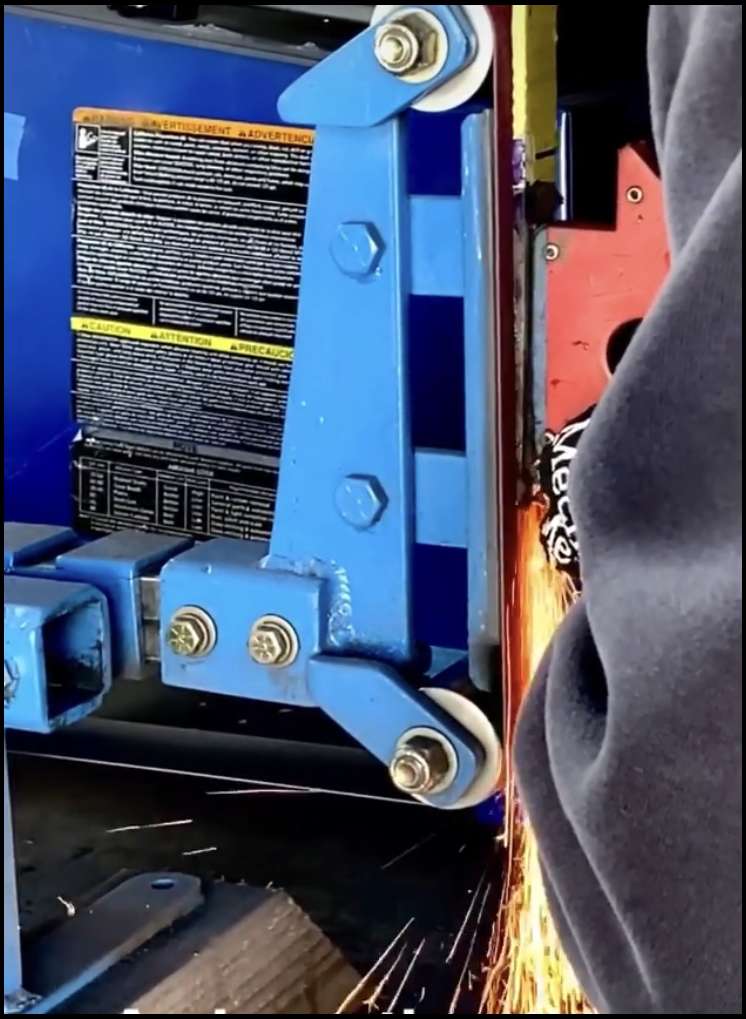
I use a computer controlled furnace to heat treat my knife blades. They must also be in an oxygen free atmosphere so not to burn the carbon out (like when welding) while at sustained high temperatures. This steel could/should not be done in a forge as requires precise high temps for optimum performance. After the high temp cycles (can be anywhere from 1200f to 2200f with ramp speeds varying) I quench the blade and when I get it to room temp it goes in liquid nitrogen for 12-30 hours to take a chill at -320f. Then into low temp tempers and straightening processes. After all that (minus the blue dye) it comes out a knife blank and I test on a Rockwell tester to confirm my process.
From: RJ Hunt
25-Apr-20

From: RJ Hunt
25-Apr-20

From: RJ Hunt
25-Apr-20
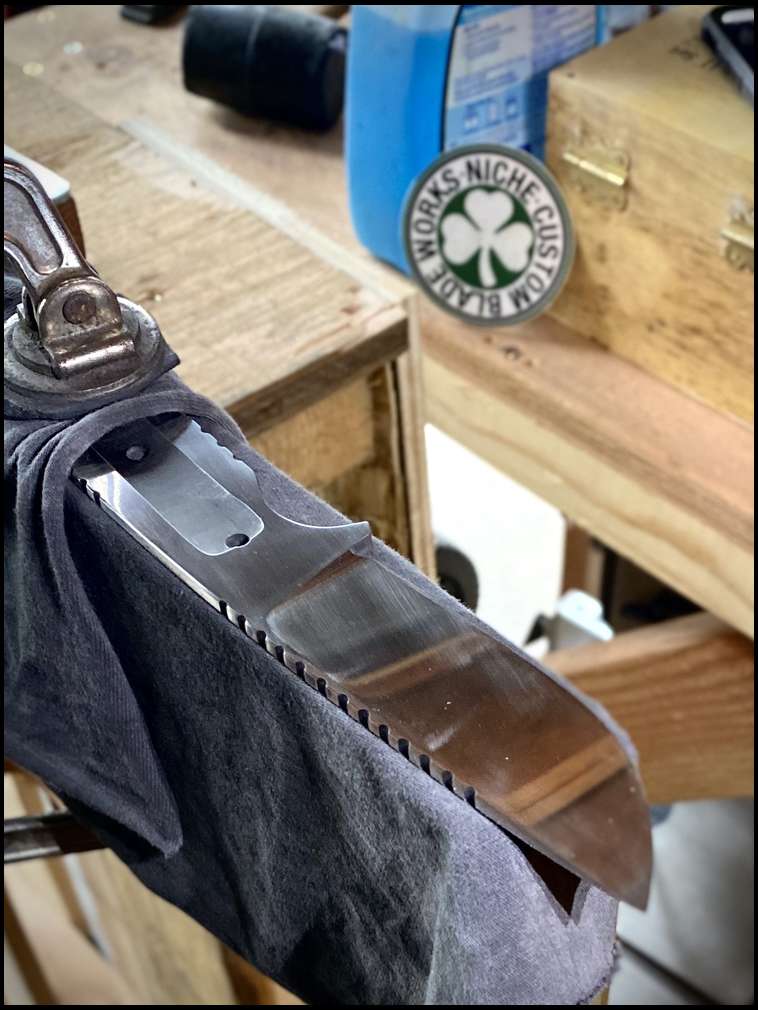
Before hollowing tang

Before hollowing tang

After hollowing tang and getting ready to taper

After hollowing tang and getting ready to taper
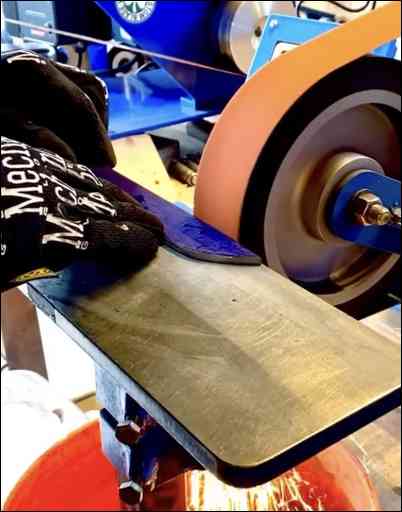
I grind the bevels while running water on the belt and hollow out the tang to prep it for tapering. Tapering the tang is nice because it keeps the weight off the back end of the knife and shows craftsmanship in my opinion.
From: RJ Hunt
25-Apr-20

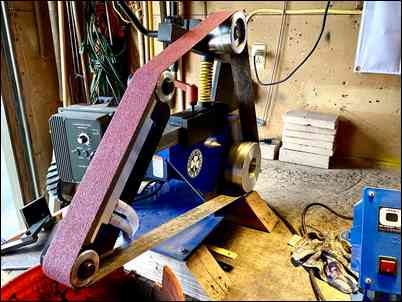
While a grind the heat treated blades I have a water cooled Platen that I run 35 degree ice water though and keep water on the belt to avoid getting any of the blade over the final tempering temperature.
From: Bentstick54
25-Apr-20
Enjoying the how to. Thanks.
From: Wv hillbilly
25-Apr-20
Thanks for sharing. Awesome work!
From: deserthunter
25-Apr-20
Now I know just how much I do not know about knife making. WOW
From: Royboy
25-Apr-20
This is very interesting!
From: RJ Hunt
25-Apr-20
Thanks guys. Will update the thread tonight. Is 9:00pm here and still working in the shop. Will get more added. Thanks for the patience.
From: RJ Hunt
26-Apr-20


I also use a 4” rubber wheel at times to hollow tangs out before tapering.
From: RJ Hunt
26-Apr-20

I use the flat of my grinder to taper down the tangs. The platen on my grinder I use for this is pyroceramic glass to ensure flat and wears well.
From: RJ Hunt
26-Apr-20


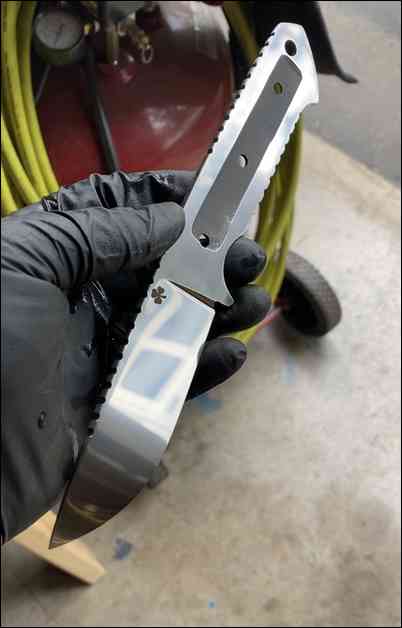
This is what the knife blank looks like after all machine work. At this point is a nice blade but will need about 10 more hours of hand work to get to the quality it should be for a hand made product.
From: RJ Hunt
26-Apr-20
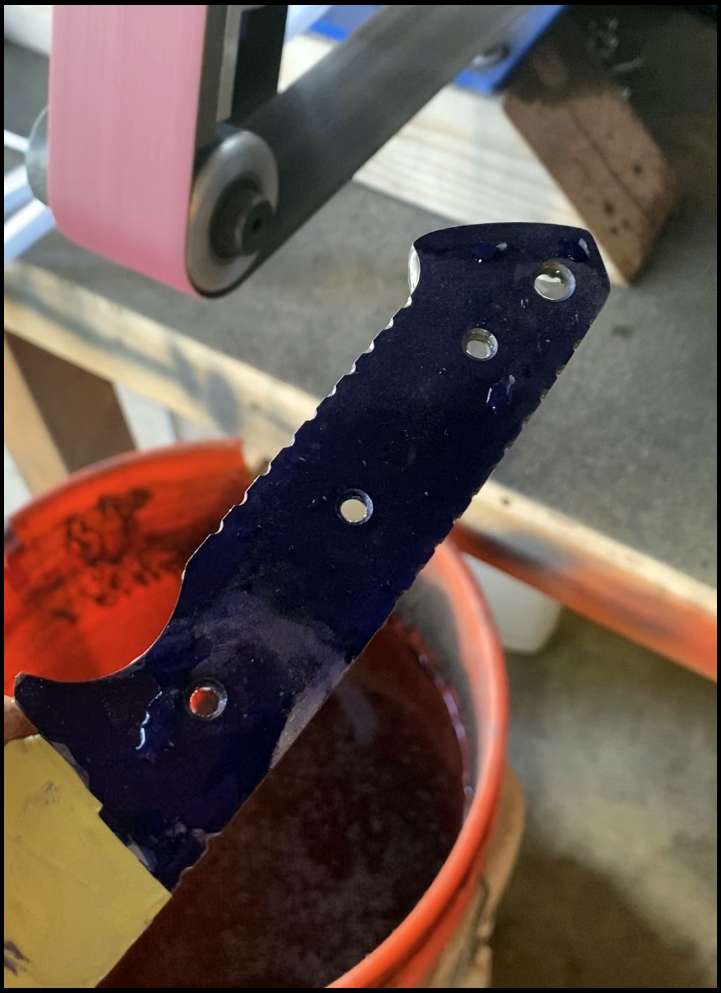
At this point I also cerakote any part of the knife I want colored or protected. Here I colored my file work.
From: RJ Hunt
26-Apr-20


From: Bou'bound
26-Apr-20
This is amazing
From: RJ Hunt
26-Apr-20


A closer view

A closer view
After all the machine work I start out with a coarse grit paper and start the process to make sure that everything is flat and remove all the machine marks from my grinders. I generally finishe anywhere to 600-2000 grit sating finish depending on the knife but for this post I went up to 1500. Here the knife is clamped to a sanding block and I am cleaning the plunges. Hand work (sanding) on a knife with and exposed tang may take me 10 hours to complete.
From: RJ Hunt
26-Apr-20
Here is a different knife but a better view.
From: RJ Hunt
26-Apr-20
Here is a finished blade ready for a handle. I design and make all my handles scales myself also. I prefer natural wood that has been stabilized (more to come on that later) either professionally or I do myself. There are times I like micarta or carbon fiber but nothing beats the feel of natural materials.
From: patience2spare
26-Apr-20
Truly amazing and such an incredible finished product!!! Your work would become a family heirloom to be passed down for generations! Thanks for sharing all of this! Pete
From: RJ Hunt
26-Apr-20

Sorry here is the finished blade
From: t-roy
26-Apr-20
Great “how-to” explanations on your process so far! Keep it coming. Very interesting thread!
From: RJ Hunt
26-Apr-20
Wow... thanks for all the compliments on these. I love the work and making a knife for a specific person. Is pretty cool thing to do. For now I have to go get some work done. Will try to post more tonight.
From: lsoiehgoee
26-Apr-20
lsoiehgoee's Link
I use a pc managed furnace to heat deal with my knife blades. They should additionally be in an oxygen loose atmosphere so now not to burn the carbon out (like when welding) whilst at sustained excessive temperatures. This metal could/have to now not be carried out in a forge as requires particular excessive temps for max overall performance.
From: jingalls
26-Apr-20
And another troll with Lsoiehgoee. DONT TAKE THE BAIT! Don’t go to his link!!!
From: hawkeye in PA
26-Apr-20
Rj Thanks for your time and posting., very interesting. I did go to a "forged" knife class earlier in the year and it was also interesting. Same results two entirely different methods. Your method looks far more consistent. Thanks again.
From: elkmtngear
26-Apr-20
So much more involved than I imagined. Truly an amazing craft !
From: T Mac
26-Apr-20
Wow very informative and a true craftsman you are.
From: Ucsdryder
26-Apr-20
When I see these posts I always think “I should try this. It looks fun.” It has quickly become apparent that This is way out of my league. Lol.
From: Lee
26-Apr-20
Wow! Much more involved than I ever realized! -350 baths, 10 hours of finish sanding! Whoa
Thank you for sharing - you are very talented.
Lee
From: RJ Hunt
26-Apr-20

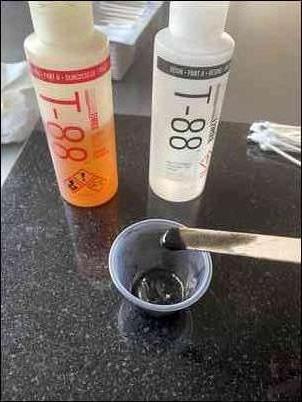
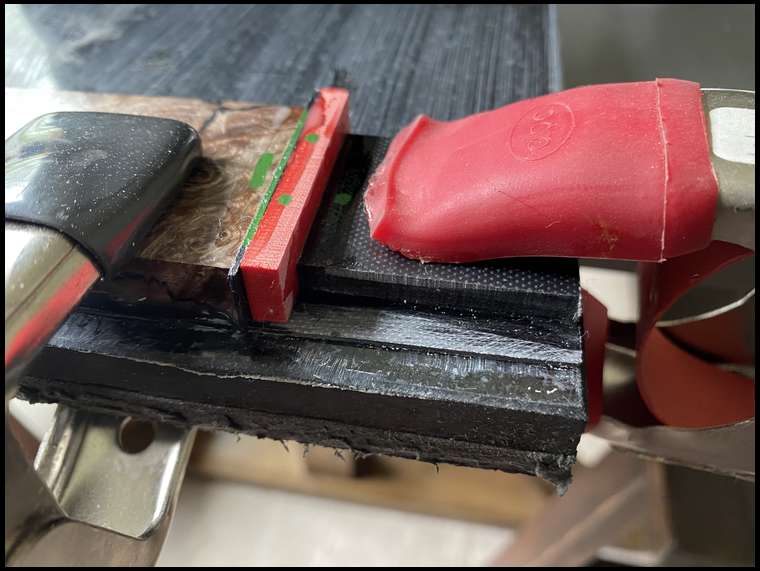

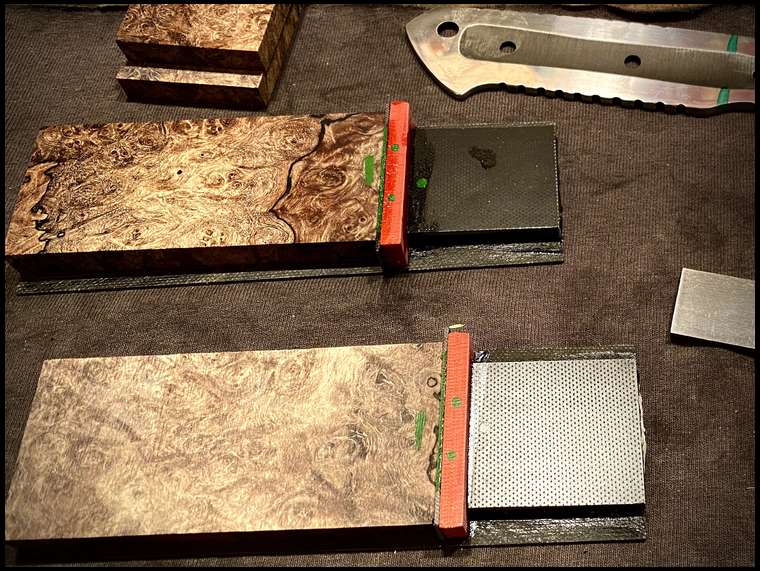
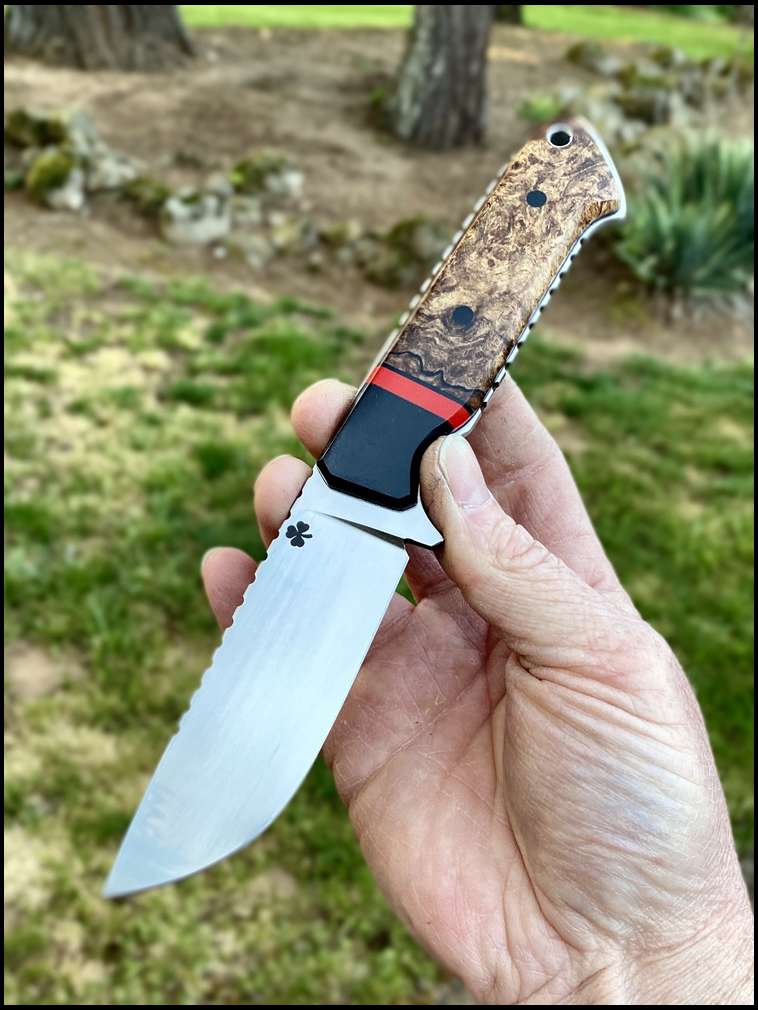
Thanks guys. Won’t go to the link. I know better. Anyhow. Making the scales I like to use stabilized wood and a g10 liner to support it when against the tang of the knife. Here I have cut the wood I want into scales, cut and sized the bolsters and added a red highlight made from g10. I also use a dye in my epoxy resin (not Home Depot type epoxy but a slow set marine grade resin) that matches the color of my liners (black in this case) so to fill any small spots with color that may show.
From: RJ Hunt
26-Apr-20

From: RJ Hunt
26-Apr-20

After they are set, usually 24 hours later I sand them flat on all sides as to line them up on the knife and drill the pin holes.
From: RJ Hunt
26-Apr-20


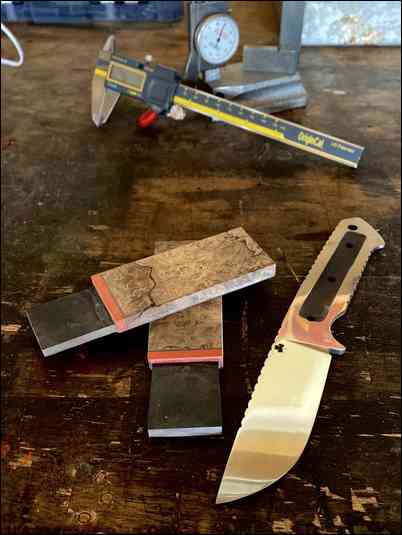
I drill all the holes so I can line up the handle scales and fit them to the knife tang, but this being an exposed tang will need to go a bit smaller than normal and I generally do by eye.
From: RJ Hunt
26-Apr-20
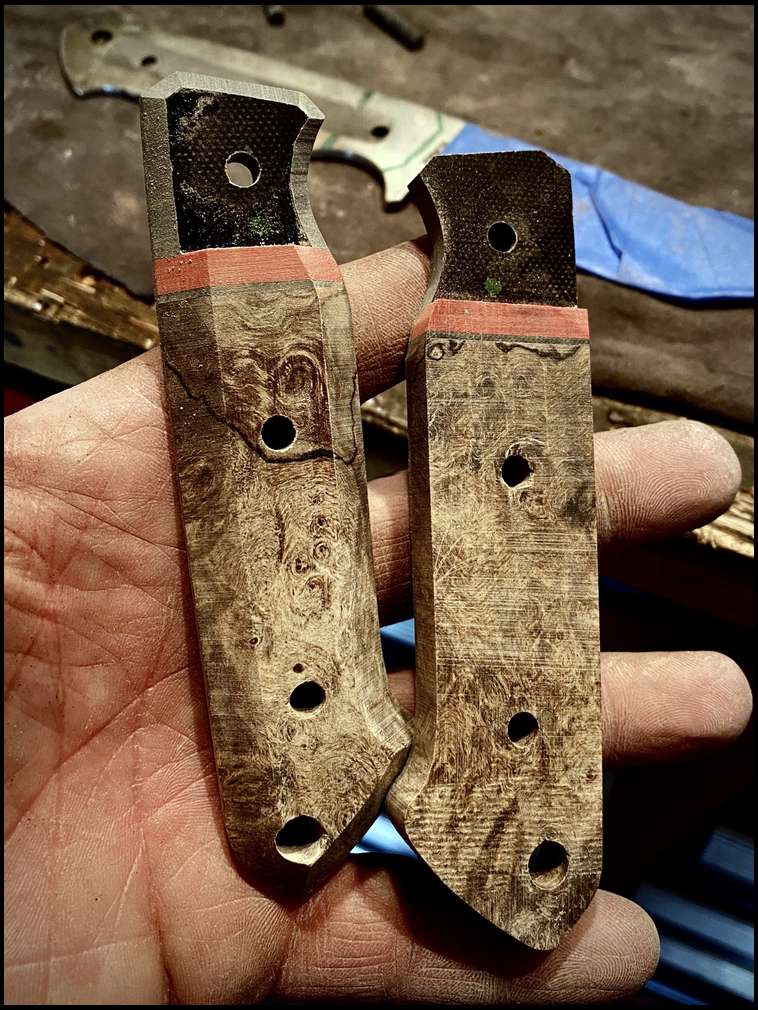
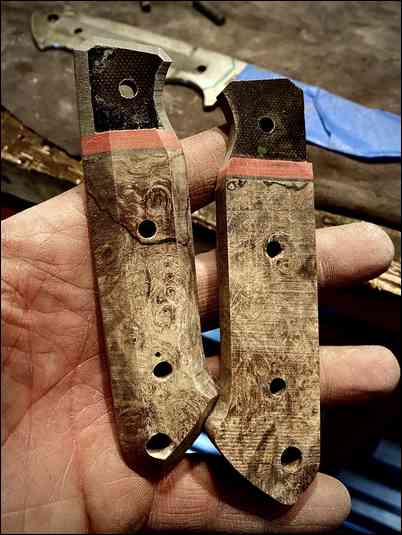


Once I get everything cut/ground to size I need to finish all the sides by hand and complete as once on the knife I will not be able to sand them without scratching the tang or blade. Once that is all done I mask off and sand blast the knife tang everywhere I need epoxy to stick as epoxy won’t stick to smooth finishes well and glue everything up with structural epoxy resin (t88) and let set up for a couple days
From: RJ Hunt
27-Apr-20

After everything sets up I grind/sand everything to size and sand to about 1200 grit to finish and apply a tung oil or tru oil to seal. Now to make a sheath.
From: Scar Finga
27-Apr-20
You are extremely talented brother! I love both my knives!
From: SBH
27-Apr-20
Thanks for sharing. What a process. Thats a piece of art. I had no clue what all went into something like that. YOU are talented!
From: M.Pauls
27-Apr-20
Wow wow wow. Now I want it even more! :)
From: RJ Hunt
27-Apr-20


One side coyote brown

One side coyote brown
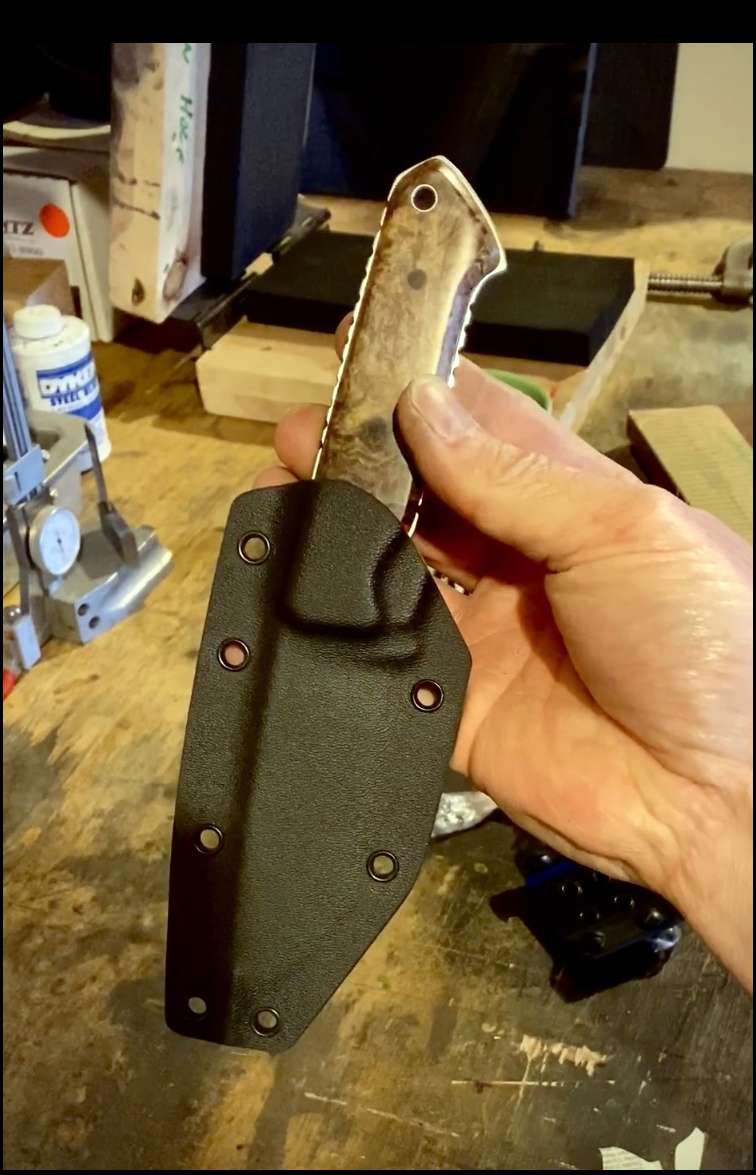
And the other side is black.

And the other side is black.
Thanks guys...
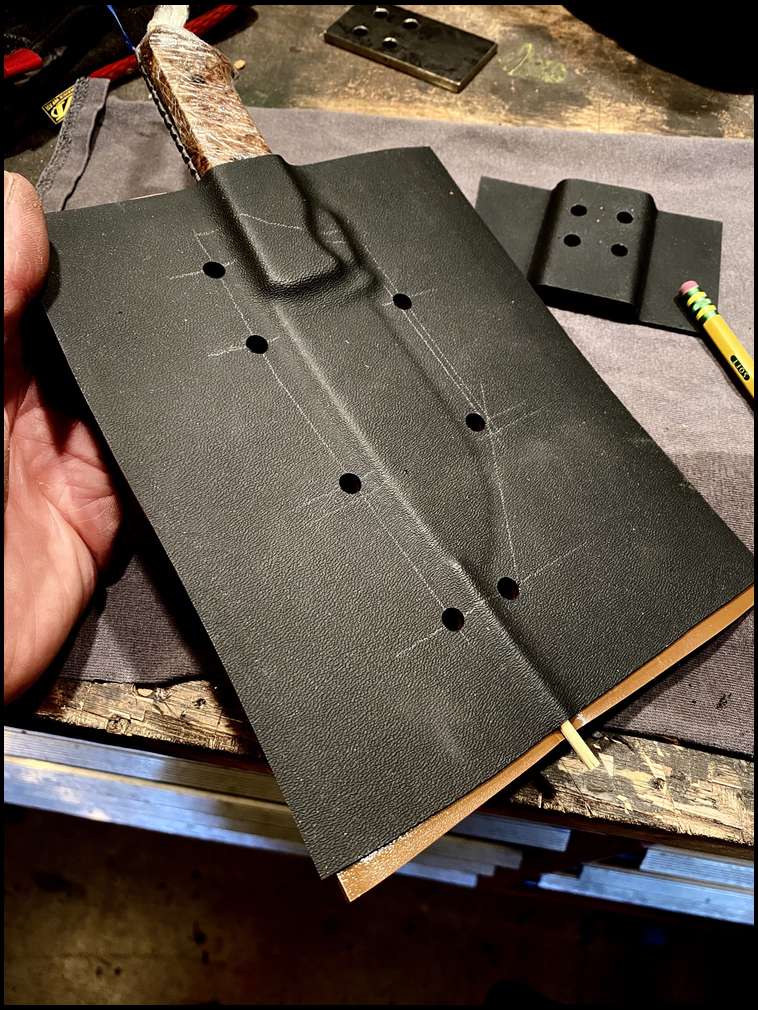
On the sheath I use kydex and mold to each knife for a tight snap fit. I don’t use leather for one reason. I hunt in the wet Pacific Northwest and have had my leather sheathes Roy in my pack. I like leather, and the look of it but all my knife experience comes from hunting for 35+ years and that has shaped how, what I make. Here I have molded thermoplastic to the knife and pressed for shape. Will drill all the holes, remove the knife and press in the eyelets.
From: Buckstone
27-Apr-20


Very nice work! I can appreciate the amount of time put in. Just like carving !
From: RJ Hunt
27-Apr-20

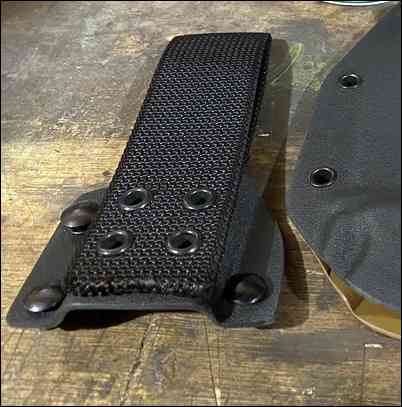
I also make removable belt loops for those that like to have on a belt.

