I Needed a Cultipacker...
Mule Deer

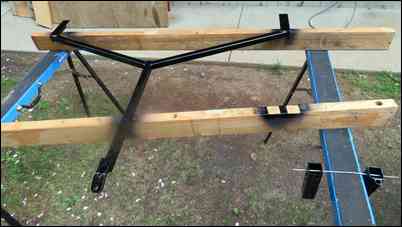
Cement poured in around a 4x4 post, kept straight and centered with three 2X4’s

Cement poured in around a 4x4 post, kept straight and centered with three 2X4’s
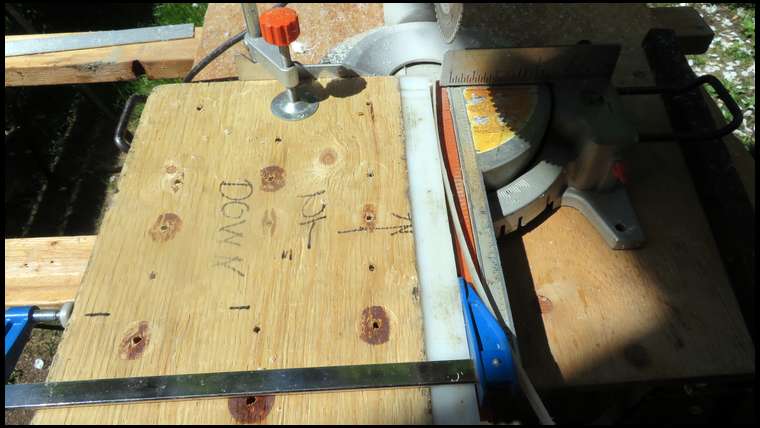
I cut some UHMW to fit inside the tubing for bearings

I cut some UHMW to fit inside the tubing for bearings

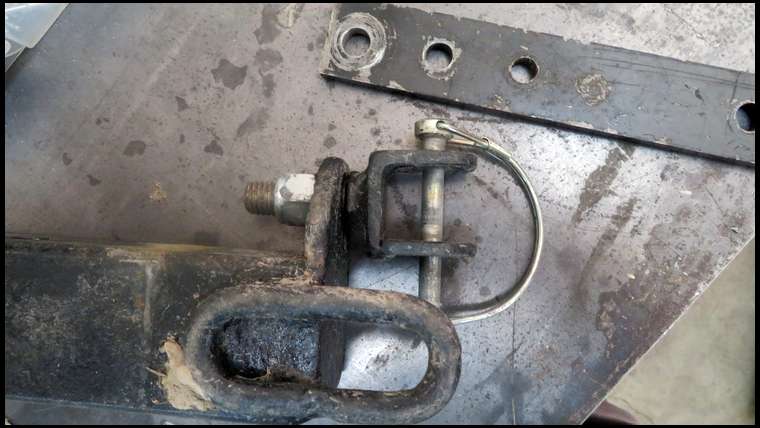
Cut the strip into four pieces and drilled some holes for the axle stub and anchor bolt.
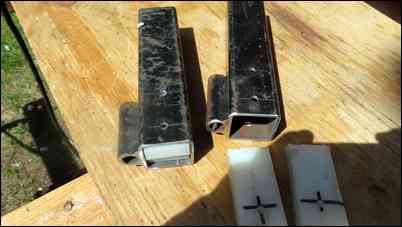
Cut the strip into four pieces and drilled some holes for the axle stub and anchor bolt.

Some more drilling to finish the bearing blocks
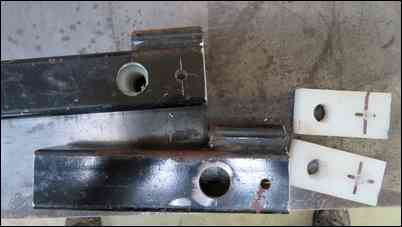
Some more drilling to finish the bearing blocks
EDIT to add more pics below.
Ive been wanting to make a small ATV sized cultipacker for a couple of years. Well last week while bear hunting I found the end of a ten inch plastic culvert that had been ripped off by a grader. And this week while helping a recently widowed friend clean out her husband’s garage, there was two bags of ready- mix cement. So that and some scrap lumber and I’m well on my way. I had to buy one more bag of cement. With that, a couple of cheap bearings, a coupling and I should have a thirty eight inch long, one hundred and fifty pound packer for under fifty bucks. I have steel tubing salvaged from a job site. I’ll post a pic when it’s finished.
I know this is not posted in the right place, but for some reason I can’t start posts under the big red B^ Icon. And my plot feeds mostly mule deer too.
Looking forward to following along on this, MacGyver!!
Don’t forget the rubber bands, baling wire, and the chewing gum wrappers ;-)
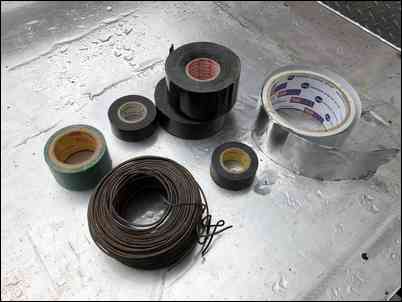
Haha, funny you should mention that. The widow also gave me several rolls of tape and a big roll of heavy gauge haywire. Didn’t see where she spit her gum though.
Please document the process with photos. This is a cool idea....
You should have witnessed an ATV repair that Rod did far back in the Canadian bush...No nut for a 5" long x 3/8" (but metric) bolt to get the rear driveline functional.....in short order Rod had it haywired on and damn if it didn't get him 25 km back to the truck with 4-wheel drive versus ineffective ft drive! I was sure we'd end up towing him but he made it. He is handy as heck, I almost think he was raised by the Inuits but he takes better care of his gear. And this is a compliment!
So many all-stars on one thread. Love it Rod. Canadiana right there
They say Necessity is the Mother of Invention.
Apparently I may be more influenced by its Stepfather; Mister Cheap.
Oh, and on the culti-packer plastic culvert...he was looking for the culvert pipe last year...glad Rod finally found it! Bet it works well.
Have known Kurt a long time. He could probably teach that stepfather a thing or three!
If there is a Will, there is a Way------->
Good luck, Robb
I will echo what Kurt said. I have seen some great Canadian bush ingenuity, by some outfitters and the guides that saved our asses.
Haha, Tavis!! You should see Kurt and I hunting together!
We use paper plates and after eating we put the utensils in a tall pickle jar to soak. The paper plates get inverted while still soggy and set out to dry. We just wipe the utensils with a paper towel ( which gets hung up to dry) when we eat again. At the end of the trip, we use the pickle jar water for soup broth, just add noodles.
We are way ahead of the curve if a depression hits.
^^^^Did you say you use utensils and plates while hunting? You pack a tablecloth and hold your pinky in the air while sipping too?
This is a great idea! Can't wait to see the finished product as I might steal this design!
Good idea,I have an old one that we refurbished(wooden bearings).
Kurt would squeeze that Indian head nickel till the buffalo poops...
"You pack a tablecloth and hold your pinky in the air while sipping too?"
That's ridiculous, we don't use a table cloth.......umm.. err.. well not usually, and and and it's faded and it's not pink, it's salmon, a manly colour.
I'll let the cement set for several days, then carry on. I'll take some pics as I go and retro a few from the beginning. I've decided to make the bearings out of UHMV plastic that I have already and a pintle style hitch either bent from round iron or cut from 1/4" plate. Might have to buy a couple of 1/2" lag bolts if I can't find any around the shop.
Other than the culvert and cement, the whole thing could be built from wood. Or, say, the draw bar could be made from the handle of your neighbours snow scoop. Just gotta keep your eyes and imagination open.
Should have used the chunk by the propane tank too, more cement but less fuel, you could have taped them together
It's awesome Rod. Looking forward to see it in action. Then looking forward to the mature Mulie you drop in the plot in late November!
I made this one a few years ago..
I made this one a few years ago..
Looks great, Dennis! Does it work good? Heavy enough?
Looks good Dennis! You must have flat , level ground to keep contact over that length.
I waited for a plastic culvert because the ribs are deeper. But metal would be easier to work with.
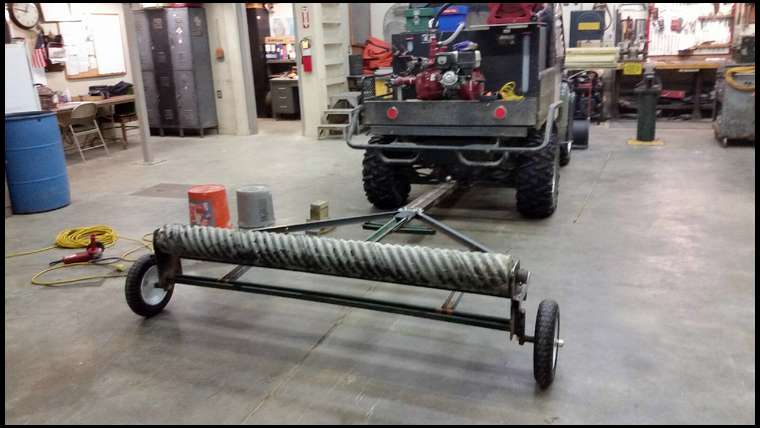
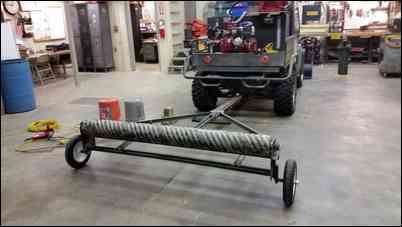
Thanks everyone. 8" culvert pipe filled with quickcrete. All materials except the wheel borrow tires and quickcrete were scrape pieces. PVC pipe in the center of the roller with a piece of galvanized pipe as the roller axle. The pipe fits perfectly inside the PVC with no wobble and rolls freely. The thing works great.
Wow, what a cool idea, perfectly done! Hats off.
Do you just flop the tongue of the trailer over, to get the culvert in contact with the ground?
Dennis’s use of a galvanized fence post for the axle is a good idea. It ensures your axle stubs are in perfect alignment to each other. And with a good hacksaw, they are readily available from many parks, schoolyards and cemeteries.
I chose the wood post and lag bolt axles for a couple reasons that will suit my own needs. I also won’t have the tire option. But my food plot and farming skills are also very minimal.
" Do you just flop the tongue of the trailer over, to get the culvert in contact with the ground? "...…
Yes, just flip it backwards and hook it back up to the UTV
The galvanized pipe runs the full length of the roller and is pinned to keep it from moving side to side.
I cut a couple pieces of angle iron to bolt to the bearing blocks for future service needs.

I cut a couple pieces of angle iron to bolt to the bearing blocks for future service needs.
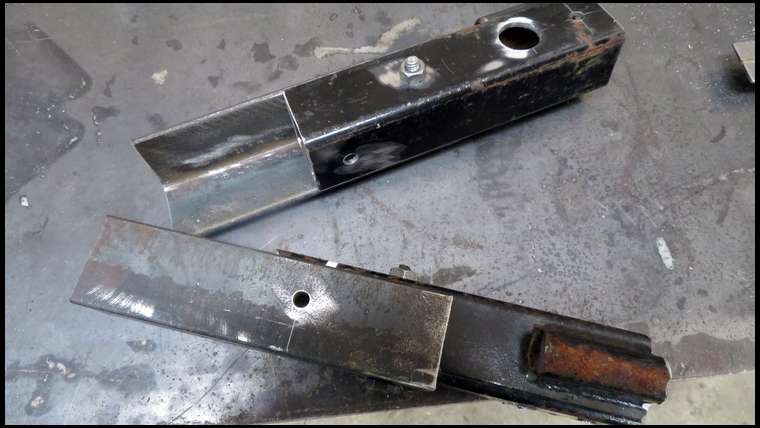
I decided on to use a tongue to go on a swivel Clovis hitch I made for the ATV. I found a bar in my steel pile about the right size and it even had a hole in the end. So I cut it in half, no sense being wasteful in these tough times

I decided on to use a tongue to go on a swivel Clovis hitch I made for the ATV. I found a bar in my steel pile about the right size and it even had a hole in the end. So I cut it in half, no sense being wasteful in these tough times

I’ll use a 1/2” lag bolt as the axle. As the bearing wears, I’ll just drill it out and add a two dollar brass bushing.

I’ll use a 1/2” lag bolt as the axle. As the bearing wears, I’ll just drill it out and add a two dollar brass bushing.

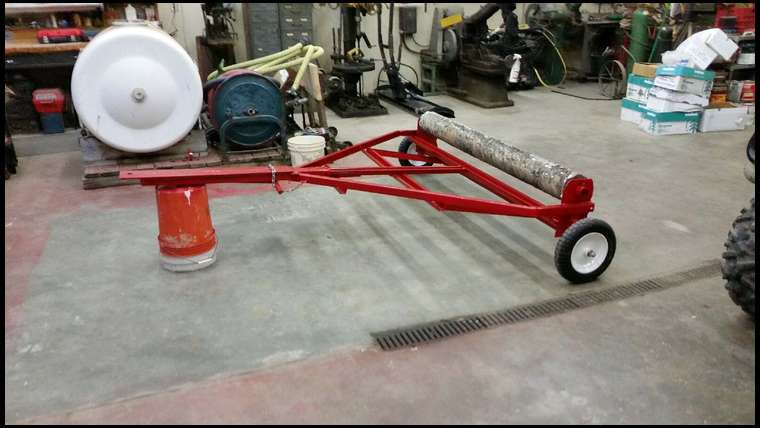
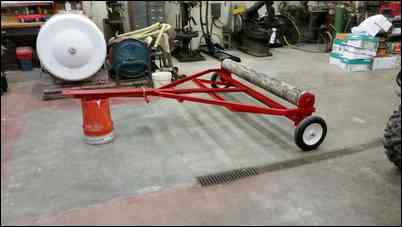
Good old spray bomb paint job. Just need to pick up a couple long lag bolts.
Good old spray bomb paint job. Just need to pick up a couple long lag bolts.
I was WONDERING what was going on with this process! At least the concrete should be cured good by now ;-)
Looking good, Rod! Keep it coming!
I didn't know my wife even cared about this project, but she encouraged me by asking "How much longer do I have trip over this stupid thing!?!"
Dang! Looks great! You could probably go into business!